You are using an out of date browser. It may not display this or other websites correctly.
You should upgrade or use an alternative browser.
You should upgrade or use an alternative browser.
Painting Miniatures Guide
- Thread starter pogre
- Start date
DethStryke
Explorer
Ditto on the sentiments that this is awesome and should be pinned. 
I've been doing a lot of research, trying to improve my miniature painting station and how I go about the hobby... two of the best improvements I've found/come up with are helping to light the miniature better when photographing them and how to mount them easily with a handle for priming/spraying/painting/etc. Sorry, I'm not a cool kid with ultra hip Hide/Show skillz. What's the tag for that?
Better lighting through Chemistry:
http://www.instructables.com/id/E6VQS8JNGQEWPKH4JG/
Using this method, I can use a 100 watt light from my painting station to illuminate the whole miniature - it doesn't even have to be a constant fixture and takes less room than every other setup I've used.
-------------
Getting a Grip:
The nexus of this idea was a combination of my existing handles (shaker pegs with blue tack holding the miniature on the top) and Jakob Nielson's transporting mini tip from here:
http://www.jrn-works.dk/tutorials/tut.php?tut=transportingMinis&lan=eng
I had not been super happy with the blue tack... it seemed that I was going through too much of it and it would not hold as well any more (maybe they changed the formula?). I saw the little bolt & nut combo and looked at my pegs and said to myself, "self, you have got to marry those ideas!" I really liked the secure nature of the hardware, but I find the shaker pegs to be hand friendly (I have large hands - enough to palm a basketball - so holding a small little block of wood or some nonsense is cramp city).
Here is my process:
This one is definitely not as easy to do without some specific tools. I will edit this if I find a better way of doing it - I'm still experimenting with the best way to produce the end result. The tools I used were as follows:
* Dremel Rotary Tool
* Miniature drill bits (specifically a 3/32 bit - can be found in some deluxe regular drill bit kits)
* Cut-off wheel (one made to cut metal) for the Dremel
* #4-40 x 3/4" Machine Bolts w/ nuts
* a screwdriver for the bolts (probably flat head... the wrench item that the Dremel comes with works well!)
* Shaker Pegs
* Zap-A-Gap.
Warning: Never use the the Dremel without hand and eye protection! Bits of whatever into your eye-ball does not equate to a good time. You should also use a vice to hold the pegs while you drill and cut things off... I don't, but I'm dumb like that.
1. Take a shaker peg and use the drill bit with the Dremel to drill a hole roughly 1/4"-3/16" deep in the center of the rounded end.
- Tip: Use masking tape on the drill bit to mark the depth if you like, so you can see how far you're going on the fly.
- Tip: You want this hole to be as straight as you can possibly make it, otherwise you're going to have figs that lean over the edge or won't fit on the peg nicely. If you're lucky enough to have a drill press (real or for the Dremel), this will make it a lot easier
2. Dab a bit of Zap-A-Gap on the last 1/4" of the #4-40 bolt. Screw this glued wonder into the hole you just made. You should need a screwdriver to get it to bite into the wood - if it simply drops in then you made too wide of a hole.
- Tip: Do not use pliers or something akin to hold the bolt while you do this! You do not want to chance doing damage the threads that will be above the wood or the whole point of this is shot and pointless.
2.5. Let that dry for a bit. Should be ready in an hour, so go do something else for a spell...
3. Welcome back! Now we cut the head off the bolt using the cut-off wheel on the Dremel. This is going to leave us with the nib for screwing in the bolts that we will glue to the bottom of the figs base. I prefer to make it the width of the bolt, so that the fig sits snugly perched on the apex of the rounded top. You can feel free to make it however long you wish. Error on the side of caution and start longer than you need. That way if you mess it up, you can always just cut off a little bit more.
- Tip: When you shear the head off, try to do it in one smooth controlled cut. If you stop and start, you will most likely have a funky ridge that will not allow you to screw the bolt on (threads get weird).
4. Glue the #4-40 bolt to the underside of the miniature's base that you want to hold. I use the #4-40 size hardware because I also use GW bases, and these hide flush with the base when it's in use. Bigger / deeper bases can, of course, accommodate larger nuts.
- Tip: As Jakob notes, you can use a bit of Green Stuff to hold the bolt on there better. Score the spot you're gluing to with a razer to rough it up and give something for the glue/putty to bond to. Be careful not to let whatever substance you use clog the bolt hole though. This is all sounding vaguely dirty...
- Tip: #4-40 machine bolts and nuts are sometimes considered specialty hardware depending on the store you go to. Lowes Home Improvement and Home Depot sell them in my area
So far, they are working as well as I had hoped for me. For my work table, I took some scrap 1x4" in a 12" section and drilled 1/2 holes through the wood with some decent spacing. The pegs fit in 1/2" holes already! Yay! That way they stand up by themselves but have enough room where they aren't bumping each other. Those planks I use on the table top or to move minis around (outside to spray them, inside to dry them in the exhaust fan equipped bathroom, etc.)
I also have a peg board hung on the wall directly above my desk. Crawford Manufacturing makes all kinds of peg board holders and hooks - their Multi-Use Tool Holder is great for holding the shaker pegs. It cradles them right under the rounded head, and keeps them up on the wall. I use them for lining up squads that are in progress so they don't dominate my table-top for other things being modded or generally put together.
pogre
Legend
Thanks DethStryke - some good tips there.
I use a lighting tent I picked up on ebay. If you are patient you can get them quite reasonably.
I put my based figs on cork with heavy duty double-sided tape. The non-based ones I paint on their pins in a pin-vise (or is it pen-vise?).
Anyway, I like your ideas. Sadly, my wife would kill me if I tried to mount pegboard in the house, so I use shelves with lots of lazy susans.
Have no idea on the hide tag thing - sorry.
DethStryke
Explorer
pogre said:Sadly, my wife would kill me if I tried to mount pegboard in the house, so I use shelves with lots of lazy susans.
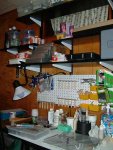
The picture attached is my station a year ago. It's pretty much the same, only a lot more messy.
I really like the peg board for holding new minis too!
Attachments
frankthedm
First Post
tzor
First Post
frankthedm said:Say, anyone mention how glitter can make fantastic coins?
I've done a number of experments with a variety of glitters (gold, green and blue).
This was an early attempt using gold.

This was an attempt to use blue to get a marble effect.


Here are two very poor very early attempts to use large green glitter as odd grass.


Similar Threads
- Replies
- 1
- Views
- 5K
- Replies
- 1
- Views
- 1K
AD6_gamerati_skyscraper
Upcoming Releases
-
April 16 2024 -
May 31 2024 -
June 3 2024 -
June 4 2024 -
June 18 2024 -
July 16 2024 -
September 17 2024 -
October 1 2024 -
November 12 2024 -
February 18 2025

