Bobitron
Explorer
Chapter 2, Flight
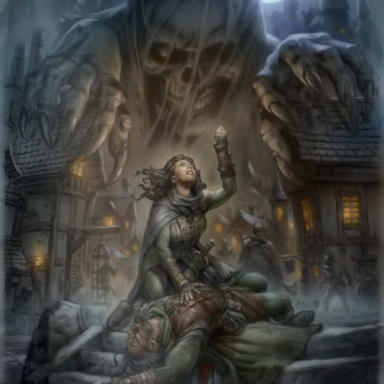
With more questions than answers, the heroes opt to travel south to Highwall, a stronghold of the Shadow, with hope of finding allies. Chased by orcish trackers, they come across the ruined den of a wolf mother and her destroyed family. The wolf would become Starhl’s companion.
A group of worg riders find the heroes and a pitched battle ensues to protect Aislinn. Herger, the giant Dornish warrior, is passing through the area and cannot stand by and let the heroes fight alone. He turns the tide of the battle and joins the group.
Continuing the journey, the heroes are spotted by a group of horsemen who are revealed to be enemies of the shadow. After a misjudged crossbow bolt from the heroes is explained…
Here we lose a portion of the game due to a server issue. The game picks up with Hroth’s synopsis of recent events. We have also now reached a stable group of characters:
Split by circumstances, the heroes continue their paths. Lodric and Kaela head for the skeleton oak, a tree where their gnomish benefactor had hinted held an escape, with Fallax, Aislinn, and Herger following. Starhl and Valurel barely escape the battle with their lives and meet with the Blue Sky Traders.
Inspecting the tree, Keala, Herger, and Lodric discover the tree’s hollowed out logs can be used as simple floats, hiding their passage downstream to safety. Stahrl and Valurel convince the Traders they mean no harm and seek only to fight the Shadow.
Using the logs to reach the wharves, the heroes avoid the orcs overhead and meet the others inside the Trader’s hidden safehouse. Aislinn tells her tale and uses her healing powers to convince the gnomes that they should help.
“I have had dreams of late, dreams of a great forest where even the Shadow fears to tread. Into the dark vales I am drawn, where even the forest's creatures fear to tread. What draws me there, I do not know, but I will not fail you. I will be brave.” –Aislinn
After days of hiding underneath the wharves, the gnomes smuggle the heroes away on Bardin’s barge, headed to the town of Baden's Bluff in hopes of meeting the insurgents there.
With more questions than answers, the heroes opt to travel south to Highwall, a stronghold of the Shadow, with hope of finding allies. Chased by orcish trackers, they come across the ruined den of a wolf mother and her destroyed family. The wolf would become Starhl’s companion.
A group of worg riders find the heroes and a pitched battle ensues to protect Aislinn. Herger, the giant Dornish warrior, is passing through the area and cannot stand by and let the heroes fight alone. He turns the tide of the battle and joins the group.
Continuing the journey, the heroes are spotted by a group of horsemen who are revealed to be enemies of the shadow. After a misjudged crossbow bolt from the heroes is explained…
Here we lose a portion of the game due to a server issue. The game picks up with Hroth’s synopsis of recent events. We have also now reached a stable group of characters:
Herger (The Giant)
Kaela
Lodric
Starhl
Valurel (The Ghost)
NPCs: Aislinn and Fallax
Starhl and Valurel
Before the database crash, Starhl was speared by a charging Sarcosan on horseback on the wharves surrounding the Blue Sky Traders, both Hero and Shadow-servant spilling into the Ishensa. Valurel and the Wolf followed, Valurel clinging to the back of the Sarcosan as he tore the Sarcosan to shreds, the Wolf jumping afterwards seeing the four orcs charging down the planks. After finishing the Sarcosan, Valurel and Starhl hid under the wharves in the cold river, following the advice of a dark figure hidden in the shadows. After the orcs dispersed to fetch slaves to explore the river (rather than go down to the water themselves given their fear of the liquid), the dark figure quietly moved through the water and around the slimey wood supports deeper into the underbelly of the wharf. The figure paused for Starhl and Valurel to follow...
Kaela and Lodric
Seeing their friends attacked by the orcs, Kaela cast sleep on two orcs that charged the two Heroes (these orcs were standing near the battlesite of the Kaela-charmed dead orc, Ghar.) Lodric dispatched the sleeping foes, but both Heroes were horrified to see Starhl and Valurel overborn into the Ishensa. The six orcs gathered near the edge where Valurel and Starhl fell before sending two of their number south, two continued to stand guard at the site of the fall, and two orcs moved west back along the Blue Sky Traders building.
Herger, Aislinn, and Fallax
The Giant had half-assisted, half-carried the small, blind girl Aislinn down the sword-grass covered slope from the wooded forest on the hills west of the Ishensa. The sounds of battle had come to Herger's ears, but the mile or more distance between him and the river meant the battle would most likely be over before he reached the river.
Split by circumstances, the heroes continue their paths. Lodric and Kaela head for the skeleton oak, a tree where their gnomish benefactor had hinted held an escape, with Fallax, Aislinn, and Herger following. Starhl and Valurel barely escape the battle with their lives and meet with the Blue Sky Traders.
Inspecting the tree, Keala, Herger, and Lodric discover the tree’s hollowed out logs can be used as simple floats, hiding their passage downstream to safety. Stahrl and Valurel convince the Traders they mean no harm and seek only to fight the Shadow.
Using the logs to reach the wharves, the heroes avoid the orcs overhead and meet the others inside the Trader’s hidden safehouse. Aislinn tells her tale and uses her healing powers to convince the gnomes that they should help.
“I have had dreams of late, dreams of a great forest where even the Shadow fears to tread. Into the dark vales I am drawn, where even the forest's creatures fear to tread. What draws me there, I do not know, but I will not fail you. I will be brave.” –Aislinn
After days of hiding underneath the wharves, the gnomes smuggle the heroes away on Bardin’s barge, headed to the town of Baden's Bluff in hopes of meeting the insurgents there.
Last edited:
")