Cartography Workshop

Wolv0rine

First Post
Pbartender said:
Here's a quick city map I recently made for my Iron Heroes campaign.

I started with a white background in Photoshop, and drew in the roads on a new layer in black using the line tool in various widths (setting up a fine grid, and activating the "snap to grid" feature can also be helpful). Solid filled polygons for the town squares and markets. Then, I just inverted the color of the streets to make it white streets on a white background. Finally I "stroked" the street layer - 1 pixel wide, black, outside edge.

That gave me nice, outlined city blocks with space between for streets, but without having to define specific buildings. I left them in black and white for an engraved wood-cut sort of feel, but from there it would be easy enough to fill in the streets and/or city blocks with whatever color or texture you prefer.
That's sweet and all (I don't want to sound like I'm saying you didn't do a great job with it) but what I want to know is how you achieved that rocking effect on the river! :)
 

log in or register to remove this ad

Jürgen Hubert

First Post
And a new way of doing mountains:

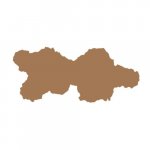
- Create the "base" of the mountain range in whatever way you feel comfortable with (using Distress Select as appropriate). Select this "base" and fill it with a dark brown color in a new layer. Keep the selection. (First Attachment)

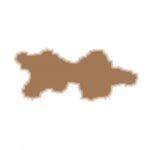
- Apply the "Fade Outline" tool to this layer. Apply the Layer Mask to the layer. Copy this layer, and then apply "Fade Outline" to the new layer. Repeat until the Selection is gone. (Second Attachment)

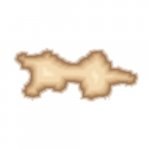
- Switch the layer mode of all layers but the lowest one to "Screen". (Third Attachment)

This already gives us a nice, plastic mountain. However, let's add some light effects to improve it:

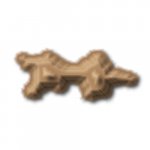
- Apply a black drop shadow to each of the layers. (Fourth Attachment)

- Apply a yellow drop shadow with the opposite direction and only 20% opacity to each of the "brown" layers to give them some "daylight" color. (Fifth Attachment)

- Alternatively, you can use red or orange instead of yellow if it is supposed to be bathed in the light of dawn. (Sixth Attachment)


I must admit, I am much happier with this way of doing mountains than the previous ones, and I believe I will use it from now on. Unless, of course, I can come up with an even better method... ;)
 

Attachments

  • Mnt1-1.jpg
    Mnt1-1.jpg
    7.6 KB · Views: 309
  • Mnt1-2.jpg
    Mnt1-2.jpg
    7 KB · Views: 278
  • Mnt1-3.jpg
    Mnt1-3.jpg
    9.8 KB · Views: 307
  • Mnt1-4.jpg
    Mnt1-4.jpg
    11.1 KB · Views: 341
  • Mnt1-5.jpg
    Mnt1-5.jpg
    10.9 KB · Views: 385
  • Mnt1-6.jpg
    Mnt1-6.jpg
    11.3 KB · Views: 320

ffaat

First Post
Jürgen Hubert said:
I must admit, I am much happier with this way of doing mountains than the previous ones, and I believe I will use it from now on. Unless, of course, I can come up with an even better method... ;)

Well, I have a way that isn't necessarily better, just different. I posted it over here:
http://cartographersguild.com/forum/viewtopic.php?t=322

Attached is an example (using your grassy background).
 

Attachments

  • mtn_tut[12].jpg
    mtn_tut[12].jpg
    16.7 KB · Views: 360

Pbartender

First Post
Wolv0rine said:
That's sweet and all (I don't want to sound like I'm saying you didn't do a great job with it) but what I want to know is how you achieved that rocking effect on the river! :)

Hjorimir said:
Any chance that you could do a more detailed step-by-step for those of us who have Photoshop (but don't really know how to use it at all)? I really (REALLY) like how that turned out. Even the river is snazzy.

I'll be your best friend!!!

Alright, here we go. Be aware that specific menus and options may vary from version to version of Photoshop, but the basics generally remain the same.

The Shoreline.

  1. First, we'll establish any shore lines. Since my campaign world is based on real world Europe and North Africa, I simply went to maps.google.com and found the actual river that my city would have been located on had it truly existed in the real world (the mouth of the Rio Guadalquivir in Spain just north of Cadiz).
  2. Once you find a coastline or river you like, hit alt-[Print Screen] to get a screen shot of the browser window.
  3. Open a new image in Photoshop with a white background, paste in your screen capture image, and crop it to your liking.
  4. Convert your "borrowed" map to greyscale. Then, adjust the contrast of that layer Until all the water is black and the land is white, and adjust the brightness, until the coastlines look right.
  5. Now, you'll have some left over bits -- labels and roads and such -- to clean up. Just set the background color first to black and use cut box and eraser to clean up the water, then set the background color to white and do the same for the land. You should now have one layer with a basic outline with black water and white land, and another white background layer.
  6. Use the magic wand to select the black area, and delete it.
  7. Use the stroke function to outline the shoreline with a heavy black line (~4 or 5 pixels, location: outside, 100% opacity, Mode: Dissolve).
  8. Stroke the shoreline layer again with a thin white line (1 pixel, location: outside, 100% opacity, Mode: Dissolve), and then again with a thin black line (pixel, location: outside, 90% opacity, Mode: Dissolve). Continue alternating 1 pixel wide white and black strokes... all the white stripes should be at 100% opacity, but the opacity of each consecutive black line should decrease by 5% or 10% (Until you reach 0%). Using the Dissolve mode with the decreasing the opacity creates the dashed shading along the shorelines.


stargate525

First Post
Your walkthrough for creating plains background is good. I replaced the greens and yellows with shades of blue, and it makes very good glaciers.


Ishmayl

First Post
Jurgen, did you ever have a chance to translate that German map-making site? I would love to try to make some maps in those styles, but I do not sprechen ze deutsche very well. :(
 

gamerprinter

Mapper/Publisher
I create maps using Xara Xtreme 4.0

I recently posted a tutorial at cartographers' guild on how I was creating maps like this:

celanta-thumb.jpg


Here is a link to the tutorial...
http://forum.cartographersguild.com/showthread.php?t=2432

I am using Xara Xtreme 4.0 to create everything in this map (still a work-in-progress). Though Xara Xtreme costs about $80, it is a complete desktop publishing application, not just a mapping or vector app.

I use photo textures from http://www.cgtextures.com for my forest, mountain textures. Everything else is beveling, transparency, feathering, layering, halo drop shadowing, text tools all within Xara Xtreme.

Please note, this is not the only style of maps I create, I also work with 3D applications and create completely hand-drawn maps that are scanned in to Xara, with coloring and compositing in that application alone.

GP

PS: I dabble in GIMP and Photoshop, as well as PD Particles and many 3D apps. I'm also playing with MapTool.
 

Remove ads

Top