How to Paint Minis the Bruce Campbell Way*

tallyrand

First Post
*this thread not affiliated with Bruce Campbell

But seriously, who wants to know how to paint the Tallyrand way, and on top of that, I don't just want this to be just "my" thread. I'm hoping to learn some stuff here too.

It saddens me to see mini painting being relegated to the sidelines of the hobby, and I hope for this thread to become a clearinghouse for anyone keeping the flame alive, be you neophyte or master brushman.


Let me start with my own personal Rule #1:

Rule #1 of painting Miniatures: There is no such thing as cheating.
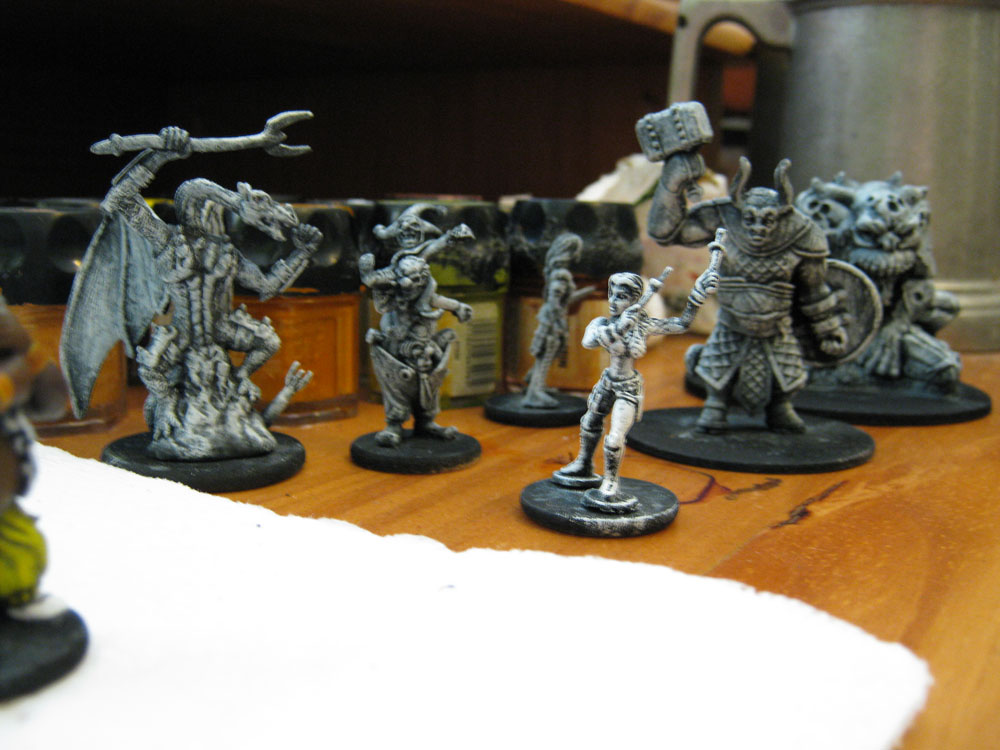
I repeat, when it comes to painting miniatures: THERE IS NO SUCH THING AS CHEATING! When I paint, I use a magnifying visor, two lamps using both an incandescent and "natural light" and super microfine ink pens to do such things as add tattoos, designs, and general blacklining.

I hope in the coming days to cover a number of topics, with lots of pictures and so on, feel free to chime in, I may even take requests.

Topics on deck:

Paints and inks- the good, the bad, and the ugly

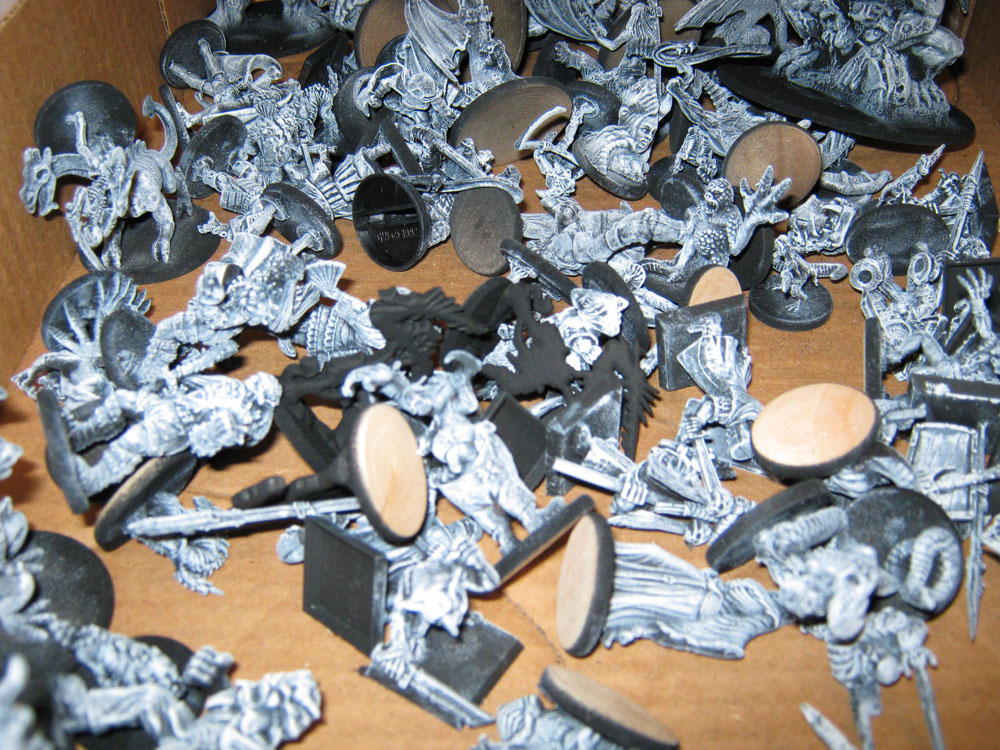
Minis - pewter to plastics, prepping and priming

Brushes - care and feeding, what to get, how much to pay, and brush modding

Bases - simple black, or scenic

Online resources - sages and gods of the brush

Heck, we may even get around to how to actually paint!

Edit: I'm mostly covering subjects at they randomly pop into my head, if you have a topic you wish me to blather on ablut, please pipe up, and let me know, and I'll blather at it to the best of my ability.
 
Last edited:

log in or register to remove this ad

El Mahdi

Muad'Dib of the Anauroch
Awesome thread idea. I'll be following it, and hopefully maybe even have something to contribute. I've already subscribed to it so I can keep up with it.

It does seem that with the advent of pre-painted minis and easily printed figure counters, less and less people paint their own minis as part of the gaming experience. That's too bad. That was always an integral part of the game for me since I first started playing. In my games I require everyone to have their own mini of their character, whether self painted or not. But, when someone paints their own, or even goes as far as to modify it to be specific to their character, I feel it adds a lot to the game.

Perhaps you (or others, including me:blush:) could also contribute ideas on modifiying minis.:D

I'll be anticipating your first installment.

See you around.:cool:
 

tallyrand

First Post
So just who is this Tallyrand guy, and why should we listen to him? What does he know?

Well, I've been painting minis for about 20 years, and I love it. I started painting right as I started gaming, and they have always gone together for me. Even when I wasn't gaming, I was still painting minis.

Here's a couple pix shared oven in Chronoplasm's "My First Minis!" post. the first here is the second miniature i ever painted, the first one did not belong to me, a friend lent it to me, so i could try out painting them for myself. I painted this guy pretty much from my list of things not to do. He was unprimed, painted with Testor's high gloss enamel model paints using a plastic bristled brush.

3598968967_71108164c0_o.jpg


That being said, here are a batch of those that I have painted over the last year. these are mostly all Player Character minis that my group uses for D&D. My DM pretty much hung up his brushes when pre painted minis became available, and he probably has a collection to rival anyone, so He provides the bad guys that we only have to look at until we kill them, and I provide the ones for the characters.

3598968969_166e234e1b_o.jpg


A bit of improvement after 20 years.

These are about a 7-8 on my personal 1-10 scale, after this point, I kind of start running into a problem with diminishing returns, where the painting time nearly doubles for each additional notch on the scale I want to bump it up.

Even after this time, I am still working on ways to improve my painting game, right now I am working with both hand painted detail, and non metalic metals, and I am slowly getting better with both.


tallyrand

First Post
MY GREATEST SECRET:

It's all in the prep work... seriously.

Trim and File:

Yes, clip and trim the mold lines, that's importiant, get yourself a nice set of mini files, I usually pick mine up from some wierdo at the flea market. Also a pair of flat edge model clippers, I have a old set of the Games Workshop ones and they are pretty nice, but they have some new ones, that I may have to pick up. A good exacto knife is nice to have (for those of you allowed sharp objects) Watch that mold line, follow it all the way around the mini.

Once the mini is trmmed and before you prime it, wash it. You've been fondling it wit your greasy mits, and its also got some mold release agent still on it, warm water and a little dish soap usually do the trick, make sure you work over a bowl or collinder, or at least have the strainer in the sink, you don't want to drop your guy down the drain.

Priming:

There are two major schools of thought when it comes to priming miniatures. Black Prime, and White Prime.

White Priming your minis will absolutely make your colors pop, but it can be pretty unforgiving, and getting your brush down into all the little white nooks and crannies can be tough, but if you fail to do so, it is obvious to even the casual observer.

Black Prime does not have this problem, but you have to slather on a several layers of paint to get your colors to really show, and this can eventually hide detail, and even then, your colors can come out muddy and dark.

Grey Prime has neither of the advantages of the Black or White Prime, and the drawbacks of both, and is an abomination before gods and men.

Optimus Prime is the leader of the Autobots.

When priming, the major environmental factor to watch out for is the humidity, this isin't an issue for some, but for those of us that live down in South Florida, it can be an issue. Priming in high humidity can cause your paint to kind of pebble up, a mistake I still make to this day, usually because I am too impatient to get painting.

Now here is the secret, here is how to get the best of both worlds of prime, and more when it comes to prepping your minis: the Greybrush.

You start with a nice flat black prime, easy enough, now after that, I get my black paint, I keep one of my black paint pots kind of watered down just for this, and go over the mini again, getting the paint in all the tiny nooks and crannies that the prime may have missed.

After that, you do a nice heavy drybrush of the whole figure with a medium to light grey, and follow up with a medium to light drybrush of a nice crisp white.

It's not until this point that I consider a mini ready to start painting. You have the black, down in the deep recesses of the figure, and the progression of black to white on all the detail, this can even bring out hidden detail on the mini that you may have not been aware of before.

When done, they should look something like this:

3620695396_f9ec2648c4_o.jpg


Or this:

3619878005_b7095a0165_o.jpg


As you can see, I tend to do this in bulk. And I work on several at the same time, giving me somthing to do while the pant dries on another.

Here's some half painted ones:


3620695380_cef5e1b343_o.jpg


There are some neat tricks you can do with this technique that I will get into later.

Tallyrand
 

Cwheeler

First Post
I haven't painted any minis for years, but I must admit that this thread has piqued my interest again. I shall be following!
 

tallyrand

First Post
I like to think that I am a good mini painter, somewhere in the top 90% of all serious mini painters, I have won a silver in a Games Workshop Golden Demon contest, and was published in White Dwarf magazine. (the guy that won absolutely smoked me too, tons of hand sculpted detail, it was outrageous)

That said, I want to introduce you to who I consider to be probably the best mini painter in the world: Jen Haley

Paintrix Miniatures, online portfolio of Jen Haley

She consistently stuns me with beautifully blended colors, and by just cramming detail into her works. I am both humbled and inspired every time I look at her minis.
 

tallyrand

First Post
PAINTING FROM THE INSIDE OUT

If you scroll up to the last pic above this post you can see kinda what I am talking about here.

When painting a mini, the painting order for me is usually as if they are getting dressed.

Skin first, then shirt and pants, armor, then cloaks, then belts, straps, pouches and buckles, and finally weapons and hair.

It is easier to work this way, and tends to lead to fewer mistakes on my part.

I tend to save weapons and hair until last because this leaves me a couple safe places to handle the miini without worry of mussing my work. See the warrior in the blue on the right there above, she's just about done, with hair and weapon still left. I have seen others recommend attaching the base of the mini to something to grip. like a large cork or some such with blu-tac, and that works for them, and may benefit you.

If you look up, you can see the executioner there on the left, the flesh is painted, and I have started on his clothes, painting them black. this means, that if I was a bit sloppy with the drybrush on the flesh, that overflow into the unpainted areas got covered when I started on the next layer up.

While my drybrush is much more controlled these days, this technique really helped me when I started out, and I still use it, it letting me instinctively plan the order in which I will paint the fig.

EDIT: that reminds me, before you start painting, wash your hands! You don't know where they've been, and you don't want the grubb form your grubby mitts to get all over your awesome mini.
 
Last edited:

tallyrand

First Post
BRACE YOURSELF

Alright, you have your paints all laid out, your brushes soldier upped in a nice neat row, fresh brushwater, a clean mat of paper towels, a brand spanking new primed and prepped mini, sitting there, as full of potential as a five year old with a tool box.

What’s the problem?

Your hands are shaking like a lab monkey on his 10th bottle of Mountain Dew.

Your paint is ending up everywhere but where you want it, that white for the eye has just become a cheek highlight, and the buckle on the baldric has become silver smear down the front of the jerkin. (someone remind me to talk about cleaning up messes later)

What you need is power… Pyramid Power! Pyramids do more than tell us what to eat, keep our undead secure, and our razors sharp, they keep our hands steady too!

When painting you want to use your arms and hands to form a stable triangle with your brush and mini as the apex.
-Your forearms, braced just past the elbow against the edge of the table.
-Your non painting hand holding the mini, usually top and bottom (this is another reason that I paint the hair last, and don’t use some kind of grip/base on the mini)
-Painting hand, with the brush held, nice and close to the bristles between thumb and your first finger, you place the 2nd and 3rd fingers of your brush hand along the 1st finger of your mini hand.

This gives you both a stable platform to work from, and still leaves you with a good range of motion for the brush. The only drawback, is it’s kinda hard to look too close at the mini while doing this without hunching, my solution for this is to either use a lower than normal seat while painting, or a higher than normal work area. Personally I just adjust my chair as low as it goes.
 

carborundum

Adventurer
Awesome thread - and you sure can paint! You're also considerably better than the bottom 10% if you ask me ;)
The greybrush technique is genius! Can't wait to see if you can explain blending and that whole backwards fake metallic technique. That's never worked for me yet :)

I'm getting back into painting again since the plastic minis get steadily worse and the summer holidays approach (I teach). I'll check back regular like. Cheers!
 

Remove ads

AD6_gamerati_skyscraper

Remove ads

Recent & Upcoming Releases

Top