Cartography Workshop

Jürgen Hubert

First Post
I thought it might be of general interest to start a Cartography Workshop thread - a thread where we can explain techniques we used to create our maps.

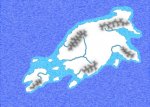
I will start with a few techniques of my own - specifically, the techniques I used to create this map. But I want to stress that I am not pretending to show the "one true way" of creating maps - in fact, I am a relative beginner, and I am sure that there are many ways of doing things better! If you have suggestions for improvements, or different ways of doing things, jump right in and tell us about it! This is a workshop, not a tutorial, and I want this to be as much for the improvement of my cartography skills as for yours.


But first a few words on the tools I used.

For line drawings - for basic outlines of continents, rivers, mountains etc - I use Inkscape. Inscape is a vector-based graphics program, meaning that if you want to change the map scale later on or move minor details around, you can do so easily without lots of minor editing to prevent weird image artifacts. I also use Inkscape to place the location of cities and similar small details - this allows them to be moved around easily.

For filtering effects - to give the map color details and special effects - I use GIMP, which is a bitmap-based graphics program in the veins of Photoshop, which you might be more familiar with.

Both of these programs are Open Source and freely available for a number of platforms, so you can repeat all of those steps by yourself.

Another tool, while not strictly speaking neccessary, is still something I highly recommend: A graphics tablet. These handy little devices will make drawing lines a lot faster. I recommend a Wacom tablet because they have pressure sensitivity (though you won't need it for what follows, that's still a nifty feature) and because they are simply the best on the market.
 

log in or register to remove this ad

Jürgen Hubert

First Post
I will create a small, simple map as an example for how this can work.

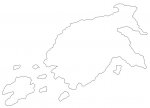
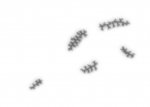
Open up Inkscape. Create a new layer called "Coastlines", and start drawing the outlines of your islands and continents.

If you have trouble coming up with good coastlines - or other terrain features, for that matter - I recommend looking at images from Google Maps. There are plenty of interesting terrain features in this world which can inspire you.

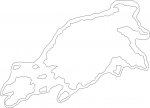
Now draw the continental shelf around your continents and islands on a new layer called "Continental Shelves" - the line where the deep ocean becomes shallower.

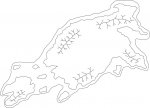
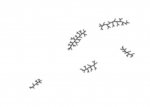
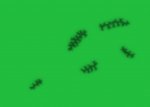
Next, create a layer called "Mountains" and draw the ridges of your mountain ranges - the lines where the highest points connect with each other.

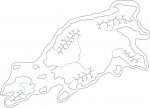
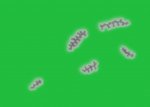
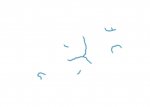
Finally, create a layer called "Rivers" and draw some rivers which flow from the mountains to the coastlines. Select them all with Ctrl+A and give them a nice, blue color with Objects->Fill and Stroke: Stroke Paint.

We will add some further details to the map - different vegetation, cities, and so on - but that will do for now. Now export the layers as bitmaps:

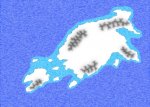
Make the "Mountains" and "Rivers" layers invisible and export the rest as "OceansLayer.png".

Make only the "Mountains" layer visible and export it as "MountainsLayer.png".

Make only the "Rivers" layer visible and export it as "RiversLayer.png".


All work steps, as well as a zipped Inkscape file, are included as an attachment in this post.


Coming up next: GIMP-fu!
 

Attachments

  • CoastLines.jpg
    CoastLines.jpg
    25 KB · Views: 1,498
  • Oceans.jpg
    Oceans.jpg
    38.2 KB · Views: 1,570
  • Mountains.jpg
    Mountains.jpg
    49.8 KB · Views: 1,543
  • Rivers.jpg
    Rivers.jpg
    53.9 KB · Views: 1,672
  • MasterMap1.zip
    26.5 KB · Views: 481

Jürgen Hubert

First Post
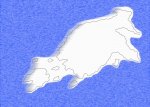
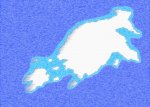
Now let's paint the ocean!

Load "OceansLayer.png" into GIMP. You'll notice that it looks strange - that's because the entire image with the exception of the lines you have drawn is transparent. To allow for better viewing, create an all-white new layer and place it below the existing layer.

Now create two additional new layers: "Deep Ocean" and "Shallow Ocean". Both must initially be white. Place them on top of the existing layers.

Go to the Background layer (that's what the original layer with the lines should be named like). Select the parts of the map beyond the continental shelves with the Magic Wand. Then go to the Deep Ocean Layer. Change the Foreground Color to a deep blue (I used 0032ff in HTML notation). Use the "Fill" tool with "FG color fill" and "fill whole selection" to paint the selection blue.

Now remove the selection with Select-None. Apply a Gaussian Blur with a radius of 10 px by going to "Filters->Blur->Gaussian Blur" and setting "Horizontal" and "Vertical" to 10 px.

Now add transparency to this layer. Do this via Layer->Transparency->Color to Alpha and choosing white as the color.

Duplicate this layer. Now merge the copied layer with the original one by right-clicking on it in the layer dialog and choosing "Merge Down".

This ensures that you have a gradual blending between the deep ocean and the shallower areas. We will use this technique a lot later on.

Now let's apply some effects:

- Filters->Noise->Scatter HSV with the values 2/3/160/10
- Filters->Generic->Erode
- Filters->Distort->Wind with Wind/Left/Leading/10/10

That's it for the Deep Ocean Layer. Now go to the Background Layer, select the shallow ocean parts, and go to the Shallow Ocean layer. Fill it with a light blue (I used 00afff), deselect, apply a Gaussian Blur as above, and again add transparency, dublicate it and then merge it with the original.

Now apply the following:

- Filters->Noise->Scatter HSV with the values 2/3/160/10
- Filters->Generic->Erode

Now merge the Shallow Ocean and Deep Ocean layers. Duplicate and merge them again to make sure that no transparency remans in the boundary between them.

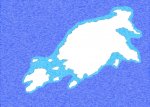
Now go to the Background layer and select the land areas with the Magic Wand. Press SHIFT to mark more than one land mass. Go to the Oceans layer and delete all land parts by going to Edit->Cut.

Make the white layer at the bottom invisible and save the result as "OceansColor.png". Now you have a nice-looking ocean surrounding your islands!


I will cover some further examples later on, but they follow the same methods - establish basic lines with an Inkscape drawing, and then generate color effects with a variety of GIMP filters. Since I don't actually draw anything with GIMP, I can easily generate a new map with the same effects even if the Inkscape map changes.

Of course, this doesn't mean that there is no room for improvement - far from it! For example, these ocean effects look nice in color and on the screen, but they look ugly and random when you print them out with a b&w printer. And I still haven't come up with a good idea how to make them more printer friendly.

Any suggestions?
 

Attachments

  • OceansWork1.jpg
    OceansWork1.jpg
    208 KB · Views: 1,324
  • OceansWork2.jpg
    OceansWork2.jpg
    220.2 KB · Views: 1,340
  • OceansColor.jpg
    OceansColor.jpg
    216.6 KB · Views: 1,442

Jürgen Hubert

First Post
Now let's create some mountains!

Load up "MountainsLayer.png" into GIMP.

Again, create a white layer at the bottom to make your efforts easily visible.

To the "Background" layer, apply Layer->Colors->Hute-Saturation with 0/50/0

Duplicate the "Background Layer", then apply a Gaussian Blur with 5 px to the dublicate.
Then create another dublicate, and merge that with the blurred image.
Repeat this step four more times.
Label the resulting layer "Blurred" and make the "Background" layer invisible.

Duplicate the "Blurred" Layer.
Apply "Script-Fu->Shadow->Drop-Shadow" with 5/5/15/Black/80% to "Blurred".
Apply "Filters->Artistic->Oilfy" with 3 px to "Blurred".
Reduce the Transparency of the layer to 50%.

Apply "Gaussian Blur" with 50 px to "Blurred Copy".
Apply "Filters->Artistic->Oilfy" with 10 px to "Blurred".

Merge the "Blurred copy", "Blurred", and "Drop-Shadow" layers.

Now the mountains look good. However, if you want to combine the mountains with other terrain features - such as vegetation - problems will soon become apparent. You can test this by filling the while layer at the bottom with a different color (see attached image).

To be ready for such future changes, create a new, transparent layer called "Foundations".

Go to the combined "Blurred" layer, and apply Layer->Transparency->Alpha to Selection.
Go to the "Foundations" layer and fill the entire selection with white five times.

Now make the white background layer invisible and save the rest as "MountainsColor.png".

And now you can combine the result with the saved "OceansColor.png" - see the result attached to this post. You should place the "OceansColor.png" layer on top of the other layers to avoid any terrain features growing into the ocean!


In general, I like this effect, but some people have cricicized it as too regular. I would also like to know how to make them more "plastic", with better light and shadow effects - and I have no idea how to do glaciers and snow. Any suggestions?
 

Attachments

  • MountainsWork1.jpg
    MountainsWork1.jpg
    17.5 KB · Views: 1,300
  • MountainsWork2.jpg
    MountainsWork2.jpg
    14.4 KB · Views: 1,267
  • MountainsWork3.jpg
    MountainsWork3.jpg
    13.1 KB · Views: 1,130
  • MountainsWork4.jpg
    MountainsWork4.jpg
    17.6 KB · Views: 1,263
  • Combined1.jpg
    Combined1.jpg
    223.9 KB · Views: 1,438


Jürgen Hubert

First Post
I'll add some stuff about painting rivers in the evening.

At the moment, I'm trying to think of ways of making good-looking greyscale maps with similar methods - something that will still look nice after you have printed it out.


Jürgen Hubert

First Post
Well, let's move on to rivers.

Load "RiversLayer.png" into GIMP.
Create a white layer and merge the Rivers layer with it.
Apply Gaussian Blur with 2px two times.

Now the "background" of the layer is probably a bit darker than "pure white", and we don't want that. Pick the background color with the "color picker", copy the HTML value of the color, and go to Layer->Transparency->Color to Alpha. Click on the color, and enter the HTML value. Now you should again have a layer that only has the rivers in it and nothing else.

Duplicate the layer and merge the two copies.
Create a Drop Shadow with -2/-2/4/Black/80%

Apply the following to the layer with the river:

Filters->Noise->Spread with 3/3
Filters->Artistic->Softglow with 10/0.75/0.85
Copy this layer twice and merge the three copies.

Now you are finished with the rivers. Save the image as "RiversColor.png"

But don't close the image yet! Instead go to File->Open As Layer and import the other Color images you have created. Move the layers around until you have the following order, from top to bottom:

Oceans
Rivers
Mountains
An empty, white layer.

It starts to look interesting, doesn't it? Save the whole thing as "BackgroundColor.png" - it will be useful in future steps.
 

Attachments

  • RiversColor.jpg
    RiversColor.jpg
    12.2 KB · Views: 1,222
  • BackgroundWork1.jpg
    BackgroundWork1.jpg
    229.2 KB · Views: 1,330

Remove ads

AD6_gamerati_skyscraper

Remove ads

Upcoming Releases

Top