D&D 2E Night of the Walking Dead (Incomplete Conversion of 2E Ravenloft Module)

Stormonu

Legend
Halloween is fast approaching. I think it was last year, but I started work on putting together a Halloween adventure that was a conversion of the 2E Night of the Walking Dead. Unfortunately, I didn't get to complete it, but I thought I'd put it out here for those who wanted to try their hand at it.
 

log in or register to remove this ad

Stormonu

Legend
Night of the Walking Dead, Part 1 Encounter 1

Friday, October 2, 2009, 02:02 AM CST [Dungeons & Dragons]

***DMs only***
As I stated in my previous blog, here begins my attempt to convert the 2E Ravenloft module "Night of the Walking Dead" by Bill Slavicsek to 4E. You can download the original module at www.wizards.com/default.asp?x=dnd/dnd/do... You will need the module for the story, background and plot. I will only be presenting the updated/revised encounters here.
For this adventure writeup, I am assuming a party of 5 players of 2nd level. Because the DCs for so many skill checks have changed since 4E has been out, I am referring to difficulties as "Easy", "Medium" or "Hard" instead of giving exact numbers. Consult p. 42 or whatever skill system you are using for the exact DCs.

Night of the Walking Dead

Part 1, Encounter 1 (EL 2 - 625 XP)

Setup

This area is a sandbar that is the haven of a pair of Visejaw Crocodiles and a few Stirges. A few coffins from a water-flooded graveyard have ended up here, with all but one of the undead occupants succumbing to the Visejaw's hunger for flesh.
This encounter includes the following creatures.
2X Visejaw Crocodiles ("V", MM, p45)
2X Stirge ("S", MM, p248)
1X Decrepit Skeleton ("D", MM, p234)
----------------------------------------------
The day is dark and dismal, painted gray by the vapors that rise from waters around you and the misty clouds that obscure they sky above. The sun has not shown its face since you arrived in this swamp, and the air is clammy and cold. The water below your raft is several feet deep, and runs deeper into the swamp on a slight and invisible current. To one side of your raft, black logs drift lazily amid a patch of pond scum that has snatched their rotting carcasses. Barely visible in the mist behind the logs you can make out a clump of trees sitting atop a small sandbar. Not far ahead, a huge cyprus tree has collapsed into the water, its dead limbs held outward as if in a plea to be pulled out of the muck that surrounds it. To your astonishment, you catch the glimse of what appears to be three coffins half-buried in the water next to the uprooted tree. From one coffin, a skeletal arm dangles, unmoving, its fingertips dipped in the dark water.
-------------------------------------------------------
Features of the Area

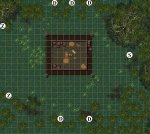
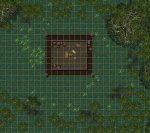
Deep Water: The light-colored water is about 5 feet deep. Characters attempting to slog through the muck move as if Slowed or attempt to swim through it with an Easy Athletics check. The dark water is difficult to see through, granting creatures under the surface a +4 bonus to Stealth checks.
Shallow Water: The dark-colored water is about 3 feet deep. Characters attempting to slog through the muck treat it as difficult terrain. It can be swam through with a successful Easy Athletics check.
Cypress Trees: Each tree is between 10-15 feet tall, and can be climbed with an Easy Athletics check. Creatures in a tree gain cover against ranged attacks, but not melee attacks. The crocodiles can't climb the trees, but can rush them and attempt to knock PCs out of them.
Dead Cypress Tree and Logs: The floating tree provides cover against ranged attacks and can be used to stay afloat while in the water. If a character attempts to hang onto the wood while being grappled by a crocodile, make opposed Strength checks. If the player wins, they can keep their grip on the log and surface for air.
Pond Scum: The light green areas are masses of pond scum that block vision completely into the water beneath them. Characters attempting to swim though the pond scum must make an Average DC Athletics check or become stuck for the round.
Sand Bar: The sand bar is mud that is so saturated with water that walking on it creates a slurping sound. The sand bar is treated as difficult terrain.
Development

Characters who make a successful moderate Perception check hear a strange buzzing noise in the area; it sounds like a mix of the flapping of bird's wings and the buzz of a flying insect. Characters who make a successful DC 20 Perception check spot one or more of the Stirges hiding in the trees.
Characters who make a successful DC 20 Perception check spot the two Visejaw Crocodiles hiding among the logs.
If characters approach the coffins, logs, sand bar or trees, they are attacked. If characters ignore the area and move on, the two ViseJaw Crocodiles follow the raft, attempting to ambush anyone at the edge of the raft at an opportune moment.
Mood

Be sure to play up the abandoned, decayed state of the area. Attempt to give the impression of an area that is devoid of life, slowly rotting away in a forgotten corner of the swamp. Contrast it sharply with the sudden onslaught of the crocodile's and stirge's attack. Do your best to frighten players with the idea of something dragging them into the black depths of the swamp water, where they will never be seen again.
When the crocodiles enter the fray, play up their unnatural looks. These are crocodiles that have gained an unnatural look from devouring the flesh of the dead - and they seek to add the PCs to their former meal. As for the stirges, play up their unnatural looks and ability to suck blood from the PCs, almost as if they were insectile vampires.
You can make it really spooky if, while the characters engage the crocodiles and stirges, the skeleton silently slips into the water and heads towards the raft; if the characters are not attentive, the bony remains they spotted may seem to have suddenly just disappeared, only to suddenly pull itself up on the raft and rush a PC.
Tactics

The Visejaw Crocodiles swim up to the raft and attempt to pull any character they can reach into the water, dragging them underwater back to the thick pond scum to drown them. They make sudden surges out of the water, attempting to pull a character back in, only to retreat into the murky depths if their attack fails - only to lunge out of the blackness again and strike from another angle.
Once the Visejaw Crocodiles attack, or if the trees are disturbed, the Stirges swoop down to the attack, concentrating on characters not grappled by a crocodile. If the Stirges are bloodied, they retreat to their trees and hide. If further pursued, they defend themselves to the best of their ability.
Once a fray begins, or if the coffins are searched, the Decrepit Skeleton rises and joins the attack, most likely swimming to the raft and boarding it to attack players. It is ignored by the Visejaw Crocodiles and Stirges, and it focuses its attacks on the PCs. It is mindless in its attacks, and if given the chance, will drag a PC off the raft and attempt to drag them back to the coffins and plunge them into the half-submerged tomb.
DM's Map


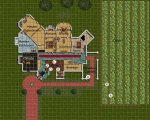
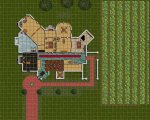
P1E1Placement.jpg


Player's Map


P1E1Play.jpg
 
Last edited:

Stormonu

Legend
Night of the Walking Dead, Part 1 Encounter 2

Monday, October 5, 2009, 01:26 AM CST [Dungeons & Dragons]


***DMs only***
As I stated in my previous blog, here begins my attempt to convert the 2E Ravenloft module "Night of the Walking Dead" by Bill Slavicsek to 4E. You can download the original module at www.wizards.com/default.asp?x=dnd/dnd/do... You will need the module for the story, background and plot. I will only be presenting the updated/revised encounters here.
For this adventure writeup, I am assuming a party of 5 players of 2nd level. Because the DCs for so many skill checks have changed since 4E has been out, I am referring to difficulties as "Easy", "Medium" or "Hard" instead of giving exact numbers. Consult p. 42 or whatever skill system you are using for the exact DCs.
Night of the Walking Dead

Part 1, Encounter 2 (EL 2 - 625 XP)

Setup

This area is a safe haven for the characters to get their bearings and a bit of information. The characters encounter a band of Vistani travelling in the swamp, and have their fortunes read.
The NPCs for this encounter are
Old Sarengi, Ryana, Carloni, Valana and three children (Essus, Venya, Boris).
Old Sarengi: Old Sarengi is somewhat short and rotund, much like a dwarf that has been stretched on a rack. He is clearly in his fifties and the sun and hard work has made his skin ruddy and wrinkled. His white hair hangs wildly like a laurel around his head. His left eye is milky white and a old knife wound runs from the bottom of the eye down to the left edge of his mouth. His face is covered with bristly stubble, and the collar of his shirt is turned up against his thick neck. He is dressed in flared pants and wears a checkered red-and-white shirt. He keeps a similar checkered handkercheif in his back pocket, which he often takes out to dab his forehead when nervous or after a hearty laugh.
Carloni: Carloni looks very much the younger version of his father. Thin, tall and yet quite strong, he dresses in tan breeches and wears a faded yellow shirt. Atop his head is a wide-brimmed felt hat and under his hooked nose is long, well-groomed mustache. His eyes do not dart about but tend to rest long and hard on those around him, as if scrutinizing others. When moving about the camp, he carries a long handled wood axe, which he keeps close for protection and to stir the logs in the fire.
Ryana: Ryana has a rotundness to her much like Old Sarengi, and she is shorter as well. She is visibly within her forties, and like Old Sarengi, her skin is ruddy and wrinkled, though unlike Sarengi, her wrinkles seem to have come from too much smiling. Her blue eyes seem to dance at the chance to meet and greet strangers, and she is never idle for long, always acting as the harried host, making sure her guest want for nothing and displaying great pride in what meager offering she has to share with others.
Valana: The eldest daughter of Carloni at age 18, is a beauty to behold. Her slightly curling brown locks of hair augment her shapely features, and she dresses to augment her ample features. Unlike the others in her family, her skin is much lighter than the others, making it almost appear lily-white when she stands next to her kin. She wears heavy, golden eyeshadow and has long, black eyelashes. Her lips are cherry red and the dresses she wears are bedecked with jewels and silver weights that glimmer in the campfire. Her every move is smooth and angelic, and her golden voice drips with honey at every word she speaks.
-------
Essus: The oldest of Carloni's sons at 8, this young boy is clearly in charge of his siblings and out to impress his father. He is slow to let down his guard, but once he opens up he is affable and talkative, always wanting to impress on others how great and talented his father is.
Venya: The middle child at age 6, Venya tends to easily latch onto other female figures as if they were her mother. She is shy and timid around male characters, but will do her best to assist her Grammie, Ryana, with seeing that their guests needs are met and their cups always full.
Boris: The youngest of the three at about 5, has no desire other than to roam the encampment and play freely. He will avoid the strangers as best he can, though he does not dare to stray beyond the half-light at the edge of the wagon, and will stay away from the water. He can only be engaged by someone willing to play games with him, and has little interest in the antics around the campfire. When called to bed, he will be the last to respond and be the most vocal about remain up.
----------------------------------------------------------------------------------
Read the following to start the encounter:
The mist that has obscured most of the swamp seems to clear up ahead, revealing a tiny island that rises out of the stagnant waters. The light of a warm, inviting campfire blazes in the center of the patch of dry land. In the flickering light, you can see a colorful gypsy wagon resting comfortably on the isle. Mulling near the wagon are a pair of well-cared mares, tied to a tether attached at one end to the wagon. Not far from them, an elderly lady seems to be feeding the horses while three children play with sticks nearby.
A moment later, two men step into view. One is old and thin, while the other is young and strong. They seem to notice your approach, and the thinner man pokes at the fire, stoking the flames as you watch hot embers lift into the sky. The older man stands behind the fire, the flames illuminating his features. He watches you with one good eye, his hands folded across his chest and the other eye gleaming milky white in the dazzling flames of the fire.
------------------------------------------------------------------------------------
Development

As the characters approach closer, Ryana, the old lady by the mares, calls out to the PCs, attempting to hail the PCs. Old Scarengi watches passively from near the fire, while his younger son pretends to be watching the flames, while he in fact, carefully observes the PCs actions. The three children stop playing immediately; if the PCs seem open and friendly, they rush to greet the, with Old Scarengi warning them to not crowd the PCs. If the PCs act hostile or aggressively, the children are scooted into the wagon or hide behind Old Scarengi or Ryana.
If the PCs approach in a friendly manner, Ryana tells the PCs that, according to Vistanti customs, they are willing to share their fire and dinner with the PCs. The characters have the chance to ask some questions, and get the chance to relax a bit before having their fortunes read.
Information

The NPCs know the following information, and will reveal it if the party proves to be friendly. Successful Persuasion checks will reveal the following.
Old Scarengi (Easy DC): "There's a village - Marias d'Tarscon - half a day's journey with the current, and marks the edge of this swamp. It is not a place to visit on a night such as this."
Old Scarengi (Moderate DC): "We have just left Marias d'Tarscon ourselves - and that is for perhaps the best. Our kind does not linger long in any one area. That is simply our way."
Old Scarengi (Hard DC): "Marias d'Tarscon is strange village, to be sure. It is centuries old, at least and they pay great respects to their dead, though perhaps not enough."
----------------------------
Carloni (Easy DC): "Better to wander the swamp than travel to Marias d'Tarscon."
Carloni (Moderate DC): "The people of Marias d'Tarscon are cursed. But it is best not to speak of such things on a night such as this."
Carloni (Hard DC): "Marias d'Tarscon has been abandoned by the gods. I do not know the reason why, but I sense that even their priest knows they have lost favor. But I will not speak no more of, lest those that protect us abandon us as well."
-----------------------------
Ryana (Easy DC): (In response to Carloni's statements) "To speak of evil is to invite it to dinner. Come, talk of other things - we have enough guests as it is."
Ryana (Moderate DC): "If you travel to Marias d'Tarson, be careful to ward yourself against evil eye. Its evil glare has surely fallen upon the village."
Ryana (Hard DC): "If you are bold enough to travel to Marias d'Tarscon, seek out the help of Brother Brucian. He is perhaps the only one who can protect you from the evil eye that has befallen the village."
------------------------------
Children (Easy DC): "You must be very brave to be out in this swamp by yourselves. The people of Marias d'Tarscon won't set foot into the swamp."
Children (Moderate DC): "Bad things started to happen in Marias d'Tarscon. Pappa said we should leave before things got worse."
Children (Hard DC): "I'm glad we're leaving that village. (low whisper) People are disappearing from the town, and the adults wouldn't even let their kids out to play. After we heard screams one night, Mami and Pappa wouldn't let us leave the wagon either."
*Note: After getting any information from the children, the adults warn the children to talk no more to the strangers, especially about the village of Marias d'Tarscon.
-------------------------------
Song and A Dance

As Ryana prepares dinner, young Carloni pulls out a fiddle and begins to play. Old Scarengi attempts to prod the characters into joining in. He sings an old Visanti balad as young Valana comes forth from the vardo to dance. He then encourages the characters to perform a song or dance themselves.
Appropriate Music: Brahm's Hungarian Dance #5 ([ame="http://www.youtube.com/watch?v=NPNN-Gl3aXw&feature=related"]www.youtube.com/watch?v=NPNN-Gl3aXw&feat...[/ame])
SKILL CHALLENGE: Impress the Visanti
Complexity: 2 (6 Successes before 3 Failures)
Primary Skills: Acrobatics (Dancing), Persuasion (Singing)
Special Skill Checks:
Bluff*: Tell an amusing joke, riddle or anecdote
History*: Relate a well-known heroic tale
Religion*: Relate a inspiring story
Streetwise*: Relate a rags-to-riches story
* Only allow one such story to be told for the entire group, regardless of the skill used.
Insight (x1): Gain a +2 bonus to the next Acrobatics or Persuasion check
-----------------------
RESULTS
3 Successes, 0 Failures: The Visanti are impressed with the party. Not only do they not charge the PCs for reading their fortunes, they give the party several trinkets to help them on their journey (a treasure packet).
3 Successes, 1 Failure: The Visanti are impressed, and decide to give the characters a break. They offer to read the PCs fortune for no charge.
3 Successes, 2 Failures: The characters perform adequately, and the Visanti offer to read the PCs fortune for a small fee (10 gp).
3-5 Failures: The characters perform somewhat poorly. The Visanti are willing to overlook the PCs shortcomings and read the PCs fortune for a small fee (25 gp).
6 Failures: The PCs have managed to offend the Visanti with their poor conduct. Old Scarengi insists the PCs apologize for their poor efforts. If the PCs comply with a hefty apology (of 100 gp or more), the Visanti accept the apology and offer to read the PCs fortunes, so that they might not ere so egragiously in future matters with others.
---------------------------------
Fortunes and Portents

After dinner and the entertainment passes, Ryana calls the children to bed, and sends them inside the wagon. While she tends to the children, Valana asks the PCs to sit by the fire, with Carloni and Old Scarengi flanking them, and the PCs sitting across the flames.
-----------------------------------------
Valana takes a seat on the old log across from your group, her supple features seeming to ripple in the firelight that dances over her dress. The younger Visanti, Carloni, takes a seat to her right as the old man Scarengi settles down with a grunt on her left.
When all are seated, she states slowly and casually. "I must warn you, not all fortunes are good; the last fortune I cast brought pain and misery to the soul who requested it. Are you sure you wish me to cast your own?"
Valana waits for the PCs to respond, and Old Scarengi mocks any who attempt to back out "You fortune has already been set and paid for; is it not wiser to know and profit than to flounder and be poorer for it?"
With a fluid motion, Valana draws up a cloth bag from her belt. The crimson bag is held shut by a drawstring of thick, golden cord. She carefully opens the bag and casts its sand-like contents into the fire. The orange flames flare, twisting into cold blue fire as they shoot high into the air. Moments later, the flames quickly die down until they seem to be but embers, revealing an open spot in the center of the blaze where an iron pan seems to have been cleverly concealed.
Valana smiles and you see that she has already drawn up a handful of what seem to be five ivory dice. The dice are marked with colorful symbols that are unfamiliar to you. Before you can question her, she casts the dice into the pan, where they clatter and clink before coming to a rest.
As Valana leans over to read the dice, the men beside her take her arm, steadying her so she does not collapse into the flame. As her eyes furtively glance over the results in the pan, her skin seems to turn a shade paler that it was before. She lets out a gasp as she reads the results.
"The lost one calls to you!" She shivers, as the others suddenly and momentarily hide their face, making protective gestures with their free hands as they do. Suddenly, Valana becomes rigid as horror spreads across her face. "The storm comes, bringing the dead with it." Her eyes snap to you and she warns, "You must find a way to put the dead to rest. If you cannot, the skies shall open and blood will rain upon you - and the city of Marais d'Tarascon." As Carloni and Old Scarengi pull Valana back to the log, she adds "Your fate and the village's fate are intertwined. If one falls, so will you both."
With that announcement, Valana seems to crumple and the last embers of the fire die out, leaving all of you in the sudden darkness and surrounded with the growing sounds of the swamp. In the dark, you hear Carloni curse, and a few moments later the fire returns to dim life, apparently with the aid of Old Scarengi's tinderbox.
"You have had your fortune," Old Scarengi states dryly, as Carloni now holds the limp body of Valana in his arms. The old man looks up to the twisting, dark clouds in the sky that obscure the waxing moon above. "It is time to rest after the adventures of the day. If you wish, you may remain here by the fire for the night, but come morning, you must move on - toward Marias d'Tarascon. I fear the storm that is coming - you have much to do before it breaks."
--------------------------------------------------------------------------
Development

After the reading, the Visanti are fearful to associate with the characters. Old Scarengi is happy to give characters verbal directions through the swamp to Marias d'Tarascon, but dares not aid the characters further. The Visanti are unwilling to part with further information.
Luckily, for the remainder of the night, there are no events. However, before the characters retire, Valana reappears, and utters a final warning: "Beware the mad man and his blood. He will seek to thwart your every move." If asked what she means, she states she can tell no more; this was simply the last bit of the fortune the dice revealed and even she does not know what it means.
In the morning, Old Scarengi and Corlani awake with the dawn and hitch the horses up to the wagon. The sky is pregnant with black clouds, and there is a fetid breeze in the air. They work loudly to ensure they wake the PCs, and urge them to prepare to cast off. If the characters ask how the Visanti are going to leave, Old Scarengi shrugs, "We will find a way." is all he states. The Visanti load up, but wait for the PCs to depart before they will leave. Should the characters return later, they will find the wagon gone, with no trace of how it left. All the remains to mark the Visanti were there is the remains of last night's fire.
 

Stormonu

Legend
Night of the Walking Dead, Part 1 Encounter 3

Monday, October 19, 2009, 01:40 AM CST [Dungeons & Dragons]

You can download the original module at www.wizards.com/default.asp?x=dnd/dnd/do... You will need the module for the story, background and plot. I will only be presenting the updated/revised encounters here.
Night of the Walking Dead, Part 1, Encounter 3 (EL 2 - 625 XP)

Setup

This area introduces the characters to Luc Tarascon, a Lost One, who has secret information that might help the characters in their endeavors. The characters encounter Luc in a creepy stilt house in the middle of the swamp.
The NPCs for this encounter are
Luc Tarascon: He has 7 hp, AC 10, Fort 10, Reflex 12, Will 10. Luc is in his late teens, but recent events have not been kind to him. He barely eats nowadays and is growing thin. His hair has prematurely turned pure white. His features are likewise pale, and his eyes have slightly yellowed, as if jaundiced. He is rather unkempt, having not bothered to take care of himself, and his cloak bears several ragged tears in it from his encounter with the ghouls back in Marias d'Tarascon. His voice is hoarse and little more than a whisper, though he still sputters a few incomprihensable phrases from time to time. He is absolutely terrified of being alone, and doubly terrified of the dark.
2 Zombies ("Z", MM, p274)
5 Drowned Ones ("D", Open Grave, p196)
1 Skulk Zombie ("S", Open Grave, p 196)
Player's Map (Characters enter from the left; rope ladder is on the westmost side of the house, near where the lilypads touch the house).


DM's Map

P1E3Placement.jpg

Player's Map

P1E3Play.jpg


Barrels: The barrels are filled with water. If rolled at zombies, it has a range increment of 3, is an Dexterity vs. Reflex attack and deals 1d8 + Str modifier to a single target in its path (or dropped on, if rolled into a hole), also knocking the target prone on a hit. The barrel is destroyed in the attack.
Crates: The crates are filled with preserved foods. Each crate weighs about 35 lbs. They can be thrown with a Range increment of 3 as a Dexterity vs. Reflex attack and deals 1d6 + Str modifier damage and pushes the target 1 square. The crate is destroyed after being thrown.
Door: The single door is too warped to close completely. Characters who wish to hold the door closed against the undead must make opposed Strength checks. Up to 3 people can attempt to close or open the door at one time.
Overgrowth: Characters passing within 1 square of an area of overgrowth or through an area of overgrowth must make a medium Athletics check or take 1 point of damage. The overgrowth is treated as difficult terrain.
Posts: The posts at each corner of the house are 8 feet tall and require a medium climb to scale.
Porch: The porch is covered with warped wood that imposes a -2 penalty to stealth checks to those walking on it. The porch is 8 feet up in the air, allowing the zombies or characters to pass under it easily. Falling off the porch into the water deals no damage.
Table: The table can be overturned to provide cover against attacks made from an opponent on the other side. It can be used to block the door, a single window or cover a hole in the floor. When used to block entry, characters make opposed Strength checks against the undead to keep them at bay. Up to 3 people can attack or hold the table at the same time.
Trees: The trees grow to about 20 feet height and can be climbed with a successful easy Athletics check.
Weakened Floor: The three areas of light-colored floor in the house can be broken through as a single standard action by any undead. No check is needed. Anyone standing on an area of weakened floor when it is broken must make a DC 20 Athletic check to keep from falling into the water below. Falling into the water deals no damage. Once the floor is broken open, a zombie can take a move action to climb up into the room.
Window: The windows have flimsy shutters that can be destroyed with 4 or more points of damage. It takes a move action to pass through the window.
Water: The water around the house is 4 feet deep. Characters can walk through it as if it were difficult terrain or swim through it with an easy Athletics check. The zombie's movement is unaffected by the water.
---------------------------------
Read the following to start the encounter:
The sun has once again set, filling the swamp with an eeiry and chaotic chorus that pines to the waxing moon above. The trees ahead seem to draw in tighter as clouds likewise move to conceal the face of the moon from you this night. A thick tangle of branches and exposed roots slows your progress even as you toil to forge ahead. Sharp, broken limbs scratch your arms and legs as you push the raft forward though the thickening foilage. As you break through a clump of foilage, you can make out a light that seems to beckon in the distance. It is brighter than a single lantern, and seems to hang with a constant and inviting brightness not too far off.
If characters investigate, read the following as they near the source:
As you near the source of the light, the swamp seems to open up around you, as if its attempts to hold you back are no longer worthy of continuing. Soon, before you lies the source of the light - a small, wooden house that is hardly larger than a shack. Bright light spills from it two front windows and a wide open doorway. The whole of the little house is surrounded by a flimsy porche and sits some eight feet in the air, suspended by a heavy, shadowed post at each corner that rises out of the murky water.
--------------------------------------------------------------------------
Mood

Attempt to convey with this scene a scene of foreboding and mystery. Everything about the scene should seem strange, bizarre and unsettling. Luc should come across as harmless, but pitiable. If the characters are foolish enough to move the central lamp or otherwise douse it, things should move quickly and terrifyingly. The zombie attack should be swift and ferocious, with Luc screaming in terror during the entire ordeal. During the zombie attack, play up the lack of light, with the horrid creatures lumbering out of the dark to attack the PCs. The zombies should attack Luc as a last resort, though if the party is intent on saving Luc, you might want to send a drowned one after the youth to give the PCs a scare and a chance to make a heroic defense of the youth.
Development

Characters who make an Easy Perception check notice that there is a rope ladder coiled up on the front porch of the shack. Characters who make a Medium Perception check notice shadows of movement from within the little house. Those who make a Hard Perception check notice something in the water just out of the edge of light spilling from the house, but whatever it is submerges before anyone can get a good look at it (it's the zombies).
Luc makes no move to answer the character's calls or help them get up into the house. Likewise, while the light still shines from within, the zombies dare not move into the light eminating from the house.
Once the characters manage to get up to the porch or otherwise manage to get a view of the house's interior, read the following:
The little wooden house has only one room. All told, more than two dozen lanterns hang from pegs on the wall, with an unusual and ornate lantern seated on a warped wooden table in the middle of the room. The edges of the room have been stacked with crates and barrels, and in the center of the room, seated behind the crooked table, is a young man. The young man is unusually thin and pale, and has long locks of stark white hair that hangs limply about his shoulders. His clothes are unkempt, and with one hand he clutches around him a somewhat ragged cloak. In his other hand dangles an open book of poety. The young man's gaze remains unfocused as he hoarsely states "The descent of evil on night lands. Near is the sign of the hexad at hand."
House Contents

The unopened boxes contain fresh food, stamped with the name "Cann Bakery, Marais d'Tarascon". The barrels contain fresh drinking water, apples, or other preserved foods.
Luc is unrespondant to the party members, except should they attempt to harm him or extinguish the lights. If the party attacks him, he cowers and whimpers, but does not fight back. If any of the lights are extinguished, he cries out in terror, screaming "The darkness is nigh! It is nigh!"
If anyone examines Luc's book, he does not resist. The book is a diary belonging to Pierre Tarascon and seems incredibly ordinary. However, on the margin of one page (in Marcel Tarascon's handwriting) is the note "This is it!!" next to an entry describing a mysterious Visanti visitor name Hykosa. The entry is breif, merely mentioning the Visanti's annual arrival, they remained a few days and the "obsessed Visanti seer, Hykosa", who after failing to convince Pierre that a terrible dark time was coming, left with the promise that Pierre's descendants would better understand his mad ramblings.
The lamp in the center of the table is a magic artifact brought here by Shaman Brucian to protect Luc (its protection will not end until the PCs move the lantern). As long as it is not moved, it continues to eminate its Protection From Undead ritual. If it is moved or "turned off", it ends the ritual, allowing the zombies waiting outside to attack.
Lantern of Holy Light (Level 5, value: 1000 gp)
Property: This item counts as a +1 implement for Divine characters.
Power (Daily): The lantern must be set in an immobile square. Make a Religion skill check, subtracting 10 from the total. Undead whose level is lower or equal to 1/4 your result cannot come within 10 squares of the lantern. It does not stop ranged attacks from undead. If the lantern is moved or doused, the power ends. The protection lasts for up to 8 hours. You can extend the duration of the protection by 1 hour with the use of 25 gp of residiuum or incense. This additional cost must be paid during the activation of this power.
Luc's Response

Luc is generally unresponsive at first. If any of the characters question him or take pity on him, he slowly begins to respond, though his responses are generally incoherant and child-like. After a short time, his tortured mind comes to see one of the characters as his "brother", and begins to follow that character, occasionally apologizing for no apparent reason. If the characters move to leave shack, Luc will follow, taking the Lantern of Holy Light with him. However, as soon as the lantern is moved, its magical light goes out taking all other light with it, and the zombies outside attack. Even if the other lights in the shack remain lit, Luc becomes terrified and delusional should the Lantern of Holy Light goes out.
The Attack

If the characters douse the Lantern of Holy Light, the zombies that have been waiting outside in the swamp instantly swarm the house as the whole is plunged into darkness. The zombies crawl up the posts and march into the house from the front, while the drowned ones burst into the shack by breaking in through the weakened areas of the floor. Meanwhile, the skulk zombie circles around to enter by the back window and scuttling up onto the roof. It then hopes to drop down unseen onto PCs in the room. The zombies do not retreat or relent until slain.
After the Attack

If Luc still lives, he is jarred enough to fear for his life. He sees the PCs as his only hope of escape, and latches onto one of the PCs, believing him to be his dead brother Marcel (though he does not openly explain this, simply refering to the PC at best as "brother"). If the PCs seem on the verge of leaving him, he begs them "Marais! Marais! Take me home!" If the characters seize on this, he can lead the characters through the remainder of the swamp to Marais d'Tarascon.

If the PCs Stay

If the PCs stay and do not disturb the lamp, after 2 days Shaman Brucian shows up at the shack. Though surprised to see the PCs, he offers to lead them back to Marias d'Tarscon. He will take Luc and the lantern with him, triggering the zombie attack. During the fight, Shaman Brucian defends Luc, though he will aid any PC in trouble.
 
Last edited:

Stormonu

Legend
Night of the Walking Dead, Part 2, Overview of the Village

Sunday, October 25, 2009, 04:48 PM CST [Dungeons & Dragons]


You can download the original module at www.wizards.com/default.asp?x=dnd/dnd/do... You will need the module for the story, background and plot. I will only be presenting the updated/revised encounters here.
Night of the Walking Dead, Part 2, Overview of Marias D'Tarascon

The Village

Marais d'Tarascon is a cluster of small wood-and-thatch buildings at the edge of the swamp, housing about 300 people. It is located approximately two-and-a-half miles
from Port d'Elhour, on the eastern edge of Souragne's vast swamp. The PCs
approach the village from the west, emerging from the swamp on the afternoon of day five. The storm clouds continue to build; despite the early hour, it seems like dusk. A cemetery is perched on a hill overlooking the village. The graveyard is divided into two sections, one old (area 11 on the map), the other new (area 10). The old graveyard contains Marcel's lair. East of the village is the Tarascon plantation. From a distance it looks impressive, but on closer inspection, it is obvious that the fields have not been tended in weeks.

The PCs can wander freely, speaking with whomever they wish. Murders, zombies,
disappearances—the events of the past weeks have caused a fearful mood to settle over the village. (Assume that Marcel died three weeks ago, regardless
of how long the PCs have spent in the swamp.) Everyone is nervous and more than a little afraid.

Some have even spoken of fleeing to Port d'Elhour, but at the moment such a course of action is still only talk.
Engaging the NPCs

Before the PCs can begin questioning the NPCs in town, be sure to run Encounter 1: The Funeral. After the funeral, characters can begin investigating the town.
Gaining information from the NPCs can be done one of two ways. Either the DM can engage the PCs in an extended roleplaying encounter where they question NPCs and come to their own conclusion on what is occuring, or the DM can run an extended skill challenge to get to the bottom of what is occuring. It should even be possible to combine both methods (the method I believe I would prefer). Information for both methods are presented here.
Role-Playing the Investigation

As characters travel around town, the following information is available from NPCs. You may require PCs to make skill checks to find certain pieces of information described below; the suggested difficulty is included with each tidbit of information.
The PCs should gain XP for each NPC they successfully engage and learn something valuable from (About 125 XP each. If using skill checks, award 31 XP per successful Easy check, 125 XP per successful Moderate check and 250 XP per successful difficult check). You may want to award PCs treasure after talking to certain NPCs; You can treat the treasure as gifts from the NPCs for helping uncover what is going on. Suggested treasures are listed with each NPC.
Jerard & Henrietta Bascolm (Area 1, Treasure: 1/4 of a treasure packet in money and/or magic):
(Easy Diplomacy) - "Its been mighty quiet in town for the past few weeks. Folks have been spooked by some unexpected deaths and we haven't had any out-of-towners 'til you showed up. Maybe when the storm passes it will all wash our worries away."
(Moderate Diplomacy) - "Over a week ago, a local fellow name Francois collapsed into his soup during dinner. One of the barmaids, Katha - I think it was - said she smelled an odor - likely blown in from the swamp - that smelled something like rotten meat just before he died. I told her she must be half-Visanti and just smelled his death before he knew about it. As for the soup, well we threw out - just in case, y'know. But I can't think that anybody would have wanted to poison Francois, and no one else who had the soup even got sick, so I don't think it was that. But I couldn't tell you what killed him either; healthy as a horse and all that."
(Hard Diplomacy) - "I wouldn't share this with the others, but Francois worked a farm, just like Farmer Hogarth did. Both their farms aren't too far from the cemetary and we'd been wondering if maybe they'd been using - y'know - unnatural fertilizer (dead bodies). We figure perhaps the dead didn't take to kindly to Hogarth and maybe some rot or disease did in the two. Coulda been the rot Katha smelled, you think?"
Louise d'Cann, Baker (Area 2, Treasure: 1/2 Treasure Packet in money only):
(Easy Diplomacy) - "All these mysterious happenings have been bad for business. No one wants to leave the house to buy anything, save old Jerard from the inn and shaman Brucius."
(Easy Perception) - The bakery sells red licorice. If characters make a Moderate Diplomacy, Louise tells the characters that Mordu, Jean Tarascon and the Bordell children are the ones who buy most of the licorice.
(Moderate Diplomacy) - "Its odd, even Jerard has had to cut back on the supplies he buys since there's been little business at the inn. On the other hand, Shaman Brucius has been buying more - like he's stocking up for something. He says he's been taking meals around to those too scared to come here themselves, but I'm not so sure."
(Hard Diplomacy) - "Business has been slow, but now that I think about, I haven't seen any of Jean or Marcel Tarascon around lately - not even Luc's been around. Usually, if there's trouble they'd call a town meeting or something. Either they're too afraid to come out, or they're too busy dealing with what's going on, I guess."
Pierot d'Bussy, Caretaker (Area 4, 1/4 Treasure packet in money or magic items [especially warding items]):
(Easy Diplomacy) - "I've been quite busy of late - a state I rather'd not continue. I've seen to the laying of rest more souls that I've cared to, and I dare say they aren't resting easy. I'd stay far from the cementary if I were you."
(Moderate Diplomacy) - "I don't go into the cemetary proper nowadays. Since at least poor Galenon Gremin - the constable's son - died suddenly, I've seen shadows moving in the cementary where there shouldn't be. About a week ago, I swear one night I saw the missing lady Grissom standing over one of the crypts, a feral smile on her face. I ran, and I'm not going back until all this business has been sorted out."
(Hard Diplomacy) - "Before all this started, I caught young Luc and Marcel d'Tarscon at the old cementary, rooting around. Wouldn't tell me why they were there, so I ran 'em off. I didn't think about it then, but all this started up a week or so later."
Constable Gremin (Area 5, Treasure: 1 treasure packet):
(Easy Diplomacy) - "Unfortunately, our small town has been host to several disappearances and sudden deaths of late. There's been tales of the supernatural involving the disappearances, but I think in most cases the swamp's just got to folks an' they've up an' left to Port d'Elhour, or at worst the death's 've scared 'em off."
(Moderate Diplomacy) - "The sudden deaths and some of the disappearances have me worried - a lot of the disappearances don't make sense either - its rather unlike folk to just up and leave. My own son's death bothers me mightily - he were fit as fiddle before he simply keeled over. Some of the tales say folks have not only just up an' died, but that they get up a few moments later as the walking dead. O' course, we ain't got any evidence 'o these walking corpes - it appears they done all walked off to the cemetary by the time I get there."
(Hard Diplomacy) - "I haven't said this to anyone, and I don't need it repeated, ya here? I've found a bit of blood at the scene of some of these disappearances - and what's more, a bit o' red licorice at some of the spots - four of them, to be exact. There's been a rumor that a vampire's behind the disappearances, but I'd sooner expect a Visanti to 'ave done this."
on a seperate check, the constable will give the names of the dead or missing with a Moderate Persuasion check or better. They are, in order of death/disappearance (those with a "*" had a piece of red licorice found where they disappeared, those in bold are known to be dead): Farmer Hogarth (21 days), Ganelon Gremin (19 days), Louis Duplessis (17 days), Jean Dionne (15 days), Karlotta Deschamps* (14 days), Teresa Balin and Maria Grissom (13 days), Sacripant Mercier* (12 days), Charles Petit (11 days), Francois Mothe (9 days), Romain Tollmoche* (8 days), Colin Smith and Elizah Woods (5 days), Hughes Rouleau* (4 days), Annette Bondy (3 days) and the latest, Jeremiah d'Gris (1 day). Note that these are the only one the constable is aware of - there are several more he knows nothing about.
Mordu, retired accountant (Area 6, Treasure: 1 treasure packet, likely to include an offensive magic item and/or ritual):
(Easy Diplomacy) - "Oh, its perhaps the most exciting thing that's happened to Marias d'Tarascon since that old gypsy sage came to town. There's been deaths and disappearance - there's sure to be cult behind it all, you know."
(Medium Diplomacy) - "I used to work for the Tarascons as their accountant - right good down-to-earth sort of people, you know. Anyway, I'm retired now and my pension has let me explore my other hobby - books. There's one I think you'd find quite interesting: It's called The Cult of the Swamp God. You'd find it a good read, I'm sure - a murdering cult who snatches victims in the night and animating the bodies to do their unholy work...you can see where I'm going with this, can't you?"
(Medium Perception) - Mordu keeps a jar of red licorice in his study. It's only half full, and if asked about it, he says he's been eating a lot lately as pores through his books (to keep abreast of the "cults" activity) and will need to get more soon.
(Hard Diplomacy) - "Listen, since it's obvious your not the cult's thralls yet, let me tell what I know to be going on so far. It's the shaman - Brucius - whose behind it all. Keeps disappearing into the swamp when he's most needed and I've seen him at the foot of the cementary praying to the Lord of the Dead to answer his prayers. I'll even bet he's done in Jean and Marcel to keep them from interfering. And if you don't keep a low profile, he'll sic Constable Gremin on you. I'd sure wouldn't want to cross a man whose offered his own son up to the Lord of the Dead, would you?"
Of course, Mordu completely has things wrongs, and may only complicate the party's attempts to uncover what is occuring.
Jordi and Nadine Smith (Area 8, Treasure: 1/4 treasure packet, likely to include magical arms or armor):
(Easy Diplomacy) - "If you've got any business here, show it to me, and let me get to it."
(Moderate Diplomacy) - "Things haven't been right in town for weeks. And now, our only son, Colin, has up and vanished. He works at the Tarascon manion, but he never came back five days ago. The manions all locked up, and we haven't been able to find any of the Tarascons to ask what's been going on."
(Hard Diplomacy) - "About three weeks ago, Colin was sent home for a few days. Said there'd been an incident between the brothers and Jean said he'd call for Colin when it had all been sorted out. Well, about four days later, Jean came calling and Colin went back to work. He started coming back late, looking grim, and when we asked him about it, he wouldn't say a thing. Sometimes, he wouldn't be back until morning, and he'd sleep all day long. Then about five days ago, he went to work at the mansion and hasn't been back since."
(Special) - Characters who manage to get at least a successful Moderate Diplomacy check or a Stealth check to slip away while the others are talking can search Colin's room. With a successful Hard Perception check, a character finds a note from Colin stuffed in the matress. The note describes Colin's involvement in recent events and Jean's madness. See the end of this entry for the full text.
Shaman Brucian (Area 9, Treasure: 1 treasure packet, likely to include one or more divine magic items and/or rituals):
(Easy Diplomacy) - "In the past few weeks, several villagers have been dying to mysterious means, possibly from some sort of poisonous swamp gas rolling in from the swamp itself."
(Moderate Diplomacy) - "Farmer Hogarth was the first to die - that was about three weeks ago. He was working in the fields when his wife suddenly saw him fall. By the time she got over to him, he was clearly dead. As she stood over him crying, his eyes suddenly shot open and he attempted to grab and choke her. She only barely managed to escape to her. By the time we got sorted out what had happened, there was no trace of him. There's been at least five other deaths, and now there tales of as many who have just disappeared without a trace."
(Hard Diplomacy) - "Shortly before Hogarth's death, there was a terrible accident with Luc Tarascon and his brother Marcel. The whole incident left their other brother, Jean Tarascon mightily upset and left Luc bereft of his senses, perhaps in guilt that he survived and Marcel did not. I buried Marcel myself in the old cemetary, and I have not seen Jean since - he was even too upset to attend the funeral of his brother."
Fiora Balin (Area 12, Treasure: 1/4 treasure packet, likely to be money only):
(Easy Diplomacy) - "Please, you must help me find out what has happened to my daughter, Teresa. I've seen - things - moving about the cemetary at night. I fear one of them may have taken my Teresa as she walked back home from the Tarascon mansion."
(Moderate Diplomacy) - "I've always told my daughter to never walk home alone, and usually Colin, the blacksmith's son, was kind enough to escort her back each night. But of late the Tarascons had been keeping her late at the mansion - preparing for the harvest to come, she told me - and about two weeks ago she simply didn't come home. I asked why Colin didn't escort her home, and Jordi told me his son hadn't gotten back home until that morning himself. Now, Colin has disappeared as well."
(Hard Diplomacy) - "After my daughter disappeared, there was a visiting group of Visanti I went to, in the hopes of finding out what had happened to Teresa. She told me I had until the 'Night of the Dead' to find her; after then it would be too late. She could not tell me more about this 'Night of the Dead' other that it was nigh; no dates or even what it meant. Will you help me? I'm sure that Colin is behind this and his parents are simply hiding him from me!"
Investigation Skill Challenge (Level 4, XP 875)

Goal: Determine what is going on in town, and who or what is behind the murders.
Complexity: 5 (12 successes, 6 Failures) Using 4th level Moderate DC's. 58 XP per successful skill check.
Primary Skills: Bluff, Diplomacy, Insight
Bluff (Moderate DC): You insinuate you will turn the NPC over to the constable or that you "really" know what is going on and just want the NPC to confirm they are not involved in the murders.
Diplomacy (Moderate DC): You ask for the NPCs assistance in solving the deaths and disappearances. The first success with this skill with a given NPC opens up use of History (the NPC metions significant past events he ignored or overlooked).
Insight (Moderate DC): You are aware the NPC has vital information that is being withheld, and manuever them into revealing what they know. Success with this skill grants a +2 bonus to Intimidate or Bluff checks with the same NPC.
History (easy DC): (Available after first successful Diplomacy check with an NPC) You make a note of how the NPC's comment about past events ties in to other events that occurred at or near the same time.
Intimidate (Hard DC): This skill only works after a failed Diplomacy roll against an NPC. Add a +2 penalty to the DC if this is used against Constable Gremin and grant a -2 bonus to the DC if this is used against Shaman Brucius. On a success, you get the NPC to open up by telling them it would not look good in the eyes of others if they do not cooperate.
Notes: Make up to three checks towards success between events in the town. Each set of three checks is considered to be made against one NPC. When the characters get at least one failure with a given NPC, they can choose to wrap up their investigation with that NPC and try their luck with the next.
If the characters have no preference to who they are talking to, assuming the NPCs are talked to in following order, and that one section of information from the Roleplaying section is learned for each success (Easy then Moderate then Hard), along with the following info:
1) Jerald & Henrietta Bascolm (Area 1): After the (3) skill checks, Characters are directed to talk to Constable Grissom about the murders and disapperances. Before the party can question Grissom, run Encounter 2: Scene of the Crime.
2) Constable Gremin (Area 5): After the (3) skill checks, Gremin suggests the characters talk to Louise d'Cann if they make 3 successes, or sends them back to the inn on a failure (Telling the PCs to "mind their own business" and not make things more difficult for his investigation). On a failure, run Encounter 2: Odor of Death. After the encounter, they run into Gremin, who finally tells them about the licorice and suggests they go to the bakery to continue their investigation.
3) Louise d'Cann (Area 2): After the (3) skill checks, Louise directs the characters to talk to Shaman Brucius. However, as the characters exit the building, run Encounter 3: The Madman Strikes. If the characters failed any skill checks with d'Cann, Gremin holds the PCs for questioning, then lets them go. If the characters have accumulated 3 failures at this point, Mordu (area 6) summons them to his cottage after the incident in Encounter 3.
[3.5) Mordu (Area 6 - Red Herring): This encounter is designed to give the PCs a chance to get some successes, although possibly bad information. If the characters make nothing but successful Diplomacy checks, they gain successes as normal but bad information. If at least one successful Insight check is made during the encounter, the PCs are able to determine that Mordu is off his rocker, and they may leave the encounter at any time to continue their investigation. Regardless of the outcome with Mordu, he directs the PCs to talk to Old Fiona. If the PCs get at least one success with Fiona, she deftly informs the PCs that Mordu is a bit eccentric and his information is untrustworthy.
4) Shaman Brucius (Area 9): After encounter 2: The Madman Strikes, the characters get the chance to visit the church and Shaman Brucuis. After the (3) skill checks, if the characters have made at least one failure in the scene, Shaman Brucius excuses himself to run errands. If Luc is with the party, out of Brucuis's sight, he mutters "He's not buried here, not here." He does not eloborate. Moments later, Old Fiona comes to the church, looking for Brucius. Seeing the characters, she takes the PCs back to her cottage to speak to them. If the characters made all 3 skill checks with no failure, Shaman Brucius directs them to talk to Old Fiona straight away.
5) Old Fiora (Area 12): After the (3) skill checks, if the characters make all 3 skill checks Fiona tells the PCs to talk to Jordi and Nadine Smith about Colin. If the characters get one or more failures, she directs them to go directly to the Tarascon mansion; run Encounter 4: The Dinner Party. Afterwards, the characters are directed by any one they wish to talk to to go to Jordi and Nadine.
6) Jordi and Nadine Smith (Area 8): After the (3) skill checks, or if the characters have accumilated 12 or more successes, they find a note from Colin hidden in his room, asking for forgiveness for his actions. It clearly outlines Jean Tarrascon's vile actions in the name of his brother (but not that Marcel is undead). If you have not done so, Jordi and Nadine beg the characters to go to the Tarascon mansion to rescue Colin: run Encounter 4: The Dinner Party. Afterward, or if that encounter has already been run, proceed to Encounter 5: The Madman Strikes. If the characters have bombed out on the skill challenge, they have nowhere to go from here; the identity of the murderer has eluded them. Proceed to Encounter 5: The Madman Strikes, though Jean will have a significant advantage on the PCs in the encounter.
------------------------------------------------

Colin's Note

Colin's note can be found after a fairly thurough search of his matress in area 8. It is stained with tears and at least one bloody fingerprint. It details his involvement with Jean Tarrascon.
"Gods forgive me, I had not choice. Jean has gone mad, and I fear that he is dragging me and Teresa into his madness."
"For four days, I had remained at home as Jean made pretense to handle some difficulty at the mansion. Last night was the first night I had returned to work. Marcel and Luc were nowhere to be found, and there was much work to do, for it seemed a whirlwind of devastation had settled upon the manor in the servant's absence."
"I discovered last night he killed Karlotta, and in his madness he had the cook, Henri, boil her into a stew. I had not discovered this until we already sat feasting on her flesh after our tiresome work."
"Teresa fainted at the revelation, and I made to bolt from the room, but Marcel blocked the way. He told me we were now part of his new family, and if we dared to speak of this to anyone, he would kill my parents before turning me over to constable Gremin and swear that it was I who had killed them."
"I had no choice to agree, for not only did Marcel block my way, he held an ugly dagger in his hand - no doubt the blade he used to do in poor Karlotta."
"After the meal, Marcel again swore us to secrecy in oaths to the most foul of gods; death was promised to us if we did not abide by his demands. I fear he has slain his twin brother, Marcel, and I can only shudder to think what may have happened to Luc.
"Yet, as both I an Teresa left that accursed mansion that evening, we talked of breaking our oath and informing the constable anyway. Before we did so, Teresa felt a strong urge to see her mother once more, lest the constable believe whatever tale Jean might conjure up, and we both be blamed for the Dame Deschamp's death."
"Yet, as we reached reached Teresa's cottage, we caught sight of the Lord of the Dead himself, standing upon the hill, looking down at us with a foul smile spread across his decayed lips. We knew then we could not break from this oath - our souls belong to him and he watches us even now."
"We remained silent and returned to the Tarascon's mansion yet again the next day, hoping last night had been nothing but a misrembered nightmare. Yet, this night Jean took us into the heart of the cemetary, where we found the missing body of Marias Grissom stuffed into a crypt. At Jean's words, she rose, unliving! As we cringed in terror, Jean forced us again to feast on the still blood he cut from her veins. As I forced myself to drink the unholy fluid, I felt something within me die. Even though I vomited up the vile fluid, I can feel it has worked some change on me and Teresa. The light once in her eyes has now left, and I fear the same change is happening to me."
"I now fear Jean as I have never before - what sort of man is he now, who can command the dead to rise and obey him with a mere word? What is he making us become and are we doomed to fall beneath his blade before the week is out?"
 

Stormonu

Legend
Night of the Walking Dead, Part 2, Encounter 1

Monday, October 26, 2009, 08:10 PM CST [Dungeons & Dragons]


You can download the original module at www.wizards.com/default.asp?x=dnd/dnd/do... You will need the module for the story, background and plot. I will only be presenting the updated/revised encounters here.
Night of the Walking Dead, Part 2, Encounter 1 - The Funeral (EL 2 - 639 XP)

This encounter is designed to introduce characters to the troubles in Marias d'Tarascon. Opening with a dream-like sequence, characters witness a surreal funeral that erupts into an attack of undead.
The monsters for this encounter are:
1 Zombie (MM, p274)
3 Zombie Rotters (MM, p274)
2 Ghouls (MM, p118)

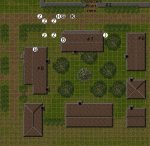
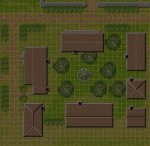
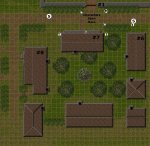
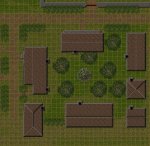
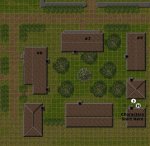
DM's Map

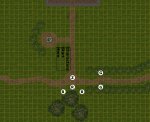
P2E1Placement.jpg

Player's Map


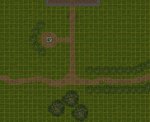
P2E1Play.jpg


Bushes: Two rows of semi-trimmed bushes line the path towards the right and a clumb of bushes half encircle the well on the left side of the map. The bushes are about 5 feet tall and are considered heavily obscured squares. Creatures in the bushes gain concealment.
Church: The stone building at the top of the map is the local church, a three-story tall stone structure with an iron-bound double wooden door. The doors start closed, and will be locked after one round by Shaman Brucius. It requires a Hard Thievery check to open the lock, or 120 hit points of damage to break the door in. Shaman Brucius will unlock the door to allow PCs adjacent to the door in with a successful Moderate Diplomacy skill check or a Difficult Intimidate skill check. He only holds the door open until his next action, then closes it. The undead can attempt to batter the door in if the PCs attempt to escape by this means.
Cypress Trees: A clump of three cypruss trees grow at the bottommost section of the map. These cypress trees are about 20 feet tall. They can be climbed with an Easy Athletics check. They provide cover from melee and ranged attacks, and the upper branches (at least 15 feet up) are considered lighty obscured squares and grant concealment to those in the branches.
Trellises: Two trellis flank each other some 10 feet from the church at the top of the map. The trellises are considered to provide heavy obscurement, but only from the side they face.
Well: The well is about 3 feet high, with a bucket and rope resting beside it. Attempts to push or slide a creature or character into the well allow the victim to make a saving throw at a +2 bonus to keep from falling in. Failure indicates a 30-foot-drop for 3d10 damage.
-------------------------------------------------
Read the following to start the encounter (select one PC as the focus; it works best if presented somewhat dreamily and you allow the PC to take a few minor actions to break up the monologue. If possible, do not set up the encounter until after reading the entire text, but keep map & figures handy to quickly place and not detract from any mood you've set):
"The terror and dread that the swamp generates is eventually overcome by sleep. The gray mists that seem like the very breath of the swamp itself surround and enfold you this night, turning the raft's light sources into floating globes that seem to simply suspend themselves in the gloom. The sounds around you slowly fade into the background, until the become a lulluby of sleep. Even the moon slips behind dark, boiling clouds that occasionally rumble with faint echo of distant thunder. It seems the entire swamp conspires to dull your senses and lull you into a dead sleep.
You've barely let your chin slip into your lap when you awake with a start. The mist has cleared somewhat, and the raft lies empty around, bereft of your companions. A single lamp hangs from the rudder, and it takes a second jolt for you to turn and notice the raft has struck dry land.
It is then that mist seems to part, like a curtain drawn back, revealing to you not some sand barge, but dry, solid land, cluttered with dark grass, waving willow trees and wilting cypress trees whose dry roots stick upward like curled toes. Beyond the shore of lightly waving trees, you espie a town - its building made of aged and gray stone, with the barest hint of lights and smoke filtering up from some of the quaint cottages. It is then you hear the tolling of a great, solemn bell, and a voice raised in solemn chorus. Like a siren, it draws you from the raft and into the town beyond.
You find yourself moving quickly through town. Shops are closed, shudders are drawn and doors are locked. No one answers your cries or knock at the door, but as you pass along the main road, the tolling and chanting clearly grow louder and louder.
And then, you see it. A weathered church, its tall steeple the source of the solemn tolling bell lies at the foot of a hill, atop which stands what might almost be declared a fortress. By the protruding monoliths you see climbing over the wall atop the hill, you guess it to be some sort of cemetary.
It is then you also see the solemn prominade exiting the church, carrying an unadorned coffin in its midst. A throng of people line the path that leads from the church to a crossroad and up the hedge-lined path to the cemetary at the top of the hill.
You are relieved to catch sight of your fellows, already among the throng, solemn as the rest of the villagers as the coffin is brought past them. You hurry up to them, and it is then you realize something is terribly, horribly wrong.
As you watch, from the side of your friends, the coffin pass you, you notice that it is wrapped in an anchor chain which has been padlocked shut. Before you can utter a word, the coffin suddenly rattles as something inside clearly shifts. The priest, following at the foot of the procession, reaches out and places a calming hand on the coffin "Peace, brother Jeremiah - don't make this any harder than it already is."
Almost as if in defiance, the coffin shifts violently, as lid rattles from something violently pounding against it. The mourners ahead attempt to ignore the heavy thudding, their cries becoming slightly more hysterical. Even the palbearers nerverously eye the coffin, their pace increasing.
However, the procession cannot last. As the procession turns onto the lane that leads up to the cemetary, a clenched fist bursts through the top of the coffin. The palbearers will stand no more, dropping the coffin to the ground. The mourners scatter, screaming. At least three of the gathered crowd swoons and fall to the ground as the odor of death falls full on the congregation. Even the priest pulls up his robes and hastily runs back towards the church in abject fear.
By the time the throng has cleared, the coffin is demolished, and its chains shattered. From the ruined remains, the coffin's occupant rises. Though well-dressed in funeral finery, his white-shrouded eyes and lolling head clearly mark him as undead. Even as he rises to his full height, the three villagers who swooned uncurl themselves and rise, their eyes likewise glazed over and vacant."
Mood

The DM should present the opening scene in as creepy and whisper-like voice he can muster. Up until the violent break-out from the coffin, attempt to create an air as if the character is experiencing a dream sequence. Don't allow the other PCs to tune out; you don't want to have to repeat it for them.
Once the zombie breaks out, try to instill an aura of panic and confusion. Keep the characters on a short leash; give them 10-15 seconds to decide what to do or threaten to skip to the next PC (As the fight moves along, you can quietly give them more time and relax a bit). The characters may initially attempt to bolt, but the undead should pursue them (especially if Luc is with the group).
None of the villagers are depicted on the map, it is assumed they have cleared far enough away that the PCs can focus on fighting the undead. However, if you can set it up without drawing away from the tension, you might want to place some villagers on the map to give credence to their attempts to escape. If the PCs are scoffing at the encounter, you can throw in some villagers who need saving to complicate matters.
Development

The Zombie (Jeremiah d'Gris) and the 3 zombie rotters move to attack immediately and mindlessly, following characters and attempting to beat the stuffing out of them. They attack the closest thing and keep attacking until put down or the target drops (even if just faking).
The ghouls in the bushes wait a round to observe and manuever (moving at 1/2 rate), then spring out at PCs. Because of the dense bushes they are hiding in, characters who are more than one square away from a ghoul can't see it at all, as if it were invisible. If the characters run, the ghouls follow in tangent, attempt to use cover and shortcuts to get ahead and intercept the PCs. (This would be a great place for a Chase Skill Challenge).
Aftermath

If the characters are overcome, Shaman Brucius overcomes his fear and comes out from the church. If the players are carrying the Holy Latern, he recoginizes it and activates it, pushing the undead away. Unable to get at their prey, the ghouls flee back up toward the cemetary and the zombies shamble after.
If the characters are victorous, or Shaman Brucius manages to save the PCs, Constable Gremin shows up a few rounds later. Brucius can help patch the PCs up, while Gremin examines any remains and asks the characters to explain what happened. He is very terse, though Brucius is somewhat protective, considering the heroism he has just witnessed.
If Shaman Brucius sees that Luc Tarascon is with the party, he offers to take the youth and watch over him at the local church (You should encourage the PCs to cooperate). He will show up again in the third part of the adventure.
If the characters question either Gremin or Brucius, they have the following information to offer at this time.
Constable Gremin:
(Easy Diplomacy) - "There's been talk of the dead rising in town, but this is the first solid evidence I've seen of any such happenings."
(Moderate Diplomacy) - "Poor Jeremiah. His son found him in his bed yesterday morning, dead as a doornail. Not a mark on him. We figured he'd worked himself to death in the fields and it'd just got to him that night."
(Hard Diplomacy) - "Poor soul's not the first to 'ave died here in town, an' I suppose he won't be the last. The winds have changed so ta' speak, and I sense more than a storm coming this way."
(Automatic) - "It might be best if you retire to the Full Moon Inn. They've got food, drink and lodgings - it is perhaps the best place to be in these times; until you're ready to move on, of course."
Shaman Brucius:
(Easy Diplomacy) - "Forgive an old cleric for running on you, I'd not come face to face with the undead before. I promise I won't let it happen again."
(Moderate Diplomacy) - "I feared this might happen. Other villagers have spoken of seeing the dead rise of late in town, but we've not seen any proof until now."
(Hard Diplomacy) - "I have been of late reading texts on the nature of the undead, considering the growing tales of the dead walking. From what I know, only two things will bring such unlife to the deceased - either an unfinished task in life or the foul ritual of some mad necromancer. I hope it to be a case of the former, not the latter - though now we may never know now."
-----------------------------------------------
From here the characters are free to explore the town of Marias d'Tarascon.
 
Last edited:

Stormonu

Legend
Night of the Walking Dead, Part 2, Encounter 2

Monday, October 26, 2009, 11:19 PM CST [Dungeons & Dragons]

You can download the original module at www.wizards.com/default.asp?x=dnd/dnd/do... You will need the module for the story, background and plot. I will only be presenting the updated/revised encounters here.
Night of the Walking Dead, Part 2, Encounter 2 - Scene of the Crime (EL 3 - 790 XP)


Setup

The characters hear a woman's scream as the exit the Full Moon Inn (area 1). Upon investigating, they find Constable Gremin locked in battle and must come to his aid against the minions of Jean Tarrascon.
The following creatures/NPCs are used for this encounter:
1 Jean Tarascon ("J", MM, p134 - use Gnome Arcanist for stats; his powers are shadow-based)

  • Scintallating Bolt is Chill of the Dead Lord. It deals necrotic damage instead of radiant damage.
  • Startling Glamor is Dread Repulse; effect unchanged
  • Illusory Terrain is Grasping Shadows; effect unchanged
  • Fade Away is Melt into Shadow; power activates when bloodied; Jean uses it to escape
  • Fey Step is Shadow Walk; effect unchanged; Jean uses this to aid in an escape
2 Shadow Hunter Bats ("B",MM, p27)
5 Zombie Rotters ("Z", MM, p274)
1 Gravehound ("H", MM, P274)
1 Constable Gremin ("G",MM, p162, use Human Guard stats. Gremin is at 0 hp and dying as the scene opens)
1 Katha Onsbee ("K", MM, p162, use Human Rabble stats)
--------------------------------------------------------
Read the following to start the encounter
The heavy clouds overhead cover the town of Marias d'Tarscon as if it were dusk. A chill wind blows in from the swamp behind the Inn, bringing with it the fetid smells from its dark waters.
A moment later, a scream pierces the dark and chill air; it does not sound far off!
If characters investigate, read the following:
Following the chilling screams, it brings you to a clump of houses outside the gate that surrounds the inn. Standing in the street is Karla, the barmaid from the Full Moon Inn. Just to her side, you see the local constable crumple to the floor, clutching his side. Towering over him is a charnel dog, the greenish flesh rotting from its haggard corpse. Behind it, hair whipping in the wind stand five figures dressed in rotting red cloaks. Karla screams once more and her screams are echoed by two monsterous bats that alight on the roof of a nearby cottage. From somewhere nearby, you hear a hoarse cackle and the sound of steel being drawn.

DM's Map

P2E2Placement.jpg

Player's Map

P2E2Play.jpg


Buildings: There are four unnumbered buildings marked on the map, showing the exterior. Having heard the screams, the villagers have (wisely) locked their doors and refuse to open up unless a character makes a successful Hard Intimidation skill check. The NPCs inside will then let the PCs in, but under no circumstance will they come out to fight.
Bushes: There are rows of overgrown bushes/hedges around the block of houses and growing up the outer wall of the Full Moon Inn. The bushes are about 5 feet tall and are considered heavily obscured squares. Creatures in the bushes gain concealment.
Cottage (Mordu) #6: This is Mordu's cottage. Any character who makes a successful Hard Perception check will see the former accountant sneaking a peak at the events outside. Like the others, he will not open his doors and keeps the windows shuddered unless the characters make a successful Hard Diplomacy or Intimidation check to get in. If characters escape the encounter into Mordu's cottage, the zombies and Jean complete their work, dragging Gremin off to be made into a zombie (If you are using the Investigation skill challenge, replace the meeting with Gremin with Mordu).
Cottage (General Store) #7: This is Deruno the dwarf's general store. Like the others, he locks his cottage and closes the shudders when the attack starts. If characters make a successful Hard Diplomacy check, Deruno opens his doors and is willing to give the PCs shelter and/or a treasure pack worth of items to help save Gremin.
Cottage (Blacksmith) #8: This is home to Jordi and Nadine. Under no circumstances, either via Diplomacy or Intimidation, will Jordi open the door. If the characters attempt to force their way in, Jordi physically drives them out, using his smithing hammer (treat as warhammer, with Jordi having the stats of a Human Bandit).
Cypress Trees: A clump of three cypruss trees grows between the houses in the middle of the map. These cypress trees are about 20 feet tall. They can be climbed with an Easy Athletics check. They provide cover from melee and ranged attacks, and the upper branches (at least 15 feet up) are considered lighty obscured squares and grant concealment to those in the branches.
Wall: In the topmost section of the map is the outer wall that harbors the Full Moon Inn. It is 15 feet tall and made of mortared stones. The top of the wall is about 5 feet wide and can be easily walked or run along. Characters can safely jump down in the sections not obscured by hedges. If they jump down or fall into a hedge, they must make a saving throw or take 1d6 damage.
Mood

Play up the unknown quality of the zombie rotters; if played correctly, the players should initially mistake them for some sort of cultists. Only when the first rotter falls should the players get an indication that they aren't fighting the living. The gravehound should be absolutely frightening; if possible, you might want to try and convince the players that the hound is rabid and could infect the PCs - it might make them more leery to ignore or face the beast directly.
Likewise, do your best to play up the zombies dragging off Gremin; try to play up the desperation of keeping the zombies from hauling off the still-living-but-gravely-wounded Constable to obstinately turn into the undead.
If possible, try to make the characters dread the winged attacks of the shadow hunter bats - the shriek as they swoop in should fill the characters with dread and they should quickly target any characters out in the open; make it seem likely that the bats are powerful enough to carry off a character or two if they get a good grip (play up the bat's attacks, one such attack "lifting the character off the ground" just before he can rip free). The bat's harrying attacks can be put to good use to help the zombies put some distance between the characters and create even greater tension.
Finally, do your best to play up Jean as both mysterious and deadly. He picks his attacks, waiting until the PCs are otherwise occupied before he strikes. He won't fully engage PCs, trying to use cover and concealment to his advantage Even if Jean only gets in one strike, or make a near-miss strike, use his presence for fear of what he represents (a madman dealing/controlling undead) moreso than attempting to inflict damage.
Development

As soon as Karla can, she runs back to the Full Moon Inn. She only fights to defend herself.
The closest zombie to Constable Gremin ("G") grabs the falled constable and starts dragging him through the area between the houses, trying to drag the constable off the bottom of the map. The other zombies run interferance, trying to slow the characters or picking up the constable if the zombie dragging the constable is slain.
The gravehound rushes the characters, attempting to keep the party occupied and off-balance. Meanwhile, the shadow hunter bats make passing attacks, attempting to use the trees and roofs of the cottages to keep away from character's retalitory strikes.
Meanwhile, Jean keeps his distance and attempts to blast the characters with Chill of the Dead Lord. He uses Dread Repulse to keep characters from getting too close and always attempts to manuever to keep from getting boxed in, with some sort of alleyway to exit. Once he is bloodied, he curses the characters and uses Shadow Walk and Melt into Shadow to slip away, moving out of the character's sight as quickly as possible. At this time, consider if the characters ever lose line of sight to him he manages to slip away. If at any time the zombies shuffle away from the PCs with Gremin's body, Jean instantly uses his abilities to slip away and end the encounter, leaving with a hoarse chuckle of maniacal laughter.
Aftermath

If the characters manage to save Constable Gremin, he is extremely grateful. Durango the dwarf finally comes out of his cottage, and if he has not yet done so, gifts the characters with a treasure packet for their efforts.
If the characters examine the zombie corpses, a casual investigation that they are dressed in simple burial robes, but the robes have been stained red with now-dried blood. A successful Moderate Perception check reveals one of the (female) zombies is wearing a cheap silver ring with a bit of Lapis Lazuli. Constable Gremin can recognize the ring as belonging to the missing Lady Grissom. The others Gremin does not know (They were actually a troupe travelling from Port d'Elhour that Marcel ambushed and turned to zombies, then donated to Jean to use).
If the characters were lucky enough to kill Jean, all is not lost. Gremin has Jean's body sent to the church for burial. While the party is either investigating other leads or retiring thinking that everything is fine now that the killer has been found, Marcel sneaks over to the church and reanimates his dead brother to continue his rampage - possibly leaving characters to think another individual is involved in the murders and disappearances. To allay suspicions, the brothers leave a mocked-up corpse behind for Shaman Brucius to bury (assume Marcel uses a supernatural power to magically alter the corpe's face to look like Jean's; a Hard Perception check will reveal the deception, and it will fade after burial).
 

Attachments

  • JeanTarascon.JPG
    JeanTarascon.JPG
    93.2 KB · Views: 959
Last edited:

Stormonu

Legend
Night of the Walking Dead, Part 2, Encounter 3

Thursday, October 29, 2009, 02:31 AM CST [Dungeons & Dragons]

You can download the original module at www.wizards.com/default.asp?x=dnd/dnd/do... You will need the module for the story, background and plot. I will only be presenting the updated/revised encounters here.
Night of the Walking Dead, Part 2, Encounter 3 - The Madman Strikes (EL 2 - 664 XP)

Jean Tarascon sees the characters as a growing threat and he uses a foul ritual to multiply and turn the pieces of his ghoulish feasts into a deadly swarm to destroy the characters in an ambush.
Setup

The following creatures are used for this encounter
3 Crawling Claws ("C", Open Grave, p142)
2 Crawling Claw Swarm ("S", Open Grave, p142)
3 Tomb Motes ("T", Open Grave, p144)
1 Clay Scout ("H", MM, p156 - guarding the gate to the Full Moon Inn)
Read the following to start the encounter
As you pass the Full Moon Inn to your next stop, you see a rat-sized blur flash past you and into a nearby bush. It takes you a moment to realize what you saw was a dismembered hand when you suddenly notice another such hand scuttling on the porch of a nearby cottage, clamoring to keep up with your pace. Your observation is quickly followed by a rising, scuttling sound - like that of a swarm of approaching rats - when suddenly from around the corner, ahead and behind you, a tumbling wave of dismembered, clawing, leaping, running hands scuttles towards your group.

DM's Map


P2E3Placement.jpg


Player's Map


P2E3Play.jpg


Buildings: There are four unnumbered buildings marked on the map, showing the exterior. The villagers have (wisely) locked their doors and refuse to open up unless a character makes a successful Hard Intimidation skill check. The NPCs inside will then let the PCs in, but under no circumstance will they come out to fight.
Bushes: There are rows of overgrown bushes/hedges around the block of houses and growing up the outer wall of the Full Moon Inn. The bushes are about 5 feet tall and are considered heavily obscured squares. Creatures in the bushes gain concealment.
Cottage (Mordu) #6: This is Mordu's cottage. Any character who makes a successful Hard Perception check will see the former accountant sneaking a peak at the events outside. Like the others, he will not open his doors and keeps the windows shuddered unless the characters make a successful Hard Diplomacy or Intimidation check to get in. However, if characters take refuge in his house, the claws swarm the windows, prying/smashing them open and flooding into the building (along with the tomb motes).
Cottage (General Store) #7: This is Deruno the dwarf's general store. Like the others, he locks his cottage and closes the shudders when the attack starts. If characters make a successful Hard Diplomacy check, Deruno opens his doors and is willing to give the PCs shelter. Like the cottage above, if the characters hide in the general store, the crawling claws flood into the building to continue the attack.
Cottage (Blacksmith) #8: This is home to Jordi and Nadine. Under no circumstances, either via Diplomacy or Intimidation, will Jordi open the door. If the characters attempt to force their way in, Jordi physically drives them out, using his smithing hammer (treat as warhammer, with Jordi having the stats of a Human Bandit).
Cypress Trees: A clump of three cypruss trees grows between the houses in the middle of the map. These cypress trees are about 20 feet tall. They can be climbed with an Easy Athletics check. They provide cover from melee and ranged attacks, and the upper branches (at least 15 feet up) are considered lighty obscured squares and grant concealment to those in the branches.
Gate: This thick wooden gate seals off entry to the Full Moon Inn near the top of the map. The clay scout has closed and locked the gate, filling the keyhole with detrius to make it nearly impossible to open (Hard + 2 Thievery skill check to open the gate). It takes 120 hp of damage to break the gate open. The gate is 8' high, and no one on the other side will come to the PCs aid.
Gazebo: Centered near the middle of the map, this open building provides cover against melee attacks for those inside, but provides no bonus against melee attacks. The gazebo is immune to damage.
Wall: In the topmost section of the map is the outer wall that harbors the Full Moon Inn. It is 15 feet tall and made of mortared stones. The top of the wall is about 5 feet wide and can be easily walked or run along. Characters can safely jump down in the sections not obscured by hedges. If they jump down or fall into a hedge, they must make a saving throw or take 1d6 damage.
Mood

While this is mostly a straight-up fight, you can play up the disgusting attributes of the severed hands and the soup-stock remnants of the tomb motes and the swarming nature of these creature's attacks. You might want to describe the clay scout as "pudding-like", made more of congealed blood than clay.
Development

The crawling claws move and strike, trying to hamper PCs from moving around, holding them in place long enough for the crawling claw swarms to envelope the PCs. The claw swarms attempt to enter the space of the nearest character and overwhelm the victim until destroyed or the PC is dead.
The clay scout has closed the gate to the Full Moon Inn and will attack any character who attempts to open the door, prefering to strike from its cover in the bushes.
The tomb motes hang back to try and isolate a character and swarm him. If any PC attempts to get help from one of the cottages, they are a prime target for attack.
Aftermath

Once the characters dispatch the creatures, a quick search of the area finds a small stash of red licorice near the gate to the Full Moon Inn. There is a piece for each character, and the tip has been dipped in foul-smelling blood.
After the attack, the characters are free to continue to their next destination; Jean has been thwarted for now, but will not remain idle for long.
If any of the characters fall during the attack, the crawling claws or tomb motes attempt to drag the unfortunate character off to the cemetery to be made into a zombie.
 
Last edited:

Stormonu

Legend
Night of the Walking Dead, Part 2, Encounter 4

Friday, October 30, 2009, 12:39 AM CST [Dungeons & Dragons]

You can download the original module at www.wizards.com/default.asp?x=dnd/dnd/do... You will need the module for the story, background and plot. I will only be presenting the updated/revised encounters here.


Tarascon Mansion.JPG


Exterior basis for mansion map.
Night of the Walking Dead, Part 2, Encounter 4 - The Dinner Party (EL 3 - 775 XP)

The characters investigate the Tarascon mansion after dark, and discover that the servants have become ghouls - and are waiting for them.
Setup

The following creatures are used for the encounter
2 ghouls ("G", MM, p )
1 Zombie ("Z", MM, p274)
1 Corruption Corpse ("C", MM, p175)
3 Rot Hounds ("R", Open Grave, p158)
Read the following to start the encounter
A lone window alights the Tarascon mansion. A quick examination reveals all the other windows on the house to be shuddered and dark, and the doors are likely locked as well. With care, you make your way up to see into the lone unshutter set of windows on the mansion's first floor.
Beyond the window lies a spacious dining room with fine appointments, showing taste and wealth. A chandelier of burning candles fills the room with a warm and pleasant light. A number of large, covered serving trays lie upon the table in center of the room, and places have been set for four of the eight seats at the table.
Three well-dressed servants enter through a gap in the curtain that curtails the room from the rest of the house. Each servant's head is bowed deeply as they walk. One of the servants moves to the table, and with a flourish, lifts the lid from the grandest platter, revealing tonight's meal: the remains of a freshly dead young man. Dried blood covers much of his pale flesh, and a wicked cut stretches from ear to ear. Suddenly, the young man's eye's flash open and with a moan, he sits up, attempting to push his bulging organs back into his opened chest. With feral glee, the servants turn their attention from the meal before them to gaze at you with yellowed teeth and sunken, glowing eyes - clearly, they are undead!
Player's Map (You might want to conceal rooms until the players can actually see them)
Note: North is towards the bottom of the map.


DM's Map

P2E4Placement.jpg

Player's Map

P2E4Play.jpg


Chairs: Intact chairs can be used as two-handed clubs dealing 1d10 damage. After first use, they break and all that remains is an improvised club that deals 1d6 damage.
Crops: On the right side of the house is the mansion's plantations, tall rows of barley that rise about 3' - 4' tall; just high enough to provide heavy concealment the rot hounds or anyone crouching or laying down in the fields.
Doors: The interior doors are hollow wood and a mere 10 points of damage will break them down. The exterior doors are much tougher; they can take 60 points of damage before they break. All doors can be locked and require a Hard Thievery check to open if locked. Doors can be held shut, requiring opposing Strength checks to get through. Up to 3 people can hold or wedge open a door at a time.
Inner Walls: The inner walls are made of thin wooden strips covered over with a veneer of plaster or wallpaper. It takes a mere 6 points of damage to create a hole in a wall, though it takes 30 points of damage to tear down a section large enough to squeeze through.
Rug: A rug can be used as an improvised net or perhaps yanked out from someone standing on it as a Str vs. Reflex attack, knocking them prone on a success.
Outer Walls: The lower half of the house's first story outer walls are made of a foot-and-a-half of stone that is topped with wood construction.
Windows: Most of the windows are covered over with stout shudders that require 10 hp of damage to destroy. The windows themselves can be shattered with a single point of damage. Those leaping through a window need to make a saving throw to avoid 2 points of damage (the undead are unaffected).
Breakfast Dining Room: The table can be tipped over to use as cover or as difficult terrain. The chairs can be used as clubs.
Dining Room: The table can be tipped over to use as cover. The chairs can be utilized as clubs. The cutlery can be used as improvised daggers/knives.
Foyer: A bearskin rug lies on the ground, it can be used in a manner akin to the other rugs in the house.
Kitchen: The stove is not lit, but can fit a halfling-sized character (possibly if stuffed there by a ghoul). A liqour rack stands against the bottom wall; the individual bottles can be used as improvised clubs or daggers (when broken). A character or monster doused in alchohol can be lit up with a successful Dex vs. Reflex attack if the attacker wields some sort of open flame. A burning character/monster takes 1d10 damage per round until they make a successful saving throw.
Living Room: The chairs here can be used as clubs. The couch can be tipped over for cover or to act as difficult terrain. The coffee table can be used like a club like the chairs or used as an improvised shield.
Master Bathroom: The chair can be used as a club. The dresser can be used to attempt to block the door, granting a +2 bonus to attempts to hold it shut.
Master Bedroom: The curtains provide concealment. The bed is difficult terrain. The nightstand can be thrown to deal 3d6 + Str damage, but breaks after use. The mirror can be used as an improvised shield or cover, or spun to make an attack (Dex vs. Reflex), dealing 1d8 + Dex mod damage. It breaks after such use. The wardrobe closet is large enough to hide a halfling or a crouching human. If tipped over, it can be used as an attack (Str vs. Reflex, 1d10 + Str mod damage). Tipped over, it counts as difficult terrain.
Music Room:A creature or character can be damaged if he/she is pushed under the open lid of the piano and it is slammed down on them. This is a Str vs. Fortitude attack dealing 1d6 + Str damage. There is a rug on the floor that could be used.
Study: The bookshelves can be pulled down on an individual with a successful Str vs. Reflex attack, dealing 1d8 + Str mod damage. The desk can be tipped over to use as cover or difficult terrain. The chairs can be used as clubs.
Tea Room: The table can be tipped for cover or to make difficult terrain. The chairs can be used as clubs.
The Second Floor of the Mansion is not displayed here.
Mood

The initial display is meant to be frightening, a warning to the player's fate if they fail to destroy the ghouls. If a player falls in combat, you might want to have one of the ghouls use a minor action to loom over the character, smacking his lips or tearing out a hunk of flesh, or the rot hounds tear at the fallen character's flesh (this doesn't have to cause more damage; just try and use it to scare the bejeezus out of your PCs) You might want to play up the "rustling from the nearby fields" as the rot hounds emerge from the fields and garden to attack the PC's flank.
If the characters remember who Colin and Teresa are, you can add to the fear by describing them (the two ghouls) so that the players recognize them. Likewise, you can play on the fact that the ghouls were waiting to ambush the PCs - talking ghouls, who explicitly talk about how they intent to dismember PCs while they still live or mockingly plead for help as they rip PCs apart, should help to instill some fear into the group.
For additional fun, you can have one of the undead (possibly the zombie) drag a paralyzed PC into the house and to the kitchen, where it then puts them onto the table and starts attempting to hack the PC up with kitchen cutlery. Or, you could have the ghouls retreat into the house after initially paralyzing a few PCs to conduct a game of cat and mouse through the rooms (dragging a paralyzed PC inside if the characters are reluctant to follow). Encourage the PCs to take the fight into the house; there's a lot of things they can use (as can the undead) to make the fight more interesting.
Development

The two ghouls leap through the window as part of their initial move action, attempting to paralyze as many of the PCs as they can, as the zombie shuffles forward to bash down anyone it can reach. Meanwhile, the corruption corpse (the young man on the table) hangs back, hurling globs of himself at still-moving PCs to keep them off-balance. The rot hounds attempt to flank the characters, cutting off any chance of escape. They gang up on a single PC to use their rot breath to nasueate the character as they attack.
Aftermath

If the PCs manage to defeat a ghoul, as it falls it seems to come out of a trance, remembering it's true self as Colin or Teresa, and begs to be saved (you should track negative hit points/death saves at this point). The other undead, however, become aggressive towards the fallen "ghoul" and attempt to destroy it if allowed. If Colin or Teresa are saved from destruction, award an extra 125 XP for each. If the characters save Colin or Teresa, they can confirm that Jean Tarascon is behind the murders and disappearances.
If the characters search the mansion afterward, they will find evidence that several of the missing people were here; their personal belongings lie on a shelf in the kitchen. Likewise, in the study on the desk can be found Jean's journal of recent events, most importantly, the details of his brother's recent death and a few other clues, including a warning for the PCs.
----------------------------------
Jean's Journal

Just Over Three Weeks Ago
"I must convince Marcel to stop this madness. Damn Luc and that journal he found in the library. Marcel has become obsessed with finding this 'Scroll of Hykosa'. I do not know what he intends to find in this scroll, but I expect it is no more than dark magic as it comes from those untrustworthy Visanti vagabonds Luc has visited."
"Now Pierot has come to me, telling me he had to drive off Marcel and Luc from the cemetary. This cannot continue; we cannot have the populace believing we are necromancers or grave robbers."
"When my two brothers return this evening, I will have words with Marcel about this matter."
Two Days Later
"The unthinkable has happened. Marcel and Luc left this morning for errands in town at d'Cann's bakery, including bringing me back licorice as a peace offering."
"However, despite my warnings to Marcel to stop this foolishness, both he and Luc returned to the cemetary to continue their search for the accursed Visanti scroll. I did not learn of their duplicity until one of the Bordell children came to tell me, at d'Cann's urging, that he had fresh licorice - and that neither Marcel nor Luc had visited the store that morning."
"Knowing where they had gone, I raced to the cemetary to stop my foolish brothers. As I neared the cemetary I felt something horrible had occured to my brother. I managed to evade Pierot and found my way to both in the inner vaults. Luc was backed into the corner as ...things poured over my brother's umoving body. I had the forethought to arm myself and I drove the monsters back into the darkness, but it was too late. Jean was dead."
"Luc, his senses scattered, tried to show me that they had found the scroll. I knocked it from his hands and dragged my brother to the church of Shaman Brucius. Luc followed, now lost in his own deranged world of shadow and madness."
"Shaman Brucius saw my anguish and attempted to perform a rite to bring life back to my brother. But it has failed so competely, utterly and totally. We are now forced to bury my brother in the same crypts that took his life.
"Shaman Brucuis has said he would take and care for Luc. I care not, my brother is lost!"
Next Day
"Am I mad? My dreams are filled with images of my brother, decayed and rotted, but he calls out to me. He whispers dark, mad things - things I dare not contemplate. Has he been lost to me forever, even damned for daring to seek out that cursed Visanti scroll?"
Two Days Later
"Again, the dreams have come. I know now what I must do. My brother calls to me from beyond the shroud. He is still with me. I feel it. He whispers words of encouragement; secrets so that I might join him in death. I will need help. Surely my servants will understand."
Two Days Later
"It begins. Jean has told me how I might cheat death by becoming death itself. I have shared my secret with my servants and now they will aid me in my quest to forever be with my brother. This town will become the altar to our triumph. Not even death shall keep me from my brother's side."
One Week Later
"My brother whispers to me to find the scroll, before the blood moon rises. I will not! We do not need it; we are invincible! Jean whispers that we must find Luc and kill him for he, too, knows the scroll's secrets. In this, I am in agreement, but when I went to see him at the church, the Shaman said he had taken him elsewhere. I let my rage get the better of me, and the Shaman drove me out. Fool! He should have destroyed me, for I will put him upon our altar of blood!"
Two Days Later
"The blood moon is coming; I can feel the bond between myself and my dead brother grow stronger each day. Jean has shown me the secret to make the dead walk and heed my command. They are better servants than the pathetic living husks in the village below; I cannot wait to transform them all into our willing servants."
"We must make preparations for the blood moon. I have informed Colin and Teresa to attend me here at the mansion. They do not need to defile themselves with the living any more."
Four Days Later
"The cursed Visanti are preparing to leave. Good riddance to those thieves and charlatans! It is they who brought this misery upon our heads. But I shall soon reverse our fortunes and emerge ever stronger beside my brother when he is returned to me. We are sure the blood moon is the key."
"He still asks me to find for him the scroll, but I have hidden it back where it was found. We do not need it and soon enough we will be one, unconquerable and ruler of this pathetic rabble that squirms before us."
Yesterday
"Cursed strangers have come to our town. They threaten to undo all I have wrought to bring my brother and I together once again. I will not allow it! I will turn them into unthinking automatons for daring to oppose me!"
Today
"I have prepared a trap for those meddlesome strangers. If they do no fall to it, I can always comfort myself in knowing that the living must still sleep sometime - and the night belongs to me and my brother!"
 
Last edited:

Stormonu

Legend
Night of the Living Dead, Part 2, Encounter 5

Saturday, October 31, 2009, 01:16 AM CST [Dungeons & Dragons]

You can download the original module at www.wizards.com/default.asp?x=dnd/dnd/do... You will need the module for the story, background and plot. I will only be presenting the updated/revised encounters here.
Night of the Living Dead, Part 2, Encounter 5 - Facing the Madman

Jean Tarascon grows tired of the character's interferance. Leading them on a deadly chase, Jean attempts to destroy the characters in a final confrontation.
Setup (EL 5 - 1,000 XP)

For this encounter you need the following NPCs
1 Jean Tarascon ("J", see below)


JeanTarascon.JPG


1 Human Rabble ("H", MM, p162, to represent Jean's hostage)
Mood

This encounter takes place at night; remember how difficult it is for the characters to see, much less keep track of Jean in the dark. Also take into account the nightly weather - the sky is thick with clouds, though no rain falls yet. Occasionally, the full moon sneaks a glance out from behind a cloud giving the PCs a brief moment to see Jean as he leads them on the mad chase through town. (Be sure to mention the moon - it becomes important in the next chapter). After Jean's first attack in the interlude, play to the characters fear that he will strike again; focus on those characters who have become isolated in the chase - every whisper on the wind, every shadow should loom with danger.
When the characters finally face Jean, play up his madness. He talks aloud, discussing things with "his brother", occasionally looking up to glance off toward the cemetary in the distance (perhaps characters think they see the outline of someone watching from the far hill...).
Part 1 - Opening Salvo

Read the following to start the encounter
Tonight's activities have come to an end; now that the Tarascon mansion has been cleared, you make your way back to the Full Moon Inn for a night of rest and contemplate your next action. You do not delay returning to the inn for the thick, black clouds above you look thick with rain and a steady wind portents of the coming storm.
As you near the gate to the Inn, the near-full moon slips from behind a pack of dark clouds, lighting the area in a eeiry white glow. Suddenly, from out of the darkness behind you, a solid bolt of blackness streaks towards you!
This is a Chill of the Dead Lord aimed at one of the characters. Jean is considered to have combat advantage against the PC he targets. As soon as you resolve the attack, begin the skill challenge.
Part 2 - The Chase

This uses a modified chase skill challenge for the characters to track down and corner Jean Tarascon.
Primary Skills: Acrobatics, Athletics, Perception, Streetwise.
1st check: Jean slips back through a narrow gap between a thorny hedge and a building. Characters wishing to follow him must make a Moderate Athletics to follow him, a Hard Athletics or Streetwise to run the long way around the hedge after Jean without losing him. A failed check results in a lost healing surge. Characters who do not wish to make a check fall 1 round behind on the chase.
2nd check: Jean overturns a cart full of firewood, hoping to slow the characters down. Characters must make a Hard Athletics check to jump the cart or a Moderate Athletics to run around it and after Jean. A failed Acrobatics check results in a lost healing surge. A failed Athletics check puts the character 1 round behind. Characters who do not wish to make a check automatically fall 1 round behind on the chase.
3rd check: Jean slips into a narrow alley between two buildings and quickly scrabbles up to the roof. Characters must make a Moderate Perception check to realize where he has gone. A Moderate Athletics or Acrobatics check allows the character to follow Jean up. A successful Hard Streetwise check allows characters to follow Jean's progress along on the ground. Characters who fail the Perception check fall 1 round behind. Characters who fail the other check, or who take no check fall another round behind.
Interlude One - The first attack: Jean uses his position to determine how spread out the characters are. He backtracks to a lone character or waits for a single foe to catch up to him (remaining on the rooftops at this point). His target must make a Perception check DC 18 or Jean gets to make a Chill of the Dead Lord attack with combat advantage (+2d6 damage) against the target. If the PC makes the check, Jean still makes his attack, but without combat advantage and the PC gets to make a return ranged attack. If any character has not failed any of the checks yet and also makes a successful Perception check DC 18, they may make a single melee or ranged attack against Jean before the chase continues.
4th check: After making his attack, Jean takes off again, sprinting across the rooftops and leaping to another building. Characters following him can make a Moderate Athletics check to make the leap to the next building, or a Hard Athletics check to skillfully tumble across. Failure of either check costs a healing surge. Characters who have been following on the ground can make a Moderate Athletics check or Hard Streetwise check to keep pace with Jean. Failure puts the character 1 round behind on the chase. As always, a character who chooses not to make a check falls another round behind.
5th check: As Jean scrambles across the roofs, a few shingles slip away from where he passes. A moment later, he hops down back to street level. Characters following him must make a Moderate Acrobatics check to keep from slipping on the loose shingles or can make a Hard Athletics check to keep up while avoiding the loose patch. In both cases, a failed check costs PCs a healing surge. Characters on the ground can make a Hard Streetwise to keep up with Jean's movements and arrive where Jean slips down to the ground. Failure indicates the character falls one round behind. As before, characters who choose to not make a check fall another round behind.
6th check: Jean has slipped down to the streets. He darts down the street and into a nearby alley. Characters following him must make a Moderate Athletics check to catch up to him. A character who makes a Hard Streetwise check can guess where Jean will come out and manuever around to the far side of the street to block him off or intercept him in time. If the character fails the check or makes no check, they fall a round behind.
Final Confrontation: Fortunately for Jean, as he makes his way down the alley, he happens upon a young lady (perhaps Katha from the Inn, Nadine the blacksmith's wife or Teresa, if the characters saved her) and grabs her as a hostage. If characters are right on Jean's heels, his first action for the round is to grab the young lady. If the characters are 1-2 rounds behind, Jean has time to grab the young lady already. If characters are at least 3 rounds behind or more, Jean kills the lady and prepares a trap for the PCs.
Part 3 - The Final Battle

Characters arrive on the scene according to how far back they may have fallen in the race. Assume Jean goes in the round before his hostage. His hostage makes no attempt to move or attack while Jean holds her.

Read the following:
You round the corner to come upon your foe standing in the alley, his red hood still pulled over his face. Backing away from him is a young woman, terror written on her face. With a flourish, the man pulls back the hood to reveal a man in his thirties, a look of sheer madness in his eyes. "Jean!" the lady screams, too shocked to move.
Jean turns to face you, his knife drawn. "You should not have come to Marias d' Tarascon," he hisses. "She will pay for you interferance, and then I will feast on your blood!"

DM's Map

P2E5Placement.jpg


Player's Map

P2E2Play.jpg

Dashed start is for PCs who made the Streetwise check at check #6.
If the first character is at least 3 rounds behind Jean, use the Ambush map for the encounter setup.
Read the following:
As you try to make your way through the darkness after your attacker, you hear a shrill scream. Unfortunately, you arrive at its source too late, for you are left with nothing but a pool of fresh blood on the ground between a pair of cottages. However, a fading trail of bloody footprints and visible drag marks lead into the grove of trees between the buildings.
If the characters investigate, read the following:
For a moment, the moon slides back from behind the clouds, illuminating the small grove of trees between houses. In the center of the grove stands a plain gazebo and the moonlight illuminates a fresh handprint of blood on one of its columns. Further, you can make out a lone figure slumped on the bench in the gazebo.
As soon as the characters approach the Gazebo, Jean attacks from his hiding spot in the trees above, leaping down at the characters. This attack is by surprise - with the combination of darkness and cover in the trees, the PCs have no chance of seeing Jean.


Player's Map - Same as Player's Map above


DM's Map

P2E5Ambush.jpg


Buildings: There are four unnumbered buildings marked on the map, showing the exterior. The doors are locked and the villagers are alseep. They refuse to open up unless a character makes a successful Hard Intimidation skill check. The NPCs inside will then let the PCs in, but under no circumstance will they come out to fight. However, Jean will simply burst into the house through one of the windows and attempt to kill everyone inside (treat the villagers as Human Rabble).
Bushes: There are rows of overgrown bushes/hedges around the block of houses and growing up the outer wall of the Full Moon Inn. The bushes are about 5 feet tall and are considered heavily obscured squares. Creatures in the bushes gain concealment.
Cottage (Mordu) #6: This is Mordu's cottage. He is sleeping when the encounter starts, but the activity wakens him, and decides to watch events unfold. Any character who makes a successful Hard Perception check will see the former accountant sneaking a peak at the events outside. Like the others, he will not open his doors and keeps the windows shuddered unless the characters make a successful Hard Diplomacy or Intimidation check to get in. If characters escape the encounter into Mordu's cottage, Jean lights the building on fire, intending to burn it down.
Cottage (General Store) #7: This is Deruno the dwarf's general store. Like the others, his cottage is locked and he is asleep. If characters make a successful Hard Diplomacy check, Deruno wakens and opens his doors after 2 rounds and is willing to give the PCs shelter and/or gear to help fight Jean. If characters hide in the cottage, Jean lights it on fire and waits for the PCs to be forced out.
Cottage (Blacksmith) #8: This is home to Jordi and Nadine. Under no circumstances, either via Diplomacy or Intimidation, will Jordi open the door. Both are currently asleep at the time of the attack. If the characters attempt to force their way in, Jordi physically drives them out, using his smithing hammer (treat as warhammer, with Jordi having the stats of a Human Bandit). If the characters attempt to hide inside the house, Jean bursts in through a window, and attempts to kill everyone inside.
Cypress Trees: A clump of three cypruss trees grows between the houses in the middle of the map. These cypress trees are about 20 feet tall. They can be climbed with an Easy Athletics check. They provide cover from melee and ranged attacks, and the upper branches (at least 15 feet up) are considered lighty obscured squares and grant concealment to those in the branches.
Gazebo: In the center of the block of buildings is this open-faced structure. Those inside the gazebo gain cover. It is immune to damage.
Wall: In the topmost section of the map is the outer wall that harbors the Full Moon Inn. It is 15 feet tall and made of mortared stones. The top of the wall is about 5 feet wide and can be easily walked or run along. Characters can safely jump down in the sections not obscured by hedges. If they jump down or fall into a hedge, they must make a saving throw or take 1d6 damage.
Development

Jean attempts to keep his hostage as long as he can. While he holds the hostage, if he is attacked, as an immediate interrupt he makes an attack against the attacker: +7 vs. Reflex; the triggering attack targets his hostage instead.
Jean continues to blast the PCs while he maintains his hold on his hostage. If possible, he makes his way in between the trees between the buildings, attempting to keep his distance from the characters as he blasts them.
Five rounds into the combat, it begins to drizzle. At this time, the rain has no effect other than chilling all involved and making it slightly more difficult to see. Open flames begins to flicker, casting only half their normal light.
Once he is bloodied, he moves to the gazebo to make his last stand, attempting to keep the characters at bay as he blasts them.
When Jean dies, his death he falls to the floor writhing and screaming. Blood begins to ooze from every pore in his body as it congeals into a cloud of red gore. With the scream of all his victims, the spirits of those he has slain seems to materialize in the cloud of blood, moments before they scatter to the four winds in a necrotic blast and into the night, rising towards the moon that slips behind the clouds as it seems to accept their souls.
 
Last edited:

Remove ads

Top