D&D 3E/3.5 Pirates of the Emerald Coast (3.5)

Last year I started my very own D20, 3.5 pirate campaign. After reading Storm Wrack, I became fascinated with the idea of having an entire campaign revolving around water. I wanted to have a lot of sailing, exploring, and swimming. However, I also wanted above all else that water always remained a factor that wasn't simply negated by magical means. In other words, none of the players play a race that can naturally breath underwater, or one that can fly. The players are welcome to use water breathing spells or potions, or to transform themselves temporarily into a marine animal (in the case of our Druid), but I agreed with them that the campaign would never include any cheap tricks to get around the issue of water.


Pirates of the Emerald Coast

The Emerald Coast (also known as Kirbawa) is set on a world designed by a close friend , and muse, of mine. It doesn't contain any elves or orcs, but it does contain dragons, and a kind of dwarves (who are not referred to as such). Mostly though, its humans, gods, and the monsters of the deep. Flintlocks have just been invented, and are not widespread (there are many places where they still use swords and armor). Airships do exist, but are rare, and the players will never get their hands on one. The world has its very own pantheon of gods, both big and small, and demigods.

Time line

timeline.jpg

Regional map

Emerald_Coast_Map_0.jpg


Campaign flow

The basic idea is that one half of the party is trapped in a massive prison tower called Kuhl Kaurar, surrounded by nothing but stormy sea. The other half is tasked with breaking them out, by carrying a huge rope up to the prison, and then raising a chain attached to a nearby ship. Of course all hell breaks lose, and the players have to make swift allies out of some of their fellow prisoners (although plenty of them are in there for a good reason, and are better not trusted). This gives the players a common goal, and a simple reason how they all met up. It also allows them to do some early recruiting for their ship's crew.

I gave each player a choice from several scenarios, which would determine how their character would start (based on their class). For example, the player who chose to be a captain was given the choice of already having a ship of his own, or being the progeny of a notorious pirate, or being in the possession of a valuable treasure map. This gave them some early role playing backstory, which could come into play eventually.


The world map contains descriptions of only the large towns and cities, and the names of known islands. The islands themselves however are a blank slate. And I fill them in as the players explore them (more on that later). While there is an overarching story to the campaign, the campaign mostly revolves around where the players choose to go themselves. It is a very open campaign, and based on where they are heading, I prepare new material.


The Emerald Coast is an amalgamation of various pirate cultures, all loosely based on various historical pirate groups. As the players visit various regions, they make friends and enemies with some of these cultures, and learn of their ways. Each culture is very unique in it's appearance, customs, language, and of course weaponry. Whenever they visit a new group of pirates, I provide them with a new equipment list with new weapons, items, and ship upgrades. The players start with a humble Pinnace. But by now they've already acquired a Caravel to replace it.


Exploring islands and the random event system

I have created extensive random encounter tables for every situation in the game: Traveling by sea, by land, in cities, underwater, in the realm of the dead (also by sea and land), along the shore, and even some custom tables for particular places. If the players choose a new heading, I simply roll on my table of sea encounters, to see what they encounter for each day of travel. For land encounters, I roll for each hour of travel. The maps of the islands are slowly filled in with random land features, as I role for them. I've also created random loot tables for various dungeons and encounters, and for beach combing.


Imagine each island being a simple map of the outline of the island, with a grid representing the unexplored sections. The only things marked on the map, are places that are already known (such as a city, or a notorious reef). As the players travel across the island, I roll to see if they encounter mountains, rivers, swamps. I also make them roll survival checks to see if they get lost.
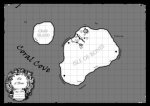

IsleOfBonesMap.jpg

Sample map of the isle of Bones. As you can see, the upper part of the island is now partially explored, but it didn't start out this way. Initially the whole island was just an empty grid, with only a few named beaches, and reefs. For each square the players traverse, I roll a D6 in my table of random land encounters for the type of encounter, and then roll a D20 for which encounter it is.


Land encounters – roll 1d6

1
Encounter

2
Common terrain feature

3
Terrain obstacle

4
Human structure

5
Major terrain feature

6
Landmark

Encounter list – roll 1d20
1 – Benign animals
11 – A predator
2 – Footprints (DC 15 tracking to find corpse, re-roll new land encounter on success or failure)

12 – Drawings on a wall (DC 15 Knowledge geography to find new human structure)
3 – Other pirates digging for treasure
13 – Natives (25% friendly)
4 – Ant colony
14 – Ant lion (DC 10 spot)

5 – A path

15 – An unmarked grave
6 – Debris (DC 15 search)
16 – Swarm of insects attacks
7 – A hidden weapon stash (DC 15 search)
17 – Buried treasure (DC 20 search)
8 – Hostile plant creature
18 – A cryptic old sign post
9 – Trap (DC 20 spot)
19 – An animal graveyard
10 – Rock slide (Reflex save DC 15 or 1d4 damage)

20 – Earthquake (DC 15 balance)
Common terrain feature – roll 1d20
1 – Clearing
11 – Dead tree
2 – Stack of balancing stones
12 – Trees with fruit (DC 15 climb)
3 – Hill
13 – Termite mounts
4 – Steep hill (DC 10 climb)

14 – Stone arch

5 – Cliff side (DC 10 climb)

15 – Large rock with unique shape
6 – Waterfall (DC 15 climb)
16 – Giant tree (DC 10 climb)
7 – Fountain
17 – Plants with fruit (DC 15 knowledge nature)
8 – Brook (fresh water)
18 – Shallow river
9 – Cave
19 – Hot spring
10 – Pool of water
20 – Exotic (See exotic terrain features)
Terrain obstacle – roll 1d20
1 – Dense foliage (Half movement speed)
11 – Broken bridge (DC 20 jump)
2 – Crevices (DC 10 balance or 15 jump)
12 – Gorge (DC 20 climb)
3 – Cactus/Bear-claws

13 – Tall cliff side with vines (DC 15 climb)
4 – Hidden sinkhole (DC 20 spot)
14 – Cave behind waterfall (DC 20 spot)
5 – Pool with sharp rocks (DC 10 balance)

15 – Footholds along cliff edge (DC 10 climb)
6 – Wind tunnel (DC 10 balance checks)

16 – Leech infested waters
7 – Shallow river with piranhas (DC 15 spot)
17 – Strong river - dangerous current (DC 15 swim)
8 – Rickety bridge (DC 15 Move silent)
18 – Rope bridge (DC 15 balance)
9 – Rocky terrain (Decreased movement speed)
19 – Stepping stones (DC 10 balance)
10 – Quicksand (Spot DC 20)
20 – Exotic (See exotic terrain features
Human structures – roll 1d20

1 – Old mill (wind/water)

11 – A ship wreck
2 – An abandoned campsite
12 – An abandoned house
3 – A totem or shrine

13 – Temple/Church/Chapel
4 – An old cannon
14 – A watch tower
5 – Tree house
15 – Witch hut
6 – Old well
16 – A hermit’s shack
7 – Abandoned pirate hide out or fort
17 – Pirate stronghold
8 – An old smuggle tunnel
18 – A pirate stash
9 – Abandoned village
19 – Inhabited village of natives
10 – Ruins of an ancient city

20 – Exotic (See exotic terrain)
Major terrain feature – roll 1d20

1 – Salt flats
11 – Canyon
2 – Medium mountain
12 – Beach
3 – Light jungle
13 – Dense jungle
4 – System of caverns
14 – Geysers
5 – Bay
15 – Quarry
6 – Grass land
16 – Large mountain
7 – Tar pit
17 – Swamp
8 – Medium lake

18 – Lava lake
9 – Desert - sand
19 – Desert - rocky
10 – Volcano (10% chance active)
20 – Exotic (See exotic terrain)

Exotic terrain feature – roll 1d20
1 – Ancient city built into a cliff
(DC 20 climb)
11 – River of lava
(DC 10 balance or DC 20 jump)
2 – Cursed swamp
12 – Misty lake with undead ferryman

3 – Haunted ruin
13 – Sulfuric wasteland

4 – Cages with a lone prisoner
14 – Hydra Temple
5 – A portal to a random other
land location
15 – Haunted pirate cave, shaped like a skull
6 – Ancient wizard’s tower
16 – Gigantic termite nest
7 – Goblin fortress
17 – Spider infested caves
8 – Mystical obelisk
18 – Stonehenge
9 – Fairy spring
19 – A friendly giant
10 – Dragon’s lair
20 – Entrance to the Netherworld
Landmarks for the Island of Bones – Roll 1d20

1
The Crow’s Foot
A tree in the shape of a crow’s foot, covered in dead crows as a warning to thieves that seek to plunder the riches of the island.
11
The Parrot Tree
A Queen palm covered in colorful parrots. The parrots have often seen sailors, and repeat phrases they’ve overheard. They also feast on the seeds of the tree.
2
The Circle of Tormentors
A circle of wooden effigies, representing the torment the natives wish to invoke on their enemies.
12
The Storm Rock
A large pointy rock on a raised hill, where the wind blows quite fiercely. It offers a nice view of the surroundings.
3
The Hunting Grounds
A graveyard of dead animals, where predators leave the remains of their prey. Predators often prowl these grounds.
13
The Moonlight Basin
A beautiful large sinkhole filled with water, where lots of flowers and fruit grow. At night fairies inhabit this natural pool. Required a successful DC 20 climb check.
4
The Ancient God
A large stone wall with the exposed fossil of an ancient creature. Many sacrifices and candles surround it. The creature is worshiped as a god.
14
The Singing Tower
A large tree inhabited by countless singing birds, that nest in its many nooks and crannies. Listen checks are made at a -4 penalty here.
5
The Wall of Pride
A stone wall covered in paintings by the natives, showing their hunting practices, and honoring their prey.
15
Blood Creek
A creek dyed red due to the metal in the water. Search DC 20 to find rare jewels in this water.
6
The Calculus
Several stone circles, where colored stones represent celestial bodies. The formation seems to calculate celestial events and formations.
16
Dead Hand’s Fork
A native signpost made from wood and a skeletal hand. Decipher Scripts DC 20 to translate the writings. It warns of a hazard, and points towards a nearby settlement.
7
The Pit
A gigantic sacrificial pit filled with razor sharp wooden spikes and the bodies of countless victims of all ages. The pit is 80 feet deep.
17
The Garden of Flying Flowers
The trees in this area are covered in butterflies. Thousands of them. From a distance they look like flowers, until you get close.
8
The Eye of Night
A twisted tree with a small meteorite caught in the center. The meteorite glows with an ominous red glow, and the tree shows signs of being worshiped.

18
The Beckoning Tree
A tree shaped like a beckoning arm. An old path passes it, which can be followed with a successful tracking check DC 20. It leads to a nearby settlement.
9
The Army of Stone
A graveyard where countless corpses are preserved as clay statues. These stone guardians wait like an army to be resurrected again.
19
The Stone Forest
An area filled with several towers of perfectly balanced stones. The stones remain balanced, even when pushed, due to a magic fissure in the area.
10
The Whispering Woods
A haunted part of the jungle, where the trees are of a rare type of wood, and whisper. They are used to carve wooden effigies that are all over the place.
20
The Martyr
The skeleton of a native is nailed to a pole. His body shows signs of extensive torture leading up to his death. It seem to have been placed as a warning for travelers.
As the campaign progresses, this system evolves. The basics are that there's always a list of terrain features, which determines stuff like mountains, lakes and rivers on the islands. Then there's encounters, which can be none-threatening or hostile. There are obstacles, which are just terrain features that require skill checks, and might be hazardous (such as a steep cliff that must be climbed, or a river with a dangerous current). There's human settlements, which includes basically anything big built by humans (from a camp, to a tomb, or a small village). There's landmarks, which are special named locations that have cool descriptions, and add flavor to the island. Sometimes these landmarks yield special treasures or clues. And last but not least, exotic encounters, and special encounters. Some of these can be quite dangerous or really beneficial.
 
Last edited:

log in or register to remove this ad

Dungeons

Of course not everything takes place at sea. The players will often be exploring the jungle. And while doing so they might run into tombs, temples and what not. Whether they encounter a dungeon is decided by the random tables. But all dungeons are specifically designed by hand to deliver an experience that is unique, challenging, and adds to the overall plot. Dungeons are a great excuse to deliver exposition regarding the past, and provide backstory for the various gods and evil powers in the world. There is however one very important rule: Every dungeon must make use of water! That may sound a bit forced, but that was the original intention of the campaign. So every dungeon has either swimming sections, water hazards, or aquatic opponents (or all of those). Water can be used in so many ways to make encounters interesting. The players carry firearms that when wet will not work. They need to hold their breath to swim through submerged tunnels, and look for pockets of air. They may need to solve puzzles that involve water, or deal with dangerous currents.

But not every dungeon needs to contain monsters. It is fine to just have an underground maze with puzzles and lore (and maybe some traps). I try to mix it up a lot. I try to not make dungeons too big. I want my dungeons to be more than just a load of meaningless rooms connected together. I don't want to waste the time of my players, so dungeons are small, but full of purpose. They are also none-linear. I provide many alternate roads, some with obstructions requiring skill checks, and some with obvious risks.

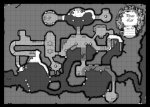
Sample dungeon:

Pirate_Hideout_Section2_Map_1.jpg

Exploring Cities

While cities are of course already explored, players can still get lost in the labyrinth of streets and alleys. I have a special random table for random encounters that happen whenever the players enter a new district. Each district has it's own ambiance and character, and is populated by a different class of society. Random events here can range from simple flavor encounters, such as a juggler, or a town crier, to bar fights, and the amazing discovery of a smugglers den. It is easy as a DM to tie these random events to other plots in the city.

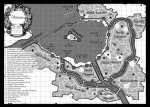
Vertesaux_Map_0.jpg

Example map of the city of Vertesaux.


Quests


I try not to bog the players down with quests too much. Quests are optional. The players meet various npc's, and may decide to help out or not. Some quests have an overarching plot, and have more dramatic results further down the line. But the random event system easily allows for some random events to be tied to the main quest hooks, and thus give the players more angles from which to tackle the quests. For example, I rolled the random event of an angry mob blocking the street, and a random event of a bar fight. I decided to tie this into one of the quests that they hadn't even encountered yet: The Marquis of Vertesaux is having trouble with angry Oarsmen (dwarf pirates), who blame the sinking of one of their vessels on the royal navy. The Marquis enlists the help of the players to find out the cause of the sunken vessel, and bring order back to his town. Interestingly, this is a quest that the players can tackle at any pace they like, and there are many ways to solve it. Inevitably they will need to visit the island of Stoneoar, and meet the Oarsmen and their captains. And they may need a diving bell to dive for the wreck of the ship, and find clues. And of course all this ties into the main plot.

The main plot

There are two large stories that slowly unfold, and that intertwine. One is that of the fragile peace of the pirates. A fearsome and influential pirate lord called Black William, was murdered in a spectacular way, to make way for a delicate alliance. The nearby country of St Valenz is at war with the Kturgian Empire, and they want the pirates to work for them. Thus an agreement was signed to allow the pirates to attack the Kturgian vessels legally, while leaving those of St Valenz alone. However, the nearby empire of Cyr (who trades with the Kturgians) has taken notice of the pirate activity, and is planning to wipe them all out. The only way to counter this massive fleet, is to form a pirate alliance. But they'll need more than just ships to counter this menace. The plan is to eventually conclude with a massive naval battle between the pirates and Cyr.

Then there's the evil demi-god Hydra. This Cthulian monster has taken over the underworld, and has pushed the benign Lady of the Waves from this realm. Hydra is a horrible indestructible being that has many cultists across the Emerald Coast. The players are slowly pecking away at its power, but in doing so they also draw the attention of two lesser evil gods. This will eventually take them to the underworld, where they will have to endure freezing temperatures. (I'm planning to borrow a lot from the book Frost Burn)

To a lesser extend, the party is also looking for a permanent base of operations. A consortium if you will. They have set their eyes on an amazing cove hidden on a dangerous island, inhabited by cannibals. But they will have to deal with the cannibals first, who also serve one of Hydra's affiliated lesser gods.

Equipment, cannons and guns

Storm Wrack provides a good basis for a sea campaign. It is sadly however completely lacking firearms and cannons, which is bizarre. So for this purpose I've created ginormous equipment lists that can contain dozens of historical firearms and siege weapons. I've also included various upgrades, and magical weapons that would be useful on board a ship. Each culture in my campaign has it's own unique equipment. This makes it exciting for the players to encounter new cultures, because every such encounter is a treasure trove of new stuff to buy. I've had to adapt various rules from Dragon Magazine, along with some stuff from Salt 'n Seadogs (which is kind of unbalanced) to come up with my own system for firearms. I've also blended some ideas from some forums that other players came up with. Additionally, I've added a table for effects in case of a critical failure (such as the gun backfiring, malfunctioning, or the powder being wet).


Gunpowder use
Item
Gun powder
amount
Pistol shots worth of gunpowder
Powder Horn
2 lb​
32 shots​
Powder Keg

15 lb​
240 shots​
Swivel Gun
0,5 lb​
8​
Light Cannon
0,75 lb​
12​
Medium Cannon
1 lb​
16​
Heavy Cannon
1,25 lb​
20​
Misfire table (D20)
Dueling pistols

Flintlock/doglock/
snaplock pistols
Multi
barrel/shot
Hold out
Pistols
Roll Result
1
1
1-2
1-3
The firearm explodes, dealing 1d6 damage on the wielder.
2-4
2-5
3-6
4-7
The weapon’s firing mechanism breaks. The weapon must be repaired before being used again, which costs one-quarter of the weapon’s total price and requires a successful DC 15 Craft (Gun smithing) check.
5-7
6-8
7-9
8-10
Something prevents the weapon’s firing mechanism from working. Determining and fixing the problem requires a full-round action. The firearm may not be used again, until the problem is fixed.
8-10
9-11
10-12
11-13
Moisture or the wrong amount of gunpowder prevents the firearm from firing. The firearm must be reloaded before it can be fired again.
11-14
12-15
13-16
14-17
A mechanical problem prevents the firearm from firing. The attack fails this round but may be retried with a new attack without reloading.
15-16
16-17
17-19
18-19
An imperfection in the muzzle causes this shot to go astray. The firearm’s user makes another attack on another creature within 5 feet of the original target, randomly determining if there are multiple targets. If there are no other targets within 5 feet, the shot simply misses.
17-20
18-20
20
20
No effect, the firearm misses as normal.
(Enhanced and masterwork weapons add their enhancement bonus to their roll on the misfire table.)


Alcohol

I've created a list of new types of alcohol for my setting, and a random list for role playing effects if the players fail their fortitude save. I felt the original rules for alcohol were kind of dumb, and they didn't provide any meaningful role playing, nor any reason to want to consume alcohol to begin with. My list of alcohol effects contains a hundred hilarious role playing effects, some really bad, some good, but most of them just really funny. So you won't constantly get int or wisdom damage, that's stupid. Instead, you might have trouble speaking, or you may fall over, or blurt out a personal secret. Or you may find yourself suddenly compelled to buy something expensive, or to buy a tattoo. Or maybe you just start a brawl fight. Either way, it provides a lot of role playing fun. Feel free to use these tables for your own adventures.


Alcoholic beverages and mixed drinks

Beverage name
Price per
glass
Price per
keg/cask
Save DC
Prim. effect
Sec.
effect
Notes
Ale​
4cp​
9gp (42 gal.)​
9​
Yes​
Yes​
Made from malted barley.​
Brandy​
2gp​
560gp (56 bot.)​
10​
No​
Yes​
Distilled wine.​
Cyrian Rice wine
3sp​
100gp (56 bot.)​
10​
Yes​
No​
Made from rice.​
Dwarven Stout​
4gp​
1,260gp (42 gal.)​
12​
Yes​
Yes​
Imported from the Oarsmen.​
Gin​
2gp​
672gp (42 gal.)​
11​
Yes​
Yes​
Made from Juniper Berries.​
Kooghan Vodka​
12cp​
40gp (42 gal.)​
11​
Yes​
No​
Made from coconuts.​
Mead​
9cp​
30gp (56 bot.)​
10​
No​
Yes​
Made from honey.​
Grog, cheap​
5sp​
17gp (42 gal.)​
10​
Yes​
No​
Rum, water and citrus.​
Grog, Pirate​
1gp​
336gp (42 gal.)​
11​
Yes​
Yes​
Burns holes in tables.​
Rum, Cheap​
8cp​
27gp (42 gal.)​
8​
No​
Yes​
Made from sugarcane juice.​
Rum, Coconut​
23cp​
77gp (42 gal.)​
9​
No​
Yes​
Made from coconuts.​
Rum, Dark​
7sp​
235gp (42 gal.)​
10​
No​
Yes​
Aged longer than normal rum.​
Rum, Gold​
6sp​
202gp (42 gal.)​
9​
No​
Yes​
In between light and dark rum.​
Rum, Light​
5sp​
168gp (42 gal.)​
7​
No​
Yes​
Mostly used for cocktails.​
Rum, Spiced​
17cp​
57gp (42 gal.)​
8​
No​
Yes​
Light rum with added spices.​
Scotch​
7cp​
24gp (42 gal.)​
12​
Yes​
Yes​
Made from malt barley.​
Sherry​
7cp​
24gp (42 gal.)​
9​
Yes​
No​
Wine from white grapes.​
Tequila​
25sp​
840gp (56 bot.)​
12​
Yes​
Yes​
Made from blue agave.​
Whiskey​
1sp​
34gp (56 bot.)​
12​
Yes​
Yes​
Made from fermented grain.​
Wine, Cheap​
2sp​
10gp (56 bot.)​
9​
Yes​
No​
Cheap wine, made from grapes.​
Wine, Valensian​
3sp​
11gp (56 bot.)​
9​
Yes​
No​
From Saint-Valenz wineries.​
Wine, Nimaehan​
2gp​
560gp (56 bot.)​
10​
Yes​
No​
Imported from Nimaeh.​
Wine, Marducian​
5gp​
1,680gp (56 bot.)​
11​
Yes​
No​
Imported from Marduce.​
Mixed drinks
Price per
glass
Not for sale in kegs or casks
Save DC
Prim. effect
Sec.
effect
Notes
Anchor’s Away​
20gp​
-​
11​
No​
Yes​
Rum Spiced/Dark/Coconut + Pineapple Juice + Banana + Strawberry​
Ambassador​
64gp​
-​
13​
Yes​
Yes​
Tequila + Syrup + Orange Juice​
Barbassirian Coast​
26gp​
-​
13​
Yes​
Yes​
Rum + Cacao + Gin + Scotch​
Bat Bite​
12sp​
-​
9​
No​
Yes​
Spiced Rum + Cranberry juice + Grenadine​
Bend over Shirley​
11sp​
-​
12​
Yes​
Yes​
Kooghan Vodka + Grenadine + 2 Cherries​
Black William​
5gp​
-​
13​
Yes​
Yes​
Dwarven Stout + Kooghan Vodka​
Black William’s Ghost​
6gp​
-​
13​
Yes​
Yes​
Dwarven Stout + Kooghan Vodka + Rum​
Bloody Hurricane​
27sp​
-​
13​
Yes​
Yes​
Tequila + Mead + Grenadine​
Calypso Cooler​
33gp​
-​
11​
No​
Yes​
Spiced rum + Peach + Dark Rum + Orange Juice + Grenadine + Lime Juice + Lemon Juice​
Cast Away​
25gp​
-​
10​
No​
Yes​
Coconut Rum + Orange Juice + Banana + Strawberry Juice.​
Cussing Parrot​
18gp​
-​
13​
Yes​
Yes​
Tequila + Tabasco Sauce​
Dances with Wenches​
2sp​
-​
9​
No​
Yes​
Spiced Rum + Cranberry Juice​
Devils Handshake​
33sp​
-​
14​
Save VS death​
Yes​
Whiskey + Tequila + Dark Rum +Limejuice + Secret Ingredient​
Fancy Marceau​
3gp​
-​
11​
Yes​
No​
Valensian + Nimaehan Wine​
Fog Cutter​
27gp​
-​
12​
Yes​
Yes​
Rum + Orange Juice + Lemon Juice + Brandy + Sherry + Gin​
Kturgian Mouthwash​
1gp​
-​
12​
Yes​
Yes​
Pirate Grog + Rum + Vinegar​
Old Salt
6sp​
-​
12​
Yes​
Yes​
Pirate Grog + Rum​
Pirate’s Kiss​
2gp​
-​
9​
No​
Yes​
Rum + Lime + Sugar​
Scurvy Scarlet​
7sp​
-​
12​
Yes​
Yes​
Pirate Grog + Wine​
Spicy Seadog​
3gp​
-​
11​
Yes​
Yes​
Brandy + Spices​
Teetering Torrent​
4gp​
-​
11​
Yes​
Yes​
Ale + Brandy + Rum​
(Note that for each drink the player consumes, the DC should be gradually raised by one after each drink.)


Effects of Alcohol

D100
Random intoxication effects
D100

1
Obtain an aversion to alcohol, cannot hold your liquor.
51
Dazzled, -1 on attack rolls.
2
Hacking cough.
52
Friendly. Everyone is your best friend.
3
Nearsighted.
53
Strong opinions on morals.
4
Lisps.
54
Forgetful. What was I talking about again…?
5
Uncontrollably rude. Victim curses and swears and does not notice.
55
Confusion, 1: wanders away, 2-6: does nothing, 7-9: attack nearest creature, 10: act normally.
6
Hard of hearing.
56
Clumsy, knocks things over.
7
Limping.
57
Easily insulted.
8
You feel compelled to gamble.
58
Doesn’t like to be touched.
9
Overly critical. You are critical about everyone and everything.
59
Bad Breath.
10
Fatigued, -2 Strength and Dexterity, 8 hours rest needed.
60
Compelled to buy a new outfit.
11
You heal 1d4 damage.
61
Talk about childhood traumas.
12
Strong body odor.
62
Exhausted, -6 Strength and Dexterity, 1 hour to become fatigued.
13
Sweaty.
63
1 wisdom damage.
14
Hands shake.
64
Charitable, feel compelled to give money to someone.
15
Not very observant, -4 to spot and listen checks.
65
Sultry, uncontrollably makes advances at nearby other characters.
16
Strange eyes.
66
You receive 1d10 temporary hit points.
17
Whistles a lot. You just have to whistle that tune.
67
Sings a lot. You just love singing and everyone must hear it.
18
Fiddles and fidgets nervously.
68
Nervous eye twitch
19
Passionate about your hobby.
69
Compelled to reveal a personal secret
20
Stunned, drop everything you are holding and can’t take any actions, lasts 1d4 rounds.
70
Nauseated, unable to attack or cast spells, or anything that requires attention. 1d4 rounds.
21
Too talkative. You can’t stop talking.
71
Too eager to help or obey.
22
Pessimistic.
72
Optimistic.
23
Forgiving. You easily forgive even the harshest insults.
73
Picks fights. They are all looking at you the wrong way.
24
1d4 wisdom damage.
74
Under the effect of the die-hard feat.
25
Unbalanced, -4 on balance checks. Make a balance check every minute while moving, for 1d6 minutes.
75
Entangled, cannot run or charge, move half speed, -2 on attacks, -4 effective dexterity.
26
Jumpy. Every loud noise or sudden movement startles you.
76
Strong opinions on culture.
27
Suspicious. You are distrustful of everyone around you.
77
Sexist. Your manners towards the opposite sex have left you.
28
Trusting. You trust everyone completely.
78
Pious / religious.
29
Neurotic.
79
You recall some long lost lore, but forget it 1 hour later.
30
Affected by emotion, 1: Despair, 2: Fear, 3: Friendship, 4: Hate, 5: Hope, 6: Rage.
80
Feeble Mind, Intelligence drops to 1, subject is unable to cast spells or communicate coherently.

31
Helpful. You are eager to help anyone who needs help.
81
Individualist.
32
Careless. You take unnecessary risks.
82
1 dexterity damage.
33
Curious. Mundane things are suddenly very interesting.
83
Contagion, contract a disease.
34
Moody. You have unpredictable mood swings.
84
Racist. Everyone is different, and you hate them for it.
35
You feel irresistibly compelled to get a tattoo.
85
Bulls Strength.
36
Proud. You must let everyone know how proud you are.
86
Use the same phrase over and over.
37
Hot tempered. It does not take much to set you off.
87
Conformist, compelled to adapt to popular opinion.
38
Easy going. You are the most laid back person in the world.
88
Falls asleep.
39
Jealous. You are jealous about everyone.
89
1 intelligence damage.
40
Unconscious, knocked out and helpless, 1d4 hours unless awakened by others.
90
Slurred speech, cannot use focal component to cast, -4 on diplomacy checks.
41
Jokester. You compulsively tell jokes.
91
No sense of humor.
42
Brave. You are reckless and unafraid.
92
Cowardly. You really don’t want any trouble.
43
Uncommitted. You couldn’t care less.
93
You feel compelled to buy something irrational/expensive.
44
Fanatic. You become obsessed by something.
94
Prejudiced, you form an opinion without knowing the facts.
45
Red nose from alcohol.
95
You receive a vision.
46
Liar, you tell compulsive lies.
96
Truthful. You tell the absolute truth about everything.
47
Lazy, you don’t feel like doing any hard work.
97
Energetic. You can’t sit still. You have to do something.
48
1d4 intelligence damage.

98
Fascinated by magic.
49
Strong opinions on politics.
99
Distrustful of magic.
50
Staggered, can only take partial actions, normal actions take twice as long.
100
You obtain an alcohol addiction.
 

Weather, ships and sea monsters

Once per day I roll to see what kind of random weather comes up, and from which angle the wind comes. Storm Wrack has some very useful tables for this, which have become a very important element in our campaigns. I also randomly roll for the movements of legendary creatures (in secret), and various important vessels. This means that the players can actually run into other ships and creatures in a way that is completely fair, and makes sense. I also keep track of the phases of the moon (although this hasn't really mattered yet).


Deep sea exploration

An element that is now slowly creeping into the campaign, is diving for ancient ship wrecks. So I've created new equipment lists with diving suits, diving bells, bathyspheres, and dozens of upgrades. This allows the players to dive to nearly any depth. I've tried to ground the rules in some realism.

Atmosphere (ATA)
Every 33ft. is roughly 1 ATA (Atmosphere) of pressure. Diving suits, bells and bathyspheres need to have the required ATA protection in order to dive to greater depths, along with a longer hoist to lower the craft to that depth. Beyond 660 ft. there is limited light. In my equipment lists, I list how many ATA each vehicle or suit can handle. The players can upgrade these items to increase the depth slightly.

Ocean depth

Near continents and islands
200 ft. – 650 ft. (1d6 x 100 ft.)
7-20 ATA
Epipelagic zone (The Sunlight Zone)
Pressure damage beyond 100 ft.
Diving Bells and simple Diving Suits can't dive beyond 500 ft.

Ridge or plateau
650 ft. – 3,300 ft. (3d100 x 1,000 ft.)
20-100 ATA
Mesopelagic zone (The Twilight Zone)
At 660 ft. is the max range for surface light needed for plant growth.
Bathysphere's and Atmospheric Diving Suits can't dive beyond 3,000 ft.

Open ocean
3,300 ft. – 13,000 ft. (2d10 x 500 ft.)
100-394 ATA
Bathypelagic zone (The Midnight Zone)
Low light conditions. At 5,900 ft. no light at all.

Deep ocean
13,000 ft. – 30,000 ft. (3d10 x 1,000 ft.)
394-909 ATA
Abyssopelagic zone (The Abyss)
No light

Deepest trench
36,000 ft. (30,000 ft. + 1d6 x 1,000 ft.)
1,091 ATA
Hadopelagic zone (The Trenches)
No light, hypothermia.

Some technical info
100 ft. is the depth at which pressure becomes a problem. Water deals 1d6 dmg every minute for every 100ft. a character is underwater. Creatures can see 4d8x10 ft. in clear water and 1d8x10 feet in murky water. 200 ft. - 500 ft. is the maximum diving depth using a Diving Bell. 1,043 ft. is the world’s deepest scuba dive. 1,000 ft. - 3,000 ft. is the maximum depth for an Advanced Atmospheric Diving Suit. The average whale can dive to a depth of 7,382 ft. At 19,700 ft. do continents rise from the ocean floor.


Here's a sample of some of the equipment:

Diving Bell
A sturdy weighted chamber of wood and iron. Can hold up to two medium creatures, and can only move up and down at a speed of 10ft. per round. It has a hatch at the bottom which can be opened to swim out. With the hatch open, it can only descend down to 100 ft. The maximum depth is 200ft., or up to 500ft. if fully upgraded. It takes 2 crew members to operate the air pumps and 4 crew members to operate the hoist. It has 4 attachment points for air hoses, to allow crew in diving suits to operate outside the Diving Bell.


Medium vehicle; Seaworthiness +0; Shiphandling: --; Speed: --; Overall AC 5; Hull hp 80 (hardness 6); Ram: --; Mounts: --; Space: 5ft. by 5 ft.; Height: 0 ft. (draft 5 ft.); Watch: 1; Complement: 2; Cargo: 200 pnds;

Max Depth: 200 ft. – 500 ft.; Pressure resistance: 6 ATA / 15 ATA. Takes up 10 ft. space and uses a heavy mount.

Bathysphere

An advanced metal submersible with a large glass observation window. The Bathysphere can descend to much greater depths than the Diving Bell, has more crew capacity, more cargo capacity, and has limited horizontal movement capability. Normally the Bathysphere is completely closed, but it can be upgraded with an airlock, to allow divers in Diving Suits to leave the submersible. The Bathysphere descends with a speed of 10ft. per round. It’s maximum diving depth is 1,000 ft. or 3,000 ft. if fully upgraded. It takes 2 crew members to operate the air pumps and 4 crew members to operate the hoist. It has 4 attachment points for air hoses, to allow crew in diving suits to operate outside the Bathysphere.

Large vehicle; Seaworthiness +2; Shiphandling: +2; Speed: 10ft. (poor); Overall AC 3; Hull hp 90 (hardness 8); Ram: 2d6; Mounts: --; Space: 10ft. by 10 ft.; Height: 0 ft. (draft 10 ft.); Watch: 1; Complement: 4; Cargo: 1 ton.;

Max Depth: 1,000 ft. – 3,000 ft.; Pressure resistance: 30 ATA / 91 ATA. Takes up 10 ft. space and uses a heavy mount.

Repairing damage to a submersible

The number of crew working on repairing a damaged section of a vehicle must equal the hardness of the material. Only one member of the repair crew need actually be a skilled workman, and succeed at a Craft check of DC 10 at the end of 1 minute of uninterrupted work. For every point that the check exceeds 9, 1 hp is restored to the damaged section. A vehicle’s repair cost equals: Number of destroyed sections / Total number of sections x half the vehicle cost
A repair crew can repair 125gp worth of damage per day. A typical dock, wheelwright’s shop or other well equipped facility can repair 250gp worth of damage per day. A dry-dock can repair 500gp damage per day. Rigging can also be repaired, or replaced if it was destroyed, at the cost of 20gp per hp of destroyed rigging.

Submersibles and pressure damage
Water deals 1d6 dmg every minute for every 100ft. a submersible is below its intended depth range. Due to the hardness of the vehicle, this allows submersibles to endure greater depths for a while. But as the depth adds up, so does the pressure damage.

Crew and allies

Each ship has it's own compliment, and requires a certain number of people to work. Npc's and followers are excellent for this, since you can keep them on the ship most of the time, and allow the players to play out their movements. I let the players recruit new crew from all over the Emerald Coast, and from many diverse cultures. But I do make sure that each npc has it's own personality and backstory. I've noticed that interactions with the npc's on board the ship can regularly fill entire sessions, without it ever becoming boring. As a DM, I cannot stress enough just how important it is to work out your npc's, and to not just make them backdrop props. Involve them in the story. Let them get into trouble, and provide new quest hooks. For example, one of the npc sailors is a notorious drunk, and got into trouble with a local rich merchant, after he found out that he was messing around with his daughter. So soon the players saw the npc being chased through town by a fat merchant with a loaded rifle, and of course they had to intervene without getting themselves arrested by local authorities. Npc's can have their own sub plots, have romances, or plots that simply lead to hilarious situations. Humor is important, just like suspense is.


Miniatures

We try to do most of the encounters without miniatures. But for ship to ship combat, and for various strategic fights, miniatures are almost a necessity. We use dungeon tiles to set up important encounters in advance, and sometimes also miniature furniture to make it all look better.

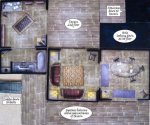
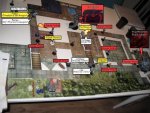
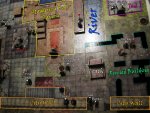
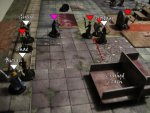
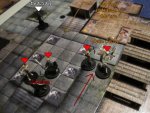
barbrawl1.jpgbarbrawl2.jpg

Example of the first and second floor of a tavern in the slums, outside Vertesaux. An infection was spreading among the very poor, and the party suspected evil magic was at work. They soon found themselves surrounded by enemies. This is a good example where Dungeon Tiles provided a great way to illustrate the terrain, and provide extra immersion. It also was important for tactical reasons. We used pre-painted miniatures for the players and monsters.

miniatures.jpg


We also use miniature ships to play out battles at sea, or other strategic ship movements. In this case, a horrid combination of a random weather type from Storm Wrack came up, along with another random exotic event from my random tables. The ship of the players was hurled onto the rocks of the grinning coast, and it took several days for the ship to be repaired. It could have been worse.


Music and sound

I have a vast playlist with D&D music for all occasions, that I combine with ambient sounds. For example, if the players are at sea, I play ocean sounds and adventure music. If they are in the jungle, I play jungle sound effects and tribal music with lots of drums. For cities I have the sound of Turkish markets, and for dungeons I have a vast library of creepy dungeon sounds. I try to stay clear from music from well known movies, such as Pirates of the Caribbean, because that is way too familiar. Fortunately there is a lot of royalty free music out there. And sites such as Freesound.org provide a wealth of sound effects. Simply have a program like Winamp play the sound effects at random, and have Mediaplayer play random music at the same time. It works perfectly to set the right mood.


No railroading!

I hate being railroaded along a predetermined plot. That will never happen in this campaign. If you want to use the same setting, then I highly encourage to just have a vague idea where you roughly want the campaign to go. But allow the players to pick their own route, and don't force quests on them. The players will make their own story, and they just need you to occasionally drop in a twist, or provide some vague clues. The rules of the game can also be expanded as needed. For example, now that the players want to build their own pirate stronghold, I've started looking into the Stronghold Builders Guidebook, and made my own lists for building costs. I've also recently created my own rules for deep sea exploration. I consider the official books just a simple basis to expand on. If something isn't in the book, make up your own home brew rules. I now find myself sharing many of my rules with other DM's.


Soft DM'ing

I try to always be fair, and provide a none-hostile playing environment, in which the players do not feel that the DM is constantly out to kill them. This allows the players to trust npc's occasionally, and they know the DM is not going to screw them over with some trivial skill check. Monsters are generally all of the same CR as the level of the players, or one above that. So an encounter will always be challenging, but never a slaughter. As a general rule, I'm not out to kill the players, but I'm not holding their hands either. I'm totally fine with a player being reduced to 0 hit points, and slowly bleeding to death. Just as long as it isn't the entire party, plus they should have means to come to each others aid. If an encounter is too easy, I generally add a few extra hit points to a boss in secret, or have him summon more minions, but I never cheat on the dice rolls, unless it feels unfair to the players (for example, a critical hit that would outright murder a player can be changed to something less bad behind the DM's screen). If I feel a player is being hurt too much by a boss, I might have him switch to a different target, just to spare the player, and to provide an exciting fight. It is okay to cheat occasionally to make a fight more fun, or less unfair, but the players should never feel like you are cheating against them and ruining their fun.

As a DM, I don't want the players to die. I would like for the story to continue. But I also realize that the players should never feel too safe, or combat would no longer be exciting. So by all means, down a few players, but don't outright force them to make new characters.


In my campaign there aren't any clear objectives, or Mc Guffins. I'm always very careful to keep my stories free of magical artefacts, triforces, hole grails, or any special items. At the moment, defeating Hydra is a long distance goal, and it is not even clear IF Hydra can be destroyed at all. The next place that the party will most likely visit, is the island of Salt. Yesterday I worked out a great deal about what Salt looks like, and its history.

Salt
Home to the Sisters of Mor. This holy sisterhood consists of priestesses who have dedicated their lives to the calming of storms. They take upon them the sins and crimes of sailors, and wash them away with salt. They must live their lives in sorrow, as atonement for the God of Storms. Salt is a tall barren rock with only one square towering temple. It is also a place of healing for many travelers. In the temple of Mor one can often find sailors who became lost in the storm. The sisterhood provides travelling sailors with fresh water from their boundless supplies. The priestesses believe that the local pirates are tools of Mor, and are instruments of his will.

The temple of Mor

The temple looks like a massive square gray tower (almost like a giant obelisk, with a lens at the top), partially built into the rock of the island. Four giant statues of the god Mor have been built along the side of the tower, with each statue having one arm stretched out. The arm hold massive chains, that can lift a gargantuan cage , big enough to carry a ship. This is the one and only way to access the tower, to be lifted into the tower along with your ship. The arms are hollow, and act as access tunnels to the temple itself. The statues look in all four directions, much like the temple itself. The temple is always surrounded by white gusts of wind, that swirl around the tower, and are made of pure salt. This is the salt that is extracted from the sea water, and is poured down from the mouths of the statues. The statues themselves hold a thunderbolt in one hand, while the cage is supposed to resemble the net that contains Mor’s storm. It is believed Mor literally empties his net, to release the storm upon the seas.

Mor's Eye

At the top of the temple is a huge adjustable mirror, called Mor’s Eye, which uses concentrated sunlight to evaporate water. This is how the priestesses separate the salt from the sea water. Central to this system is the chamber of tears. A large cave, with a slanted glass ceiling. The ceiling is higher towards the middle, causing water to condense underneath it, and flow off towards the sides. At the bottom of this room is a large basin of water, with an empty trench surrounding it. High above the glass ceiling is a mirror, called Mor’s Eye, which can be adjusted to aim the sunlight into the chamber below. The sun heats the ceiling, which evaporates the water, leaving behind the salt in the middle basin. The water then condenses along the colder rock wall of the temple, and leaks down into the trenches along the outside. The middle basin with salt is then emptied through the statues on the outside of the temple. The massive mirror at the top of the temple can be lifted up and down using cogs, and it can be tilted to aim for the sun at any time of day. It could potentially also be used as a secret weapon against approaching ships. The chamber has small windows to look inside. While the basin can become quite hot, the chambers surrounding the cave are actually quite cool.

The stoneoar and Beler the Blessed

The temple also acts as a watchtower, and a weather center. It predicts incoming storms, and has a massive warning horn that can be heard all the way from Stoneoar. It is no secret that the Stoneoar helped construct this technical marvel, and that they rely on their fresh water supplies from Salt. Mor’s Eye was created by a brilliant Oarsmen architect called Beler the Blessed. Currently Captain Birus the Traveler is his successor on Stoneoar, and is trying to create a permanent underwater transport system between Salt and Stoneoar. He has however met with some resistance from other captains. The current high priestess of the Sisters of Mor suspects that much like his predecessor, Birus has a hidden agenda. And his fellow captains probably suspect as much, and thus have not given him their support.


Some of the groundwork was already done by Beler himself. Salt has a room called the Underhaven, where a possible underwater connection could be created. It was however never finished, and Beler died under mysterious circumstances (the reason why the Stoneoar left the tower under custody of the sisters). Beler is buried in an honorable tomb on Salt itself, instead of on Stoneoar. Above his tomb is the tablet of the foundation (a stone plate), which seals away the original building agreement signed by the sisterhood and the Stoneoar. It contains all the legal agreements, edged into a plate of solid gold, that lead to the construction of the tower. No one but the high priestess have ever read the original text. Supposedly it is written both in ancient Barulean (the Oarsmen language) and common.

Beler’s symbol is a double sided square key, with the handle in the middle. This symbol is found throughout the temple, on his tomb, on many walls and several doors. The doors that contain this symbol are sealed, and only the high priestess possesses the key that opens them. It is rumored that Beler constructed many secret passages, that only his key gives access to.

Even more obscure, is the knowledge that Beler constructed the tower to resemble a larger version of the mystical obelisks in the Eternal Depths, and that the temple can be seen across the two realities. Beler knew of the Netherworld, and constructed this tower as a weapon against Hydra. The lens can not only be used to scorch ships, but to shine sunlight into the Netherworld itself. The light of Avenna scorches Hydra, and is a powerful weapon again it, and its minions. The obelisks are also creations of Beler’s design, an attempt by Beler to provide landmarks that cross the boundaries of the dimensions.


The people of the Emerald Coast
My campaign is defined by the various pirate cultures that inhabit it. These are the most important factions:

The Kooghans, from the island Abyscus
The island on the edge of the abyss. This island is filled with jagged rocks and dense jungle. It’s native population are the Kooghans, brilliant navigators, weapon smiths, and a tribe of pirates that is very shamanistic, and superstitious. The Kooghans believe in a prophecy that the seas will swallow the world of stone, and bring upon a new world of the Deep. They are very fearful of this prophecy, and of its harbinger, The Harrowing. All Kooghans are dark of skin tone, and wear elaborate outfits made of wood and reed. These make for excellent armors that are light, and also float in water. Both their armors and ships are often decorated with horns, tusks and claws of great beasts.
The Kooghans are very frightened of drowning (since they fear the Eternal Depths, which is the realm of Hydra). The Kooghans also believe their island is on the edge of two realms, that of the mortal realm, and that of the Netherworld. The Kooghans have a lot of shamans, and consider the Cult of the Hydra as their mortal enemy. The Kooghans practice a good kind of voodoo, make totems for good luck, and are excellent at making light armors and vessels. Their ships are known for being the lightest and the fastest in all of the Emerald Coast. Kooghans develop a lot of experimental firearms, including new kinds of devastating cannons and siege equipment. All Kooghans believe deeply in oral traditions, and thus every Kooghan pirate is well schooled. They know a lot about the world, and about the Netherworld. It is often said that only a Kooghan knows how to sail out of the Netherworld. The Kooghans can trace their lineage back to primitive island cultures, whose ruins still litter the many islands along the Emerald Coast. They are an important part of the areas history. Kooghan culture is deeply rooted in warfare, which is why they are at the fore front of firearm, and cannon development.

The Oarsmen, from the island of Stone Oar
Stone oar is home to a group of dwarven pirates, known as the Oarsmen. The Oarsmen are all dwarves that seek riches beneath the waves. They are amazing swimmers and divers, and have very unique boats and equipment. Oarsmen make for excellent trustworthy crew. They are always true to their word, and never commit mutiny. The island known as Stone Oar, looks like a massive basalt city, that has mines that descend deep down into the murky depths. The Oarsmen are brilliant craftsmen, who build ramming boats, and submarines. They are also the only source of diving equipment. The Stone Oar seek great riches, but their pirate lord has a darker agenda. He seeks access to the Netherworld, which he believes to be beneath the ocean floor. Often employing the help of the Oarsmen requires a valuable gift to their pirate lord. The Oarsmen do not equip their boats with cannons, but with rams, heavy bombards (that fire stone projectiles) and bombs. They can litter a strait with mines, or assault a ship from underwater. Oarsmen do not like being called "dwarves".

The Gongya An, on Fú Kong the floating city
Fú Kong, home to the eastern pirates of Gongya An (the Blackwaters). A gigantic floating city on top of a giant dragon turtle. Only the top of its shell is visible above water. The pirates of the Blackwaters travel around, and have a culture that specializes in fishing and hunting great marine creatures. They are excellent craftsmen that facilitate a lot of anti-sea monster equipment, as well as defensive gear for ships, such as sails that are flame resistant. Since the pirates of the Blackwaters are nomadic, a lot of their technology is behind on that of their original homeland. A lot of their equipment is a mix of home brew items and scavenged equipment. They fled Gongya An when it came under a new oppressive rule, and have been sailing the seas ever since. They also are the main producers of gunpowder. They manufacture giant harpoon guns, anti-sea serpent spears and spikes that can be mounted on the side of ships to scare off sea monsters.

The Speakers of the Dead, on the island of Witchclaw
A crescent shaped island covered in a large stone fortress, inhabited by spell casting pirates called the Speakers of the Dead. They believe that their women are in direct contact with the gods, and regard all of them as priestesses. Unlike other sailors, pirates from the Witch Islands believe it is actually bad luck not to have women onboard. They also believe that satisfying their women with love making and gifts keeps the gods of the sea at peace. As a result, Witch Claw is dominated by mostly a female population. Witch Islanders dress in dark tattered clothing, and wear jewelry made of bones, feathers and other animal parts. They are frightening to behold, due to their darkened eyes and blackened teeth. Their vessels are also black, with black sails, and are mostly equipped with catapults (which they load with volatile chemicals). Witch Islanders are also known to practice necromancy. Many pirates of these islands seek out riches to satisfy the women, or they seek a way into the Netherworld. Witch Islanders do not fear death. In fact, they revere it. They are renowned for their magic, alchemy and power over the seas. They also use poisons on their blades, and have invented something they call liquid fire. They do not use firearms. It is rumored that the Witch Islanders once assisted the Marquis in taking down the dreaded pirate lord Black William, by making the mountain collapse on the ship called the Grim Torrent. The Speakers of the Dead are also responsible for the living island Damnaur. The Kooghans once asked for their help to open a gateway to the Netherworld, and defeat Hydra. But as the sea of the dead came flooding in, it corrupted part of the island now known as Witch Claw. The land came alive like a crawling pile of flesh, and took off on its own. It has been moving about ever since, slowly increasing in size. This is why currently the island of Witchclaw has a crescent shape, and looks like a giant piece of it is missing.

The Speakers of the Dead name their people after their profession:

Apprentice – Anyone still serving under an Artisan, and learning their craft.
Artisan – A craftsman or woman, who is the best at his/her chosen field.
Bladedancer – A warrior, guard or man at arms.
Dactyl – Healer, priestess, alchemist and wise woman. Rarely a man.
Interpreter – A clairvoyant and decipherer of scripture. Oversees ancient volumes of text.
Singer – Spiritual servants, undead, who do nothing but sing for spiritual processions and occasions.
Skua – Spell caster, mage or witch. Practices dark magic and necromancy. Always a woman.
Kua’nille – Student caster, mage or witch. Still in the process of becoming a Skua.
Watcher – Someone who welcomes people, and oversees a spiritual place.

Entire paragraphs can be dedicated to some of the other islands as well.
 

In this pirate campaign I often have to come up with random vessels on the fly. For example, if the party stumbles upon a shipwreck, what kind of ship is it? And what cargo was it carrying? For this purpose I came up with this system. First, roll a D8 for the type of vessel. Then note the cargo quality level behind the ship. Next roll a D20 for the value of that cargo.


Roll D8 for vessel type

Roll D20 for corresponding cargo quality
D8
Derelict vessel
Cargo Quality
Poor
Average
Good
Total Cargo value
1
None​
-​
1-5
1-2
-
Empty cargo hold​
2
Diving Bell​
Poor​
6-10
3-5
1
400gp​
3
Bathysphere​
Average​
11-15
6-10
2-3
800gp​
4
Launch​
Poor​
16-20
9-15
4-8
1,600gp​
5
Pinnace​
Average​
-
16-18
9-13
3,000gp​
6
Cog​
Average​
-
19-20
14-16
6,000gp​
7
Caravel​
Good​
-
-
17-18
15,000gp​
8
Longship​
Good​
-
-
19-20
30,000gp​
Next you want to know what types of goods are on board the ship. Roll a D10, and then find the correct column matching the previously rolled cargo quality. You can pick any of the listed goods in that block, or a mix of all those things. For example, if I roll 4, for a launch, which contains poor quality goods, with a 14 for the value (which is 800gp).


I can then roll a D10. If I roll a 1, that means that the ship is a Launch containing 800gp worth of Onions, Green Peas, Green Beans, Cherries, Currants, Walnuts and Hazelnuts. Its that simple.


Cargo type
Roll a D10 for Cargo contents
D10
Poor, Common Goods
Average, Rare Goods
Good, Exotic Goods
1
Dried Goods​
Onions, Green Peas, Green Beans, Cherries, Currants, Walnuts, Hazelnuts​
Apples, Carrots, Raisins, Mushrooms, Tomatoes, Almonds, Chest Nuts​
Apricots, Peaches, Figs, Pears, Dates, Prunes, Cashews, Pistachios, Pine Nuts​
2
Fabric​
Sackcloth, Cotton​
Leather, Wool, Linen
Silk, Velvet, Fur​
3
Furniture​
Cheap furniture​
Quality furniture​
Ornate furniture​
4
Metals​
Iron, Zinc, Lead, Brass​
Bronze, Copper, Tin, Silver
Palladium, Electrum, Gold, Platinum​
5
Lumber​
Local, Cheap​
Unusual, Rare​
Exotic, Foreign
6
Alcohol​
Ale, Mead, Cheap Rum, Scotch, Sherry​
Rice wine, Cheap Grog, Rum, Whiskey​
Tequila, Wine, Brandy, Dwarven Stout, Gin, Pirate Grog​
7
Paint and Dyes
Common​
Unusual, Rare​
Exotic​
8
Rugs & Tapestries​
Common, Cheap​
Unusual, Rare​
Exotic, Foreign​
9
Spices​
Coriander, Dill weed, Mint, Garlic, Horseradish, Salt Juniper, Oregano, Parsley, Rosemary, Thyme​
Rose Hips, Poppy Seed, Laurel, Cinnamon, Tarragon​
Nutmeg, Saffron, Mace, Turmeric, Cloves, Ginger, Pepper​
10
Exotic Items​
Tobacco, Sarsaparilla, Chillies​
Coffee, Coconut, Paprika, Pimento, Betel​
Lotus, Hickory Nuts, Pineapple, Black Walnuts, Vanilla, Maple Sugar, Black Betel​
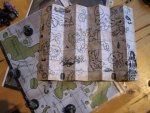
treasuremap_0.jpg

Of course no pirate campaign is complete without a treasure hunt. The party discovered this remarkable old map inside the portrait of the infamous pirate Black William, who terrorized the Emerald Coast some years ago. The map showed strange islands in the shape of skulls and monsters. Places that did not match up with any of the locations on the actual world map (the colored map beneath it in the picture).

But a popular pirate shanty gave them an important clue. Many pirate crews had their own lyrics for the song Hanging Johnny, you see. And it was up to the players to find out what the lyrics were that the dreaded pirate "Black William" used on board his ship. Luck would have it that he had the lyrics tattooed onto the breasts of the infamous Scurvy Scarlet. A female pirate captain with the dirtiest mouth in the entire Emerald Coast. And this "lady" in massive air quotes, also earned her nickname due to rumors regarding the diseases she left her lovers with. The captain of the party "sacrificed" his own health to have a gander at the lyrics, among other things. This lead to him not only discovering the correct words to the song, but also to an interesting dialogue between the two characters. This would establish Scurvy Scarlet as an important character to be reckoned with.


After learning the lyrics, the party was able to match some of the words in the song, with symbols on the folding lines on the back of the map. Now they knew how to fold the map. After folding it, the map revealed an entirely different (and much smaller) map. Yes, when you fold the various parts of the map in on themselves, the fantasy islands disappear, and become actual islands as seen on the world map. There were still plenty of strange geographical anomalies on the map that did not match the actual world map. But as they would later find out, this isn't a map of the surface, but of the underworld! Yes, the treasure is not hidden above the waves, but beneath it! The party will have to travel into the ice cold depths of the realm of the dead, to find the treasure!


A duel to the death!

One of the npc crew members of the party, has gotten himself into a bit of a dicey situation. Rummy, the notorious drunk, has long been the comic relief character in the campaign. But now his hilarious romantic pursuits have gotten him into hot water. The father of his girlfriend is a rich merchant, who does not like Rummy very much. So he has arranged a marriage for his daughter with a rich nobleman. And when Rummy confronted the nobleman, he was challenged to a DUEL TO THE DEATH!


In classic times a duel was a common way to settle disputes, and I wanted to inject a bit of historical accuracy into my campaign, especially regarding nobility. I also felt that it would be interesting to have the players be indirectly involved. By making an npc the victim of this duel, the outcome is less in the hands of the players, and they have to come up with a way to change the outcome of what's basically a death sentence. Rummy is a pirate and a decent fighter, but the nobleman has enjoyed a life time of the highest sort of training in fencing. In other words, Rummy is no match for this man. Also, the nobleman can choose to pay the best sword man in Vertesaux a lot of money to fight for him. So on both counts Rummy is screwed.


So now the party is trying to come up with all sorts of ways to save Rummy's life. Will they cheat? Will they take his place and fight for him? Will they break the law, and perhaps assassinate the nobleman? Or will they try and teach Rummy some fencing in the short time that remains? They know that if they get caught cheating, they will forfeit the duel, and probably also be arrested. And they know that judges will be appointed, who will be checking for cheating and for the use of magic.

I have provided them with the name of an expert sword man that they could hire to train Rummy, but what the players do not know, is that this man has already been bought! As a storyteller I also have another ace in my pocket. One of the female npc's on board the crew is of nobility herself, and could potentially offer to marry the nobleman instead, to end the duel. Which would be a massive bombshell of a twist.


As a storyteller, I do not know how this will play out exactly. The outcome is unclear, but it is incredibly exciting to get the players so involved with the fate of one npc. This is one heck of a situation, yet it fits the story so well. It feels completely like what the logical outcome of this sub-plot should be. Now I'm really curious what clever plan the players are going to surprise me with.


The Eternal Depths

My campaign is slowly but surely putting more focus on the underworld, known as The Eternal Depths. What is The Eternal Depths you may ask? It is a Netherworld for those who have drowned. Sailors believe that when you drown at sea, your soul travels to the Eternal Depths. This realm used to be ruled by the good ocean deity The Lady of the Waves, who would guide the souls of the dead to the god of Death. He would then weigh their sins, and take them to the actual afterlife. But the evil entity known as Hydra has taken over this realm, and banished The Lady of the Waves, by corrupting her sanctum (The Cathedral of Light). One of the cultures in my setting, the Kooghans, fear death at sea for this very reason. This is why they all wear armor made of wood and reed, that floats in water, so they won't drown.


Now the Eternal Depths are a dismal place. They are a shadowy copy of the mortal realm, only the temperatures are sub-zero. Many ancient buildings that can be found topside, can also be found down below. However, the topography of the Depths are not a one-on-one copy of the mortal realm. For example, beautiful grass lands up above, are now icy wastes down below.

The Eternal Depths are extremely cold. It resembles a giant underground cavern with an infinite ceiling. It is covered in complete darkness, with a land mass of glassy black rock, surrounded by The Sea of the Dead. This is literally a sea made from lost souls that are stuck here. An endless ocean of grief and sorrow. The ceiling of the Depths is covered in an icy mass of swirling clouds, that instantly freeze anything they touch. Within these clouds Hydra lurks, like a giant anteater. It has long feeding tubes that reach down to the land below, and consumes the souls of the dead. Once Hydra eats your soul, it is forever destroyed. But apart from your soul being devoured by Hydra, you also don't want to be forgotten. Because a forgotten soul freezes into an icy statue, and all your life becomes meaningless and without purpose. Sometimes though, if a frozen soul is remembered again in the mortal realm, it will defrost. But the frozen wastes are littered with countless icy statues of forgotten souls.

The ancient Oarsmen

The Oarsmen are a dwarfish people, who specialize in diving, and salvaging of shipwrecks. They hunt treasures beneath the waves. Oarsmen are short of stature, none of them have beards, and they are covered in tattoos. They are all incredibly strong, and take offense if they are called "dwarves". One of the Oarsmen captains has a special interest in the Eternal Depths, and believes that if they dive deep enough, they may be able to reach it, which is very dangerous. But a lot of their old lore is lost. The Oarsmen used to have enormous magical knowledge, and their ancestors created magical runes that could ward off Hydra. Many ancient Oarsmen structures are still warded to this very day. The ancient Oarsmen knew how buildings were mirrored in the Depths, and so they made sure that their magic worked on both worlds. This is why it is impossible for Hydra, Hydra servants, or the dead, to enter these structures.


Hydra and his servants

Hydra is a cosmic entity with strong influence on water. It is not at all like it's Greek mythology namesake. It is not a dragon with countless heads, but a ginormous mass of tentacles and horrific mouths and arms. It is close to an evil deity, and worshiped by many evil cultists. The Eternal Depths are full of various frightening and powerful servants of Hydra. Hydra's power in the mortal real is limited however. It cannot materialize in a realm that is so dominated by other deities that oppose it. Instead, it has agents on the surface that do its bidding. On rare occasion Hydra may send a living ship up to the surface to seek out its enemies.


Looking ahead

With all these details in place, it is unavoidable that my players will some day venture into the Eternal Depths. They have already had a peek at this netherworld, and they've already fought one of Hydra's living ships. Then run into servants of Hydra quite often, and it is only a matter of time before the players go to Hydra, or Hydra comes to them. I plan to have Hydra's agents try and give their deity a foothold in the mortal realm, in the form of harbors where its vessels can safely rise to the surface. The players will either need to stop Hydra's servants and block their plans from completing, or they will need to take out what ever structures Hydra builds on the surface. Eventually the players will also need to find the Cathedral of Light, and restore the sanctum of the Lady of the Waves, so she regains her power over the Eternal Depths.


More on the duel to the death

The players have about 2 weeks (in game) to find a solution to their crew member's duel to the death. Or let me rephrase that: Duel to HIS death. They've discussed the option to fight for him, which would probably get someone else killed, they've discussed cheating, and the punishment for getting caught, and they've discussed a more political approach. One of the big problems is that for the duel each party appoints one wizard to check if the other party is not cheating with magic. The duel must be fought with one sword. No armor, no shield, no magical items or spells, no potions, no firearms, no cheating, no other weapons.

The players must appoint a wizard for themselves, but they are also trying to figure out which wizard was chosen by the nobleman. If they learn his identity, they may be able to bribe him, kill him, and/or impersonate him. Well, as it turns out the wizard in question is a very dangerous one, who is now at the top of their kill list. The wizard is tied into two plot lines in fact, so they have twice the reasons to kill him. One problem: he is very very dangerous, and he has a lot of dangerous henchmen who are all wizards.
Another approach that they are attempting, is to manipulate the rich benefactor of the merchant (whose daughter is at the heart of this conflict). They have found out who the merchant serves, and they will try to play the game that way.

Cheating is a valid way to win the duel, as long as the players do not get caught. If they do get caught however, they automatically lose the duel, and may be hanged. If they do not show up for the duel, they lose by default.

There are of course still a few things that the players do not know. They do not know that the nobleman whom their crew member is supposed to duel, intends to appoint the best sword fighter in Vertesaux to fight for him. The very same sword fighter that the players want to approach to teach their crew member how to fight. However, the nobleman is very proud. If their crew member decides to fight himself, the nobleman will feel pressed to do the same. His honor demands it. If however the players appoint one of their own to fight, then the nobleman will do the same. This is bad, because this sword fighting teacher is of course a much better sword fighter than even the nobleman.


The sword fighting teacher does not believe in duels to the death however, and will refuse to take a life just to settle a silly argument. Once the opponent is beaten, he will accept his surrender, and not finish the job. This will anger the nobleman of course, who demands death. But the sword fighting teacher is an honorable man, who will refuse to do so. He may even end up defending the life of the man whose life he was supposed to take. This is where alignments and personalities are thrown into the mix, and the plot becomes very unpredictable.

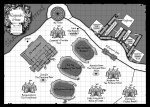
Circus_Map.jpg
harborexplained.jpg


Leopardo's Sensational Sailing Circus is in town. Three ships are docked along the coast of Vertesaux, and giant circus tents have been erected. But all good things must come to an end, and I figured that my players were starting to feel a little bit too comfortable with the current situation. Like an episode of Game of Thrones, it was about time I eliminated some good guys from the story.


I made sure there was some foreshadowing. Captain Roberts (one of the players) had one last meeting with the Marquis during a circus show. The Marquis explained a little bit about how important it is for the local pirates to trust him, and to be seen with Captain Roberts. He wants them to understand that he is on their side. He explains how trust was not easy to come by, right after the death of the dreaded pirate captain Black William (whom the Marquis betrayed, and which got him appointed as Marquis). For weeks they tried to scry for the body of Black William, but they could never find it. It was as if the body was simply in a place where no seer could see. (Foreshadowing of the resurrection of Black William, and explains that the hide out is warded against scrying)


The secret meeting

Later on in the evening, the party spies a group of 4 Azarah Witches who are disguised as mimes with an Alter Self spell. They spy on a secret meeting between them and the owner of the circus, Leopardo Pardini himself. Leopardo hands them a large heavy coffin, which he uses for magic tricks. In return they hand him a sack of gold. Leopardo wants to know what they plan to do with "it", to which the leader of the witches replies that "Questions were not part of the deal." and "It would be a terrible shame if she had to inform her mistress that he'd been asking nosy questions." Leopardo points out that she has a lot of guts trying to threaten him at his own circus, surrounded by his own men, while her mistress is miles away. But the witch replies that her mistress is a lot closer than he thinks. Leopardo responds by reminding her that he has three vessels here, along with the ships of the Marquis to protect him. But she reminds him that his ships are currently docked. "And, on a scale of 1 to 10, just how safe do you feel under the protection of the Marquis?" (This foreshadows that the villains are already planning to assassinate the Marquis)


The secret meeting is interrupted by the players, who want to prevent the witches from getting away with what ever is in that box. But the lead witch drops the box, it unfolds, and flattens. It is empty, and the contents have vanished like a simple magic trick. This was a bit of railroading on my part, since the plot kind of needs the contents of that box to come into the possession of the villains.


So now here comes the big twist. A few sessions ago the daughter of the Marquis had asked the druid of the party, with whom she is romantically involved, to help her give her real father (Black William) a proper burial. But by doing so, they removed his bones from his lair (which was protected against scrying). This allowed the villains to find the bones (and also explains why the Marquis could never find them). So now one of the most feared necromancers in the Emerald Coast (Sharokina Pitchwater), is in possession of the corpse of one of the most feared pirate captains of history. Sharokina is also responsible for murdering the mother of one the npc crew members of the party, and then reanimating her mother as an undead servant (this is why Sharokina was banished by her people). So in all ways, this has gotten very personal.

The final battle

The night ends with a spectacular fire show in the harbor. Wizards duel with each other on a floating platform in the harbor. The place is crowded with people, and the Marquis has a special spot in the royal box. But then all hell breaks loose. In the midst of the show, the royal box explodes (which was not part of the show). The Marquis is buried underneath a pile of wood, and could very well be dead. His daughter is witness to the assassination, just as she is sharing a romantic kiss with the druid of the party. There is much confusion and chaos. And midst the fleeing public are Azarah Witches that randomly fire into the audience, in order to cause as much death and misery as possible. One of the witches shrieks: "Now you can inform your KING that he has very good reason to FEAR us! Sharokina the Magnificent wishes you all happy holidays!". A Huge Coral Golem rises from the water, and under the command of the witches the construct fires stars of coral into the audience. The witches have also set loose a Huge Monstrous Black Scorpion, which was one of the circus attractions, along with plenty of other vermin.


I've illustrated the battle in the picture above. The white boxes are players, the yellow are npc's (some player controlled), and the red are enemies. One of the Azarah Witches casts a fireball spell at the western dock, obliterating it and causing everyone on it to fall into the water. This is one of those cases where we really hit the limit of our dungeon tiles. There simply weren't enough of them, but I think I did a pretty good job. We didn't have proper miniatures for the Coral Golem or the Monstrous Scorpion, so we used other miniatures to stand in for them.


One of the problems the players had to deal with, was a huge fleeing crowd. The crowd was not illustrated for obvious reasons. But I asked the players to succeed at a DC 14 strength check (or a tumble check), in order to move through the crowd. Later on, as the docks cleared, that DC lowered to 12, and eventually to 10. The players also had to traverse the ship decks and docks. I made them roll jump checks when moving from ship to dock, but the DC was really low. Some players and npc's still rolled a 1 several times, so it was clearly still a tactical obstacle in this battle.


I'm very happy how this turned out. Once again I managed to set up a really unique battle, that has an interesting lay out, and involves water in a new way. I have one aquatic monster, and several witches with their own interesting set of spells and equipment (lots of wands and potions). Water is always the focus of this campaign, so I design all my encounters around it. Sometimes it has a central role, and sometimes it's a minor part of the battle. But it's always there.

More on the plot so far


So I just wanted to go a bit more into detail regarding the set up of this plot. One of the key things here was to close a few last minute plot holes. For example, there had to be a good reason why they could never find the corpse of the dreaded pirate captain, and why the villains could find him now. So I came up with the idea that the lair, in which the party found Black William's corpse, was warded against scrying. I had an npc, Sophie (and daughter of the Marquis) ask her lover (one of the players) to help her give her real father a proper burial, in secret. This felt like a touching moment, but it made one of the players responsible. Player involvement is always important when writing a campaign. If the DM just lets an npc do things behind the backs of the players, then it feels like a cheap plot device. But if one of the players agrees to help do it, then it's their burden to carry. That's ultimately more exciting and dramatic.


So Sophie never knew her real father, and only knew the horrible tales about the dreaded Black William. But regardless she wanted him to be at peace. But secretly this was a set up so that I could bring Black William back to life. It wouldn't be a proper pirate campaign, without an undead pirate captain. And this one has had one hell of a set up.

From the moment I wrote the campaign, I knew that I wanted to have Black William come back as an undead. But I always teased the players with the idea, but never followed through on it. Npc's would convey myths and legends about Black William's ghost haunting the waters, but it was all just a load of nonsense. When the players first discovered Black William's lair, and found it filled with undead pirates, they were completely prepared to fight an undead pirate captain. They were surprised to find him still very much dead, in the magical circle where he cursed his lair. I deliberately decided to not have a cliche boss battle, and surprise them with a dead pirate captain instead of an undead one.


The campaign has been going strong for over a year now I think, and Black William has always been part in the background lore. But I couldn't just bring him back out of nowhere. I first needed to set up some menacing villains that would be credible. That is how the Circle of Azarah got introduced. I wanted the players to have more tangible villains to deal with, rather than the intangible shapeless threat of Hydra. These are all temporarily villains, that are intended to be killed off. In the span of a few sessions, I think the players will at least kill one of them. Now that Black William is back into the picture, his treasure and daughter come back to the fore front of the plot.


I also felt the players were getting a bit relaxed. I don't want them to get too comfortable. They always had the city of Vertesaux, and the goodhearted Marquis to fall back on. So taking my cues from George RR Martin, the Marquis obviously had to bite the dust. Poor Marquis, he really didn't deserve it. But you need to kill a good guy every now and then for the plot to keep moving. The assassination was one of those WTF moments for the players. They all dreaded that the circus was the perfect moment for an attack on the Marquis, but they did not anticipate something of this scale. Its made even more severe by the fact that the daughter of the Marquis had a front row seat for the murder of her own father (or substitute father, because Black William was her real father).


Follow up to the harbor battle

Since last week's battle lasted well into the night, we paused it then, and continued it today. The players finished off the Coral Golem by getting one of their ships in fire range, and blasting the hell out of it. It was a close call for some of the players. One was at 3 hp, another at exactly 0 hp. Seems like I balanced this encounter just right (and at no point did I need to fudge any dice).

Sadly, after digging up the Marquis, they found him quite dead. Of course Sophie (his adopted daughter) is in tears, and there is a huge debacle about Vertesaux's new rule. They will need to appoint someone, and that isn't a simple matter. It involves lots of nobility, plus a representative of the crown needs to come over from the capital to give his blessing (which takes at least a month). This was a great opportunity for me as a DM, to figure out how the governments of St Valenz actually work. I wrote several new npc's, and added in a couple of existing noblemen that I already introduced earlier on in the campaign.

That very same night the party discovers that the shipyard they were planning to attack, has been demolished and the ship is gone. This was kind of what they feared. However, they are informed by a cleverly disguised Souleymane Lo (the leader of the thieves guild), that the ship never actually left the harbor. Much to the surprise of the players, it turns out that the shipyard is actually hidden beneath an illusion spell. The ship was not ready to set sail yet, so the evil wizard Grumwick hastily created this false image of a collapsed shipyard. The party starts planning their massive assault on the shipyard, together with the captain of the guards (Ser Bastian Roche). They also call upon the help of the Oarsmen and their captain, Horfor. And they seize the old maritime museum (which is just across the canal from the shipyard), to place their cannons here (again with the help of Ser Bastian Roche).

We end the session with all these preparations in place. The stage is set, next time we have a huge battle between evil wizards, Flitter Hounds, Oarsmen, city guards, a skeleton crew (literally) and dozens of cannons. Perhaps the players will also meet the key players behind Vertesaux's government. I have a few really interesting new npc's to introduce.

(The duel is still been delayed, because the players have a few more pressing matters at hand. I suspect that they will deal with it, after the Shipyard is taken care of.)

Battle at the shipyard

In the wake of the assassination of the Marquis of Vertesaux, the party now faces three dilemma's. The first, is a replacement ruler for Vertesaux. It seems some nobles have already started undermining Sophie's claim on Vertesaux long before she even considered taking her father's position. They blame the assassination on her father's own soft approach to the Hydra cultists, and to the pirates he works with. And they claim that Vertesaux's new ruler should be someone who is hard on crime. Sophie would be just as soft as her father, and inexperienced, at least so they say.

The second dilemma is still Rummy's duel, which is approaching fast now.

The third dilemma is the shipyard. The party knows that one of the judges in Rummy's duel is a dark wizard called Grumwick Bristlethorn, who has acquired an old shipyard, and bought the ship of the Oarsmen captain (Horfor) that was imprisoned. The party wants to return this ship to Horfor (The Oarsmen captain), so that he may join their consortium. They also want to get rid of Grumwick because he's a dangerous member of the Circle of Azarah. And although he personally was not responsible for the assassination of the Marquis, he is affiliated with those that were.

Planning the raid

So the next morning after the assassination, they are planning their assault on the shipyard. They've brought in Ser Bastian Roche (Head of the city guard), who has in turn also brought in the head of the local church/cult of Avenna (Father Julien, who leads a group of paladin zealots that are spreading their influence in a worrying fashion). Roche is not happy with this partnership, but many of his own men are wounded, so he needs the help of these paladins. Roche is also not usually a friend of the party, but on this matter they all agree. They also recruited Leopardo Pardini, the owner of the circus. He will reluctantly provide a few mages to help dispel the illusion that covers the shipyard (the illusion makes it look as if the shipyard is collapsed and abandoned). There are also a few Symbols of Pain that will need to be dispelled. Sophie Marceau is also there, who insists in taking part in this raid, to show strength and dispel those foul rumors. Sitaara (the npc Speaker of the dead crew member) brought in Mamma Zima, a local Kooghan mystic, who will assist with dispelling magic. Horfor and his army of dwarves are also ready to swim into the shipyard, and take back their ship. Horfor's greatest worry, is that they may set fire to the gunpowder room and blow up the ship. Bastian Roche's greatest worry, is that they may set fire to the city. And Sitaara warns that if they allow Grumwick to escape, he will cause more trouble for the city in the near future.

So there you have it. A lot of different objectives, different agendas, and some people that do not like working together. And yet it was up to the players to make this all work. The day before the players had rows of cannons set up in the old naval museum across from the shipyard. Roche even commissioned a few old museum pieces, against the wishes of the museum. After all, these are ancient great cannons from Black William's ship. But they were claimed none the less. Rows of riflemen stand at the ready on the shore, and an army of paladins is ready to burst into the shipyard.

Setting up a massive battle

Since this operations involves about a hundred individuals, I simplified the battle. Basically, all the allies would half the number of enemies that the players needed to worry about. This allowed me to focus on just the players, their followers, and their enemies. So I told the players to imagine that there is a lot of fighting around them, but they would not need to worry about it, and just focus on what is left. This meant that they effectively had to fight six level 8 Azarah Men, four CR 3 Flitter Hounds, a level 12 wizard, and his two CR 9 undead minions. The party is level 10, with three additional followers taking part too. I was initially planning to have an army of skeletons, but later decided to pick something more interesting from Libris Mortis.

For the battle terrain, I had created four very large custom dungeon tiles, that illustrated the entire shipyard. Water was again a factor, because they had a ship to deal with, and would be approaching the shipyard stealthily through the water. They did not know where Grumwick would be, or if he would still be at the shipyard to begin with.

shipyard.jpg


Tactics

The players used an invisibility spell, and approached by swimming underwater. They soon found out however that the Flitter Hounds were able to sniff them out with their Scent ability. Their opponents would also use Greater Invisibility, along with an assortment of wands. They would cast things such as web, melf's acid arrow, and fireball, to cause a lot of mayhem. The party used a cleverly placed Wall of Thorns to obstruct their enemies, which would later be dispelled by their enemies. They initially assumed that Grumwick would still be in his office, but I had rolled randomly where he would be (to make it fair), and it turned out he was on board the ship.

Side note: It would be extremely unfair of me to simply place Grumwick at the point furthest away from the players as soon as they came out of the water. So I allowed the dice to determine it instead.

The party was surprised when Blasphemes were introduced into the battle (a medium sized undead from Libris Mortis). They were not expecting these very fast zombie like creatures, with a strength draining bite and stun ability, a ton of hit points, and the ability to do charge attacks. They were however able to prevent Grumwick from using Dimension Door to escape, and used their cannons to blow him to pieces, after first tripping him with a summoned Dire Wolf (which interrupted his spell).

After math

The party was successful in capturing the ship, and in killing Grumwick. They did some damage to the ship, which can be repaired. They will now be able to secure the mysterious cargo on board, that Grumwick was going to use to build Hydra a harbor (So Hydra can launch it's living ships to the surface). They also captured one Azarah Man alive, who will probably now be interrogated. The party received a lot of ability damage, as well as normal damage. But there were no casualties. The party succeeded thanks to their excellent strategy.
 

Weapons and equipment!


Older pistols
Exotic one-handed weapons
Weapon name
Cost
Dmg (S)
Dmg (M)
Critical
Range increment
Weight
Type

Double barrel matchlock pistol​
*​
**​
350gp​
1d8​
1d10​
X3​
50ft​
3lb​
Piercing​

Double spiral barrel matchlock pistol​
*​
**​
400gp​
1d8​
1d10​
X3​
60ft​
3lb​
Piercing​

Double shot single barrel matchlock pistol​
*​
***​
350gp​
1d8​
1d10​
X3​
50ft​
3lb​
Piercing​

Wheellock pistol (expensive)​
300gp​
1d8​
1d10​
X3​
50ft​
3lb​
Piercing​

Doglock pistol​
230gp​
1d8​
1d10​
X3​
40ft​
3lb​
Piercing​

Snaplock pistol​
240gp​
1d8​
1d10​
X3​
45ft​
3lb​
Piercing​
(* Move action required to light all matchlock pistols)
(**Fires two shots at once. If the first shot hits: The second shot has a 25% chance to hit at medium range, and 50% chance to hit at close range. At point blank the other shot automatically hits as well. If the first shot misses, you may roll a second attack for the other shot.)
(*** Fires two shots at once through the same barrel. If the first attack hits, so does the second.)

Flintlock pistols
Exotic one-handed weapons
Weapon name
Cost
Dmg (S)
Dmg (M)
Critical
Range
Increment
Weight
Type

Pistol butt​
-​
1d3​
1d4​
X2​
-​
-​
Bludgeoning
Bullets (10)​
3gp​
-​
-​
-​
-​
2lb​
-​

Flintlock pistol
250gp​
1d8​
1d10​
X3​
50ft​
3lb​
Piercing​

Spiral barrel pistol with stock *​
350gp​
1d8​
1d10​
X3​
60ft​
4lb​
Piercing​

Officers double barrel flintlock pistol **​
1,500gp​
1d8​
1d10​
X3​
50ft​
3lb​
Piercing​
(* Has improved aim and deals rifle butt damage when used in melee)
(**Fires two shots at once. If the first shot hits: The second shot has a 25% chance to hit at medium range, and 50% chance to hit at close range. At point blank the other shot automatically hits as well. If the first shot misses, you may roll a second attack for the other shot.)

Dueling pistols
Exotic one-handed weapons
Weapon name
Cost
Dmg (S)
Dmg (M)
Critical
Range increment
Weight
Type

Mortemer & Son
1,100gp​
1d8​
1d10​
X3​
50ft​
3lb​
Piercing​

Lepage​
1,200gp​
1d8​
1d10​
X3​
55ft​
3lb​
Piercing​
(All dueling pistols come as a pair, with a box, 10 bullets and a cleaning kit. Dueling pistols are of higher quality and less prone to failure.)

Hold out pistols
Exotic one-handed weapons
Weapon name
Cost
Dmg (S)
Dmg (M)
Critical
Range increment
Weight
Type

Deringer​
Holdout pistol
100gp​
1d6​
1d8​
X2​
10ft​
1lb​
Piercing​

Rigby Holdout pistol​
200gp​
1d6+1​
1d8​
X2​
15ft​
1lb​
Piercing​
(+2 on sleight of hand checks to conceal the weapon, but more prone to failure)

Rifles
Exotic two-handed weapons
Weapon name
Cost
Dmg (S)
Dmg (M)
Crit
Range increment
Weight
Type

Rifle butt​
-​
1d4​
1d6​
X2​
-​
-​
Bludgeoning​

Bullets (10)​
3gp​
-​
-​
-​
-​
-​
-​

Carbine​
300gp​
1d10​
1d12​
X3​
150ft​
7lb​
Piercing​

Matchlock Musket *
400gp​
1d10​
1d12​
X3​
200ft​
10lb​
Piercing​

Spiral barrel musket​
600gp​
1d10​
1d12​
X3​
250ft​
10lb​
Piercing​

Musket​
500gp​
1d10​
1d12​
X3​
200ft​
10lb​
Piercing​
(* Move action required to light all matchlock rifles)

Using a firearm as a melee weapon
Any loaded firearm has a 50% chance to explode on its wielder, when used as a melee weapon. The firearm deals normal damage in this case.

Gunpowder
Gunpowder is sold in small kegs (15-pound capacity, 20 pound total weight, 250gp, 240 shots) and in water resistant powder horns (2 pound capacity, 32 shots), 35gp for a full horn. An ounce of gunpowder is needed to fire a basic firearm. Reloading is a standard action.

Dueling Pistol boxes
A Dueling Pistol comes with a box which includes two guns, two powder horns, a compartment with extra bullets (20), a cleaning cloth, a loading stick, a canister for linen cloths, brushes, a tin oil drum, a bullet mold, a screwdriver, a spring grip, a bowl for making gun cloths, and a spare compartment.


Misc
Exotic weapons and items
Weapon name
Cost
Dmg (S)
Dmg (M)
Critical
Range
increment
Weight
Type
Cannonball (10)​
30gp​
-​
-​
-​
500ft.​
15lb​
-​
Linked shot (10)​
50gp​
-​
-​
-​
100ft.​
20lb​
-​
Ball and Chain (10)​
60gp​
-​
-​
-​
300ft.​
30lb​
-​
Scatter shot (10)​
100gp​
-​
-​
-​
500ft.​
15lb​
-​
Explosive Cannonball​
150gp​
3d6 fire​
3d6 fire​
-​
500ft.​
15lb​
-​
Grapeshot (10)​
30gp​
-​
-​
-​
100ft.​
30lb​
-​
Bombard
(4 crew needed)​
3,500gp​
-​
10d6​
-​
200ft​
(100ft min.)​
-​
-​
Swivel gun
(1 crew needed)​
(Reload 1 full round)​
500gp​
2d6​
2d6​
X3​
90ft​
50 lb.​
-​
Light cannon
(2 crew needed)​
(1 shot/3rnds)​
1,000gp​
4d6​
4d6​
-​
500ft/5ft. line​
400 lb.​
Direct​
Light​
Medium cannon
(3 crew needed)​
(1 shot/4rnds)​
4,000gp​
6d6​
6d6​
-​
500ft/5ft. line​
900 lb.​
Direct​
Heavy​
Heavy cannon
(4 crew needed)​
(1 shot/6 rnds)​
10,000gp​
10d6​
10d6​
-​
500ft./5ft. line​
1,800 lb.​
Direct​
Heavy​
Organ gun
(3 crew needed)​
(1 shot/4 rnds)​
3,000gp​
-​
4d6​
-​
300ft./10ft.line​
-​
-​
Bandolier​
2gp​
-​
-​
-​
-​
1lb​
-​

Gunrest​
2gp​
-​
-​
-​
-​
5lb​
-​

Powder horn (32 shots)​
35gp​
-​
-​
-​
-​
2lb​
-​

Powder keg (240 shots)​
250gp​
-​
-​
-​
-​
20lb​
-​

Bayonette, fixed​
15gp​
1d4​
1d4​
-​
-​
+2lb​
-​

Bayonette, plug​
**​
2gp​
1d4​
1d4
-​
-​
1lb​
-​

Bayonette, ring​
***​
2gp​
1d4​
1d4​
-​
-​
1lb​
-​

Bayonette, spring​
5gp​
1d4​
1d4​
-​
-​
+2lb​
-​

Breachloading *​
50gp​
-​
-​
-​
-​
-​
-​
Shield pistol​
300gp​
1d6​
1d8​
X2​
10ft​
+2lb​
Piercing​

Blunderbus
(two handed)​
300gp​
1d4​
1d6​
-​
Special​
10lb​
Piercing​
Hand cannon​
50gp​
1d8​
1d10​
X3​
50ft​
15lb​
Piercing​
Bomb​
150gp​
2d6​
2d6​
-​
10ft (thrown)​
1lb​

Bomb casing​
30gp​
special​
special​
-​
10ft (thrown)​
1lb​

Cannister​
20gp​
-​
-​
-​
10ft (thrown)​
1lb​
Caltrop​
1gp​
2lb​
Marlinspike​
1sp​
1/5lb​
Grappling hook​
1gp​
4lb​

Grenade pistol
300gp​
-​
-​
-​
40ft​
4lb​

Grenade rifle​
500gp​
-​
-​
-​
50ft​
5lb​
Duck’s Foot Flintlock Pistol ****​
600gp​
1d8​
1d10​
-​
10ft​
4lb​
Piercing​
(* Turns standard action reloading into move action reloading)
(** Requires a move action to attach, weapon cannot fire while it is attached)
(*** while attached: weapon takes -2 to attack rolls, reloading takes full round action. Must be drawn like any other weapon in addition to the time it takes to attach it)
(**** hits targets in a 10ft wide arch in front of the user, Reflex DC 15 for half damage)

Bombard
To fire a bombard, make a special check against DC 15, using only your base attack bonus, intelligence modifier, range increment penalties, and any appropriate attack modifiers from the Catapult Attack Modifiers Table on page 100 of the Dungeon Master’s Guide. Targets who succeed at a DC 15 Reflex save take half damage. If the attack succeeds, following shots hit exactly at the same spot. Bombards cannot cause critical hits. If a bombard missed, role 1d8 to determine where the shot lands. 1 being back towards the bombard and 2 through 8 being clockwise around the target square. Then count 3 squares back for every range increment of the attack.
Loading a Bombard requires a series of full round actions. DC 15 Profession (Siege Engineer) to set the fuse, DC 15 Profession (Siege Engineer) to load the charge, DC 10 strength check to load the cannonball. It takes four full round actions to aim the Bombard, or 1 full round action for a crew of 4.

Swivel Gun
An extra light cannon that can be mounted on the railing of a ship. The Swivel Gun does not require a weapon mount, and mounting or unmounting it, is a full-round action. Loading a Swivel Gun requires only one full round action. Unlike other cannons, the Swivel Gun can be operated by only one person. The Swivel Gun can only fire regular cannonballs (not any other special ammo), and does half damage to a ship’s hull.


Cannon (light/medium/heavy)
The Cannon can be either a ship’s cannon, or a cannon used on land. Firing a Cannon is a standard action that provokes an attack of opportunity. The Cannon fires the cannonball in a 500ft long, 5ft wide line. Creatures in this line are allowed a DC 15 Reflex save to take half damage. Cannons do not have a standard range increment, and cannot be fired further than 500ft. Loading a Cannon requires a series of full round actions. DC 15 Profession (Siege Engineer) to set the fuse, DC 15 Profession (Siege Engineer) to load the powder, DC 8 strength check to load the cannonball. It takes 2 full round actions to aim a Cannon, or 1 round for a crew of 2. Depending on the ammo and caliber, the range of the Cannon may differ. It takes 4 rounds to load a medium cannon.

Ammo
Range
Area of effect
Special
Cannonball​
500 ft.​
5 ft.​
-​
Linked shot​
100 ft.​
10 ft.​
Double damage to rigging sections​
Ball and chain
300 ft.​
10 ft.​
Double damage to rigging sections​
Scattershot​
500 ft.​
10 ft.​
Double damage to rigging sections​
Explosive shot​
500 ft.​
5 ft.​
-​
Grapeshot​
100 ft.​
10 ft.​
-​
Organ Gun
Firing a loaded organ gun requires one full round action that provokes an attack of opportunity. Upon being fired, the Organ Gun discharges a 10ft wide barrage in a 300ft long line directly in front of it. DC 20 Reflex save for half damage. Organ Guns do not have a standard range increment, and cannot be fired further than 300ft. Loading an Organ Gun requires 6 DC 10 strength checks to load the cannonballs, a DC 20 Profession (Siege Engineer) to check and bind the fuses. Re-aiming an Organ Gun takes 3 full round actions, or 1 round for a crew of 3.

Bombs, bomb casings and Grenade Pistols
Lighting a bomb requires a move action, in addition to the time it takes to load a weapon (or you can simply throw it). The user can choose to set the length of the fuse, so the grenade explodes after 1 round, or up to 5 rounds. When the bomb explodes, it deals 2d6 damage to anything within 5ft. radius, and anyone caught in the blast is allowed a DC 15 Reflex save for half damage. Lighting a bomb casing works the same, but the casing can be filled with any chemical, including poisons. But since this is an indirect method of spreading the chemicals, the Fort DC is decreased by -2 for these contents.

Gunpowder use
Item
Gun powder
amount
Pistol shots worth of gunpowder
Powder Horn
2 lb​
32 shots​
Powder Keg
15 lb​
240 shots​
Swivel Gun

0,5 lb​
8​
Light Cannon
0,75 lb​
12​
Medium Cannon
1 lb​
16​
Heavy Cannon
1,25 lb​
20​


Nautical equipment
Cost
Weight
Anchor​
30gp​
50lb.​
Boarding hook​
15gp​
15lb.​
Flag​
2gp​
2lb.​
Flags, semaphore​
10gp​
8lb.​
Hardtack (rations/day)​
5cp​
1lb.​
Sounding line (500 ft.)​
10gp​
50lb.​
Navigation equipment
Astrolabe (+4 on nav checks)
800gp​
4lb.​
Charts, poor​
10gp​
3lb.​
Charts, average​
20gp​
3lb.​
Charts, good​
50gp​
3lb.​
Charts, great​
100gp​
3lb.​
Compass (+2 on nav checks)​
500gp​
1lb.​
Cross-staff (+1 on nav checks)​
150gp​
1lb.​
Nocturnal​
200gp​
4lb.​
Quadrant (+3 on nav checks)​
650gp​
3lb.​
Sextant (+2 on nav checks)​
500gp​
5lb.​
Spyglass​
1,000gp​
1lb.​
Sunstone (+1 on nav checks)​
25gp/stone​
1lb.​
Cargo handling
Block and tackle​
5gp​
5lb​
Chain (10ft.)​
30gp​
2lb.​
Crane, portable Str 22​
30gp​
75lb.​
Crane, portable Str 24​
60gp​
120lb.​
Crane, portable Str 28​
120gp​
250lb.​
Pulley​
5gp​
1lb.​
Winch, portable Str 18​
20gp​
20lb.​
Winch, portable Str 20​
40gp​
40lb.​
Winch, portable Str 22​
80gp​
80lb.​
Containers
Barrel (empty)​
1gp​
20lb.​
Bucket (empty)​
5sp​
2lb.​
Cask (empty)​
1gp​
10lb.​
Chest (empty)​
2gp​
25lb.​
Handkeg (empty)​
5sp​
20lb.​
Sack (empty)​
1sp​
1/2lb.​
Adventuring gear
Animal call​
1gp​
-​
Armor maintenance kit​
(+2 on Craft armor smithing)
20gp​
1lb.​
Ascender/slider (Climb +1, DC 15 Strength to rapidly descend)​
20gp​
1lb.​
Bolt cutters (deals 15 dmg to 1 inch thick metal objects)​
6gp.​
5lb.​
Book, false (floats in water, waterproof, open lock DC 20)
30gp.​
2lb.​
Bottle, wine, glass​
2gp​
-​
Candle, Insect bane (5ft. radius)​
1sp​
-​
Chalk​
1cp​
-​
Earplugs​
3sp​
-​
Finger blades (+1 on pickpockets)​
10gp​
-​
Fishhook​
1sp​
-​
Fishing net (25 sq. ft.)​
4gp​
5lb.​
Float bladder (-2 to swim)​
10gp​
3lb.​
Hammock​
5sp​
1lb.​
Hut, portable​
125gp​
75lb.​
Lantern, fog cutter (40-10ft. cone)​
20gp​
3lb.​
Mess kit (bowl, plate, cup, spoon)​
6sp​
1lb.​
Paper/parchment (sheet)​
4sp​
-​
Pole (10ft.)​
2sp​
8lb.​
Pot (iron)​
5sp​
10lb.​
Saw, folding​
2gp​
2lb.​
Signal whistle​
8sp​
-​
Spade/shovel​
2gp​
8lb.​
Spell book (blank)​
15gp​
3lb.​
Spell book (waterproof)​
50gp​
3lb.​
Table case, folding​
5gp​
5lb.​
Tent, one person​
5gp​
10lb.​
Vial (ink or potion)​
1gp​
1/10lb.​
Winter blanket​
5sp​
3lb.​
Saint-Anna’s Church
Holy symbol (wood)​
1gp​
-​
Holy symbol (silver)​
25gp​
1b.​
Holy water (flask, 2d4 to undead)​
25gp​
1lb.​
Saint-Anna’s oil (blesses one weapon or coats 20 units of ammo)​
100gp​
1lb.​
Salve of Saint-Anna (suppresses 2 ability dmg for 1 hour, craft DC 20)
50gp​
1lb.​
Tools and kits
Healer’s Kit (+2 on heal checks, 10 uses)​
50gp​
1lb.​
Thieves Tools (+2 on disable device and open locks)​
30gp​
1lb.​
Thieves Tools (Masterwork)​
100gp​
2lb​
Potions/oils/salves
Armor insulation (flask) (24 hours, +5 on Fort/cold, craft DC 25)​
50gp​
2lb.​
Whale grease (flask, lasts 1 hour, protects against hypothermia)​
75gp​
2lb.​
Elixir of Swimming (+10 to swim checks)​
250gp​
1lb.​
Salve of Slipperiness (+20 on escape artist checks, lasts 8 hours)
1,000gp​
1lb.​
Sealskin salve (+2 to fort saves against cold, lasts 2d4 hours)​
20gp​
-​
Silversheen​
(Lasts 1 hour, can also coat 20 units of ammo)​
250gp​
2lb.​
Stone of Alarm​
(Triggers if subject touches stone without speaking command word)​
2,700gp​
2lb.​
Smother blend
(Extinguishes a 5ft. cube of flame when thrown)​
20gp​
-​
Potion of cure light wounds​
(1d8+5)
50gp​
1lb.​
Potion of endure elements (lasts 24 hours)​
50gp​
1lb.​
Clothing
Eye patch
1sp​
-​
Boots, High​
5sp​
1lb.​
Boots, Smuggler’s (Fine compartment in heels, Search DC 30)​
10gp​
1lb.​
Hat, bicorne
50gp​
1lb.​
Hat, tricorne
15gp​
1lb.​
Hook (1d4 slashing dmg when used in melee)​
1gp​
1lb.​
Leg, wooden​
3gp​
2lb.​
Officer’s Garb​
75gp​
10lb.​
Pirate’s Outfit​
10gp​
4lb.​
Sailor’s Outfit​
1sp​
2lb.​
Artisan’s Outfit​
1gp​
4lb.​
Cleric’s Vestments​
5gp​
6lb.​
Cold weather Outfit​
8gp​
7lb.​
Courtier’s Outfit​
30gp​
6lb.​
Entertainer’s Outfit​
3gp​
4lb.​
Explorer’s Outfit​
10gp​
8lb.​
Monk’s Outfit​
5gp​
2lb.​
Noble’s Outfit​
75gp​
10lb.​
Peasant’s Outfit​
1sp​
2lb.​
Rich Merchant’s Outfit​
45gp​
.7lb.​
Scholar’s Outfit​
5gp​
6lb​
Traveler’s Outfit​
1gp​
5lb.​
 

The duel is now most definitely coming

A lot of plot lines have been getting in the way of my players sorting out the duel, which their booze-loving crew mate "Rummy" got himself into with a local nobleman. So last time my players attempted to talk some sense into the parties involved. They talked to the father of the woman that this whole mess is about, a man by the name of Wiebe Ter Weel. The talk started out reasonable, but the players kind of pushed the father beyond what is reasonable. They tried to tell the father that it was not for him to decide who his daughter Laura marries, which is simply not true. This is a medieval society after all, and the daughter gets no say in the matter at all. So they quickly outstayed their welcome, and the father got very angry with the players. The players realized that they had made an error in judgement. They discussed the option of making the father pay dearly for all this, but one of their npc crew members disagreed. He pointed out that the man was clearly a widower, and that taking everything from him would not be just, nor would it make his daughter happy. The man was right to not want his daughter to marry some drunken pirate. The players felt a bit guilty.


The party also met with The Great Ravelli. This sword master had been trying to teach Rummy how to fence in the short time that he had (the players had not met him yet in person up to this point). Ravelli expressed his dislike for these stupid pointless duels. He had trained dozens of stuck up noblemen, only to have them throw away their lives over something pointless. He was sure that Rummy would die at this duel, despite his best teachings. He explained how even people who had trained under him, often died in these sorts of duels. It was clear that despite his lack of nobility, a lot of people had respect for this master.

The party decided to meet with the nobleman, Aldredo Poussin, as well. But the man was not an idiot. He provided enough security for himself, and made sure there was a long table between him and the players. He was still as arrogant as ever, and not willing to cut a deal. His only offer, was that Rummy would simply leave and take his defeat without a fight. The party also learned that he'd find a replacement wizard to act as referee, and thus the duel would take place tomorrow. The party had only recently taken out his original judge in an epic fight at a shipyard. So they were surprised that he'd managed to find a new referee so quickly. They tried to offer him to marry one of the widows of the marquis instead, but he considered them to be "spoiled goods". They also offered him some power over Vertesaux, which he declined, since it didn't end that well for the last ruler (the Marquis had been assassinated a few sessions ago). The players also noticed a diploma on the wall that confirmed that the nobleman had been trained by Ravelli too, which is very concerning.

So now the players find themselves in a difficult situation. The duel is tomorrow, and it looks like they under estimated the situation. They have no power over either the father or the nobleman. And they do not want to break the law. Their last hope, is the fact that the new referee is family to a well known countess, who will be present at a meeting between many nobles tomorrow. Will they cheat their way to victory, or will they go for an honest fight? Rummy certainly won't win, but he is allowed to let someone else fight for him. This would mean that one of the players could put his life on the line for Rummy. Unless Rummy fights for himself, the nobleman could also appoint someone else, and who would this champion be?


Four important events are about to take place: The burial of the Marquis, the meeting between the nobles (from which a new ruler will be appointed), the duel, and a ritual to destroy the contents of the black crate which the players recovered from the shipyard. And all on the same day. I'm especially excited to see how the meeting with the nobles turns out. I get to introduce the players to a lot of interesting new characters, and the players will get the choice to push a new ruler forward. Will they push Sophie Marceau (daughter of the Marquis) forward? They will also get to meet the enigmatic Countess Camille, who misses her left arm. There's a really interesting story behind how she lost her arm, which I'm eager to tell.


Finally, the duel to the death! But first, a new ruler for Vertesaux!

My players sure get distracted easily. But at long last they finally got to finish up something we had delayed for a long while. The players first had a meeting with all of the nobles, to try and pick a new ruler for Vertesaux. I ruled that each individual at the meeting had a diplomacy DC to convince them, along with a topic that they were interested in, and a topic they were not interested in. Most of the nobles had already picked a candidate, but it was up to the players to try and sway their opinion. A bishop was sent from the capital, to gather all of the votes, and make the final call. So the players all schemed and gathered gossip on various nobles, and tested the waters to see where each noble stood on the matter. In the end they chose to vote for a kind elderly noble, Lord Demphrey. They all realized that it would be hard to convince the bishop that a woman should be the new Marquis, since he had a clear disdain for women. But they were also careful not to get on the bad side of the bishop. They also played political games with an eastern baroness, who had a lot of influence on the opinion of her much younger husband. They also managed to poison Aldredo Poussin, who would fight Rummy this same day. This meant that he would be fatigued during the fight. They also asked the Bishop to remove a curse (caused by a fight with a mummy) from one of their party members. This was of course no problem for a Bishop.

After all was said and done, they gathered at the harbor for the duel. They had convinced Rummy to pick one of their party members to fight for him, because he would otherwise surely die. At the sight of this, Alfredo decided to appoint a second as well. Much to the surprise of the players, he appointed the one and only sword master. The famous Ravelli. Both the player and Ravelli were searched for weapons and armor. They were then handed a regulation rapier and buckler. A wizard-referee for each side then proceeded to check for magical items or spells, which were not allowed. Both fighters then stepped onto a floating platform in the harbor, where they would fight to the death. Because it was raining slightly, any charge attack would require a balance check as well.

At first there was a long stand of. The two both went into full defense, and slowly approached each other. Ravelli waited for the player to attack him, so that if he missed, he could counter attack with a trip. After the trip, the player was basically open to a full attack. Since getting up also provokes an attack of opportunity, Ravelli would get a free chance to disarm his opponent as well. Fortunately the player tumbled out of the way, and got to his feet without provoking an attack. And so the two duked it out, while drawing a lot of blood on both sides. When they were both badly wounded, the player put his sword away, and said that enough was enough. Ravelli agreed, and put his sword away too. An angry Alfredo start yelling at Ravelli: "I order you to kill him!" -But Ravelli ignored his commands.

Meanwhile the rest of the party was eager to get rid of Alfredo, who was now standing on the peer. They created a distraction of a screaming woman with Ghost Sound, and then the captain used Ring of the Ram to knock Alfredo into the water. Here the shape-shifted Druid could easily attack him as a shark, without it looking like murder. The players did run the risk however, of one of the referees seeing the effect of the ring (a vague shape resembling a ram's head). Alfredo was pulled under by the shark in full sight of an astonished audience. The Bard-Captain worked his charm, and helped encourage the opinion that it must be a sign of the gods. When the Sheriff came to ask the referees if there was any foul play, one referee looked at the captain in silence. But before he could accuse the captain of any wrong doing, it was Laura's* father who told the Sheriff that he saw Alfredo slip and fall into the water. This came as a big surprise to the players, because Laura's father hated Rummy, and didn't want his daughter to marry a worthless drunk pirate. As it turns out, by putting his life on the line, Rummy had earned her father's respect. The father apologized for not seeing it sooner, and the Captain apologized for their rudeness towards him earlier (in a previous session). Rummy and Laura's father shook hands, and the Captain ended the evening by heading to the tavern to collect his winnings. After all, he was the only one who bet all his money on Rummy.


(* Laura is the woman that Rummy is in love with, which started this whole duel)

So now the party has finally finished up all their business in Vertesaux (for now). Sophie will rejoin the crew, and not follow in her father's footsteps. Laura and Rummy are reunited, and Laura might even get offered a new job by the players, along with a beneficial trade deal for her father. Lord Demphrey will be the new Marquis of Vertesaux, while the other nobles will be part of a council. The party now looks to the west, where they will visit the island of Abyscus, and seek the Kooghans for their knowledge of naval weaponry. They will also revisit the island of Witchclaw, where the Speakers of the Dead live. Then they will travel south, and then east, to hopefully avoid running into the Undead Captain Black William. On the way there they will use their old ship to bring carpenters and soldiers to the site of their new base, to start building it. This is on the dreaded Isle of Bones, where a dangerous tribe of cannibals still needs to be dealt with.


How did they pull that off?

Sometimes things will go completely off script, and this was one of those evenings. I had refrained from using my city encounter tables for a while now, to speed things a long a bit. The party had been lingering in Vertesaux for many sessions, and I felt it was time to push things forward, and get them back onto their ship. But of course, I decided to roll just one random encounter.... just one.... oh boy.

The encounter that came up, was of course an exotic encounter: "A ghost ship appears on the horizon". Since the party had recently allowed the bad guys to get their hands on the body of Black William, this could only mean one thing. Captain Black William would attack Vertesaux with his ghost ship. I described the haunting sight of a ship that the navy could not hit, which looked like it had been crushed by a mountain, and then stapled back together. Its mere sight frightened people (frightful presence), and its cannon balls trailed through the air as if being fired underwater, and exploding in ghostly green flames. And yes, this of course derailed all my plans for this session completely.


I described to the party how at first they only noticed all the people in the street staring towards the bay. It was a hilarious sort off Independence Day moment, where the whole city seemed aware of an imminent disaster, while the main characters were oblivious to the threat looming right in front of them. But I started wondering... what would the dreaded pirate captain Black William really want? Revenge on Vertesaux would probably be one thing, but his daughter would be the other. And since Sophie is the love interest of one of the players, and they left her unattended, I felt a damsel in distress was fitting here. Black William had come to reclaim his daughter, and take her to gods know where.

The captain of the party decided to commandeer a ship, and go head to head with a ship many size categories bigger than his own. He raised his flaming sword in defiance, and after a successful Intimidate, I ruled that he had drawn the attention of the undead pirate captain. However, the players were outgunned and outmatched in every way. And besides, how are you going to hit a ghost ship? I raised the stakes, by deciding that the Ghost Ship was on a ramming course, and that Sophie Marceau had been made into a figurehead, by chaining her to the bow of the ship. As a DM, I had not prepared the statistics of Black William or his ship (this was all improvised), so I went with what ever seemed reasonable (and I looked up some ghost ship details in one of the books).


What I had not prepared for, was for what would happen next

The druid conjured up a large water elemental, who would try and body block any shots coming towards the player-ship. The two heavy cannons at the front did around 34 and 35 damage each, which instantly dropped the HP of the elemental to exactly 1 point. So once Sophie came into view, and the elemental was still alive, he commanded the elemental to rescue Sophie. I described how she was chained to the ship, and I looked up the break DC for iron chains. As it turns out, with the strength of the elemental, he could only succeed if he rolled a natural 20.


Which of course he did! By the gods, what unbelievable luck! And it was totally legit, there was no cheating here. We all saw him roll it with his dice cup. This was one of those impossible rolls, yet he made it anyway. The elemental rips the chains apart, and dives underwater with Sophie in its watery hands, just as the ghost ship crashes into the player-ship, and passes straight through. The ghost ship then dove into the water, and vanished underneath the waves.

Important tip for other DM's: Just roll with it

It's not like I had set up this encounter to be unwinnable, but I did plan for Black William to vanish again, as Ghost Ships do. The players were unequipped to fight this ship yet, but it was cool to give them a glimpse of just what terrible odds they face. I did not know from the top of my head what the strength of the water elemental was, or what the break DC of the chains was. I only knew that I didn't want to make it easy on them, so I substituted rope for a chain. But then our Druid rolled that 20, and this is I think an important lesson for any DM. When ever that happens, just roll with it. Don't try to force your hand as a DM. Sometimes your players will succeed at amazing things, and that will be THE defining moment of the evening. So when that happens, just roll with it. Let it go, and allow your players to have their well earned victory. Sometimes the bad guy doesn't succeed in getting away with the damsel in distress. I'm sure he'll get plenty of chances to try and get his revenge.

Besides, how awesome was that rescue? It was one of the most epic rescues ever.


Raid on Old Quarter

While two of the players are engaging a ghost ship at sea, and have barely rescued Sophie from the bow of Black William's ship, two other players stumble into Old Quarter to see what all the fuss is about. They hear screaming and sounds of gunshots, so they grab a coach and race towards the city gate. As they arrive on the scene they jump off, and the coach crashes into an old well. The horses are spooked by what they see. Ghost pirates everywhere! They are raiding the city!

oldquarter.jpg


The ghost pirates are sacking Old Quarter, and have gathered around Rummy's favorite tavern, "The Staggering Bull." Since the party is split, I allowed one of the players to control Sophie (who had just been rescued), and I allowed the other player to choose a member of their crew who happened to be in the immediate area, and control him/her. He selected Amaziah, their Kooghan cleric. I allowed him to pick what ever spells he wanted for her, because I'm not that bothered with meta gaming. The player pointed out that he didn't want to meta-game, but I told him it was perfectly fine, he could just pick what ever he liked. We reasoned that from a story perspective, Amaziah had just visited the seer called Mamma Zima, and thus she may have been warned by what was about to happen. Amaziah approached from the north west.


Sophie approached from the east, where she overheard the two ghost pirates that were kidnapping a young girl. Apparently they were still looking for Sophie! She quickly took shelter in the small jail to the north east, where she was able to liberate two towns people who had been imprisoned by the ghost pirates.


Shae and Bioran approached from the south, and were first to arrive on the scene.

entry.JPG

Shae and Bioran surveyed the scene. Up above them on the city wall, a city guard was duking it out with a ghost pirate (and losing). Around the corner, a ghost pirate-sorcerer was waiting on higher ground. He was standing on the stairs leading up to the city wall. Meanwhile a group of two ghost pirates was making off with a sack of loot and a poor prostitute. They dragged their spoils off, while the poor wench was kicking and screaming in protest. They also noticed a brute of a ghost pirate bursting into the tavern. One of the two pirates gave Bioran a quick glance, and his Horrific Appearance special ability immediately drained a lot of Bioran's ability points, due to a botched saving throw. The two players immediately realized they were outnumbered and outmatched. But just as they considered a retreat, they caught a glimpse of Amaziah and Sophie. Now they realized that retreat was not an option, they had to save their crew.

cannonparty.JPG


Meanwhile Amaziah approached from the north west streets. Two ghost pirates were manning a ghostly cannon (represented by a ballista here, since we didn't have a cannon miniature). The two pirates seemed to be cackling loudly, as they were firing the cannon randomly into the city. And they were clearly still unaware of Amaziah's presence. Meanwhile two other pirates were heading for the rum cellar of the local tavern. Amaziah also noticed a staircase leading up to the second floor of the tavern. She decided to unleash her cleric powers upon the cursed creatures. We decided to go with alternate Turn Undead rules here, because the undead were of an equal level as the party, and we didn't want the ability to feel completely useless. So I allowed Turn Undead to deal damage instead.

standoff.jpg


We ended on a cliffhanger, as Bioran and Shae rejoined with Sophie. They were able to steal two ghostly swords from the ghost pirates, and now found themselves at a stand off with one of the ghost pirates. The ghost pirate helt a blade against the throat of the kidnapped little girl, and threatened to take her life if they made any wrong moves. Bioran unleashed his Disarm spell, and this is the cliffhanger we ended on. We'll see if the spell succeeds next time!


Some of you may wonder what the Disarm Spell is. This is a homebrew level 1 wizard spell that I introduced, which is very handy in magical combat. It can pull any helt items from the hands of an enemy, with a strength 22 opposing strength check. If the spell is succesful, you use the scatter dice to determine where the weapon flies off to. It only works at close range, and has verbal and sometic components. It's basically our version of the typical Harry Potter disarm spell that you see in the movies. This makes magical combat a lot of fun, since it's very effective in blasting wands from the hands of wizards.

Since this was going to be a pretty big and lengthy battle, we'll have to continue this battle on our next session. This is also the most dungeon tiles I've ever used, and I was barely able to dress the whole scene. But I think it has turned out pretty well. Having these huge illustrated terrains for large combat encounters adds so much, I can't even describe. You tend to pay way more attention to how you spend your movement, and where you can find cover. The party decided to use stealth, and be cautious, which was a clever thing to do. They knew that I was slowly beefing up the difficulty of the encounters, and this was clearly going to be one of those harder fights.

By the way, our combat area is a lot bigger than what the previous pictures showed. I also illustrated the cellar, and the second floor of the tavern. Down below you can see how this lines up. As you can see there are three routes to access the second floor. The stairs inside the tavern (white arrow), and the two doors outside (orange and yellow). The cellar can also be accessed from the hatch outside (blue arrow). Two of the ghostly pirates that we saw earlier, have now taken the poor prostitute inside for some fun time... although I'm not quite sure how they intend to make that work, since they are ghosts. There's some more ghost pirates inside raiding the place. One is raiding the kitchen, another is upstairs, and the other two are stealing rum from the cellar.

staggeringbull_0.jpg


And this is why dungeon tiles are awesome!

Some futher remarks regarding this encounter

I think more DM's should play around with the motives of their bad guys. In this instance, the players were not the primary focus of the ghost pirates. They were after four things: Sophie, rum, loot and wenches. They mistook the little girl for Sophie, since one of them had forgotten what her hair color and age was. Sophie is in her twenties and has black hair, while the little girl was 12 had blond hair.

I also offered multiple goals to the players. They could try and rescue hostages, try and capture the cannon, heal the dying guard in the south west, try and get a hold of one of the ghostly swords, go after the rum cellar, or focus on securing the tavern. This is far more interesting than merely having them fight every enemy till everything is dead. Multiple objectives make combat encounters far more exciting. If they don't heal the dying guard, he will die. If Bioran's spell fails, the little girl will die as well. And in this instance, stealth was a viable option as well. There were so many ways that they could tackle this situation.

It's also fun to give some character to all the individual enemies. I gave every ghost pirate a unique name, and had them converse with each other during the encounter.


Follow up to the events in Old Quarter

Today the players finished up the battle in Old Quarter.

When we last left off, we were on an exciting cliff hanger. A ghost pirate had a blade to the throat of a young girl, and threatened to cut her throat if the players made any moves. Bioran, the Abjurent Champion, quickly used a disarm spell on the pirate. Would he succeed?

Well today we found out that he did succeed. The spell succeeded with an opposing strength check, and the blade was knocked out of the hands of the ghost pirate. The girl was saved, and the players reunited her with her father (the owner of the tavern). They then duked it out with the pirates, and suffered the effects of their Frightful Moan special ability, which is very nasty. Fortunately one of them had a Protection from Evil memorized, to protect them. They killed all of the ghosts, except for the two in the cellar.


They also discovered that their ghostly equipment vanishes if they kill the ghost that it belongs to. So after killing a few ghosts, they now have only one ghostly cutlass left. They also managed to secure the ghostly cannon, although it seems to spook the rest of the crew a bit (they think it is a bad omen to have such a thing on board).

The two ghosts who went to steal rum from the tavern, decided to prioritize securing the rum over fighting the players, and thus fled the scene. So the players did not need to fight them. I gave the players full experience for all the ghosts that they fought, even if some of them fled. They also learned that the ghost pirates recognized Sophie's rapier, and thought it was the weapon of their captain. This makes sense given the context of what they just learned about ghostly equipment. A ghost can have a ghostly version of his original equipment, while the physical copy of that piece of equipment also exists.

The players also checked out the basement, and almost fell prey to a pitfall trap. Clearly this trap did not affect the ghosts, although one of the kegs of rum had clearly fallen down the pit as well. They found a lever to disable the trap, so they could steal one of the remaining barrels of rum.

Securing a base for the consortium

Using the vast amount of wealth that the players have acquired with their piracy, they have bought an office and a tavern for their new consortium. The Sheriff also showed the captain that the old building has a secret smuggling tunnel, which has been bricked shut, but connects to the old sewers. They also returned to their ship, and readied it for its next voyage. They kept the ghostly cannon covered under a sheet, so the crew wouldn't freak out.

The mystical closet

Many sessions ago the players had acquired a magical closet, with cold air emitting from it, and wrapped in chains. The chains seemed to be holding something inside, which was violently beating against the doors of the closet, and trying to escape. So in order to solve this conundrum, the Druid of the party brought Leopardo Pardini in to inspect it. Leopardo is the owner of the traveling circus, and thus knows many wild animals. He also knows a thing or two about magic. Leopardo was able to identify the closet as containing a small extradimensional space. He did however not recognize the sounds of the creature inside, and thus it is not any animal that he knows. Perhaps it is not a normal animal at all, but some monster. They decided to keep the closet closed, and thus it remains a mystery. I love throwing in some weird magical items every now and then, and this is one of those examples.

The house that lives

On one of their treks through the city, the players had come upon a house that seemed to be alive. Today the Abjurent Champion tried to find the house again. And while he had made a note of it on the map, it turned out that the house had moved. It was now sitting on top of another house, as if the house beneath it had gained an extra floor. This living house is capable of talking, and refuses to let anyone inside without the permission of the mistress of the house. The players do not know who she is, but are eager to meet her. But she rarely seems to be at home. The house is also capable of facial expressions, and its windows follow the players as if they were eyes, and as if the door was its mouth. They decided to leave a note for the mistress, inviting her to meet with them some time.

Meeting with Ter Weel

The players decided that their favorite npc crew mate Rummy should talk with the father of his girlfriend Laura. Rummy's relationship with Laura's father hasn't exactly been great, because Ter Weel would rather not see his daughter with a drunken pirate. So they joined him to Ter Weel's mansion, and knocked on the door. Much to their surprise, Rummy was greeted with a big hug by Ter Weel. Not the reactions they were expecting. And that is where we ended the session for today.
 

Panartias

First Post
Good to know you already made the migration!

Good to know you already made the migration!
Keep up the good work – and I’ll keep my fingers crossed for Rummy (everybody’s favorite NPC);)
 
Last edited:


Remove ads

Top