Grum_l
First Post
Hi all,
I was asked here to show how I did my forests.
As I said there, I used Photoshop to draw my map. The attached images below show the process of creation.
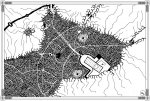
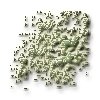
The image "Wood.jpg" (#1, form left to right) is the finished example. How do we get it?
1. We create a new file in Photoshop and add two additional layers - one for the background and two for the forest (two different greens).
2. The image "Background.jpg" (#2) shows the plains. Its the lowermost layer.
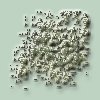
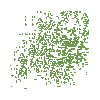
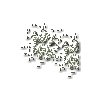
3. "Wood 1.jpg" (#3) and "Wood 2.jpg" (#4) are the two layers above. Each contains a cloud of dots (two different greens).
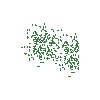
4. Change the style of each "wood" layer. Add several effects to get a layer style similiar to the images "Wood 1 with effects.jpg" (#5) and "Wood 2 with effects.jpg" (#6).
5. When you look all layers at the same time you see something like "Wood.jpg" (#1).
Because GIMP is used here, I hope it was useful.
I was asked here to show how I did my forests.
As I said there, I used Photoshop to draw my map. The attached images below show the process of creation.
The image "Wood.jpg" (#1, form left to right) is the finished example. How do we get it?
1. We create a new file in Photoshop and add two additional layers - one for the background and two for the forest (two different greens).
2. The image "Background.jpg" (#2) shows the plains. Its the lowermost layer.
3. "Wood 1.jpg" (#3) and "Wood 2.jpg" (#4) are the two layers above. Each contains a cloud of dots (two different greens).
4. Change the style of each "wood" layer. Add several effects to get a layer style similiar to the images "Wood 1 with effects.jpg" (#5) and "Wood 2 with effects.jpg" (#6).
5. When you look all layers at the same time you see something like "Wood.jpg" (#1).
Because GIMP is used here, I hope it was useful.
Attachments

Last edited: