D&D 4E RRH2: Building the Adventure Outline

Jacob Lewis

Ye Olde GM
This is part of a series about expanding the classic D&D adventure from 4th Edition, Reavers of Harkenwold. I initially started this project on another forum. But after a bit of encouragement and positive response, I've decided to share it here. The first thread of this project can be found here.

Even though I am writing specifically for 4th edition, most of the information here is usable with any version or game system. I don't think I need to explain that, but it seems that people sometimes forget. I hope to convince others that an older edition is still a viable option, no matter which one you prefer. We don't need tools, or support, or permission, if we have the books and the desire to continue enjoying them.

I'd love to have more discussions with those who want to share their ideas and their passion for adventure design, 4th edition, and D&D. Your responses and participation in this thread tell me that there is interest and appreciation for me to continue posting this series.
Introduction

Before I go any further, let me make one thing perfectly clear: I have no qualms about running this adventure as written. It is well written and well designed for what it is. The balance and variety of encounters and challenges make it a fun and exciting experience for everyone. And it shares a lot of the basic elements, plot structures, and design features with another one of my favorite adventures, Red Hand of Doom. Both adventures offer a familiar story line with similar experiences. But Reavers is much more compact. It condenses the same kind of story and adventure that Red Hand does with 5-6 levels in only two. And it does it without feeling rushed or forced. That in itself is impressive to me.

This brings me to what I need from this adventure, and why I want to revise it. Simply put, I want to give my players more story and more adventure. This first campaign arc will become the epic beginning of their own heroic stories. But I also need a stronger connection built into the narrative to set up for the next module that I intend to run. A campaign that feels like an evolving story and keeps the players engaged in what comes next is much better than a string of seemingly random quests, in my opinion. If successful, I will have expanded this adventure without diminishing any of the qualities that I feel make it special. But its going to take more than bigger maps with extra encounters. That's why creating this outline is an important step for me.

Aside from the obvious benefits of being more organized, outlining the adventure will help me stay focused and keep me on track. This is a fairly big project, so it's going to take me some time to finish. An outline serves as a roadmap, showing me where I am, where I want to go, and how I can get there. If I get lost along the way, it'll remind me of important points I made weeks ago or might have forgotten since. The good news is that a lot of the work has already been done for me. If I were creating an adventure from scratch, this would require a lot more thought and planning on my part. But there's still plenty of work for me to do. How much? Let's find out.

Reavers of Harkenwold is organized into two parts, each contained within its own 32-page adventure book. The first half of the adventure takes the characters from 2nd to 3rd level, while the second half is designed to take them from 3rd to 4th level. Following this formula, each character level would require its own 32-page booklet. So if I want to start the characters at 1st level and take them to 6th, then I would need a total of 160 pages. That's 96 more pages than the original adventure, or 150% more content. And I may still need to make some adjustments for those original 64 pages. Sounds intimidating, but I'm not writing to publish a book. Its a D&D campaign, which is measured by a different standard. So let's look at this another way.

The adventure breaks down into five distinct chapters with twenty-two possible encounters. There's an additional encounter at the end of the adventure to be used as an epilogue, but its optional so I'm not counting that. That means eleven encounters for each character level, which is over the expected number needed for a character to gain a level (i.e 8-10 per level). But having adding some extras isn't a bad idea. You can't expect players to find every encounter you place on the map. They might skip an area of a dungeon, ignore clues or quests, or go in a completely different direction than anticipated. Players are like that sometimes. So I will still need 55 encounters, but that's less intimidating than 160 full pages, right? Besides, encounters are easy to make. Especially with 4th Edition.

(Sidebar: This, by the way, is how most of my campaigns are born. I don't have a lot of original material or ideas when it comes to world building or adventure design. That's not my thing. But with all the content and products that I have purchased for my shelves and stored on my hard drives over the last few decades, I don't feel like I should have to. In my experience, players are more interested in playing the game than reading the content. People don't just stop going to theme parks because they've been on all the rides, or stop watching their favorite movies over and over because they know how it ends. As long as the quality is good, and everyone is having fun, no one is going to question whether the ideas are original or fresh. I'm a Game Master, not a writer. There's a good reason for both.)

Part I: The (Original) Adventure Synopsis || Part II: Just Add the Starter Set || Part III: The Revised Synopsis (Part I) || Part IV: Regarding Eladrins, Elves, and Goblins || Part V: TBA

Related Thread Links
========================
Main: Revisiting Reavers of Harkenwold
1: Expanding the Iron Circle || Part I: The Iron Circle || Part II: The Iron Circle (cont.) || Part III: The Fell Court || Part IV: The Ashmadai || Part V: Gardmore Abbey
 
Last edited:

log in or register to remove this ad

Jacob Lewis

Ye Olde GM
Part I: The (Original) Adventure Synopsis
Reavers of Harkenwold (RoH)


It doesn't matter which edition you choose. If you break down an adventure into its most basic and fundamental components, you'll likely end up with a series of encounters and some maps. These are the only pieces you actually need to run a D&D game, and sometimes, even the maps are optional. Everything else surrounding the encounters—the story, the setting, the wandering monster tables, etc.—can be substituted or ignored. Your adventure might not be anything more than a repetitive series of pointless violence and looting, but its still playable for a game. I'm not passing judgment if that is your preferred style of play. There's definitely some merit to it. But if that happens to be your speed, you'll probably be fine skipping this section altogether.

Reavers of Harkenwold has a very simple plot driving an even simpler story: the Iron Circle has taken over the region and the heroes must kick them out. There isn't a whole lot of build up or background included in the write up. The bad guys are already in place, causing trouble and challenging anybody to do something about it. We don't know what they intend to do next, or if they even planned that far ahead. The heroes are essentially answering the call to action, and the module expects they will succeed before anything else takes place.

This is neither a complaint nor a critique of the adventure. As written, it really doesn't need any more than this to work. It is a footnote in the annals of your character's heroic saga. But since I'm revising this to be a major campaign arc, it should become a more significant part of the heroes' story. Thus, it would benefit from adding more depth that the players can actually perceive. First, let's see what the adventure has to offer.

Book 1 gives a synopsis of how the adventure is expected to unfold on page 3. You can read the details for yourself if you have a copy, but here is a brief summary:
  1. The adventurers encounter a band of Iron Circle marauders threatening a farmhouse. After her rescue, the widow directs the heroes to the nearby village of Albridge.
  2. The heroes meet the leaders of the resistance who enlist their help. Players can choose to clean out the a tribe of bullywugs in Toadwallow Caverns, or deal with isolated Iron Circle detachments. The heroes will most likely do both.
  3. The heroes are asked to contact the Woodsinger elves to gain their assistance. Of course, the elves have problems of their own and ask the characters to help them before they can help the rest of Harkenwold. The adventurers must defeat the evil lurking in the catacombs of Dal Nystiere.
  4. As soon as they complete their last mission, the adventurers learn that the Iron Circle is marching to destroy the resistance in Albridge. The heroes help defend against the attack.
  5. And finally, the heroes infiltrate the Iron Keep to drive out the remaining forces and free the Baron. Harkenwold is saved!
The next two pages breaks it down further into five distinct chapters with their corresponding encounters:

Part 1: The Iron Circle
  • Chapter I: Road to Adventure (encounters E1-E3)
  • Chapter II: Opening Salvos (encounters T1-T3, E4)
  • Chapter III: Gathering Allies (encounters D1-D4)
Part 2: The Die Is Cast
  • Chapter IV: Battle of Albridge (encounters B1-B4)
  • Chapter V: Iron Keep (encounters K1-K7, E5)
Now, I know what you're thinking because I thought about it, too. Five chapters for five levels? This adventure is practically writing itself! Yeah, not so fast. Take a closer look and you'll see that all chapters are not created equal.

The first one barely qualifies as a real chapter. It is literally the first encounter that kicks off the adventure and get players moving in the right direction. Then there's two more isolated encounters that don't really fit anywhere else. The players can decide if they want to deal with those other encounters in chapter one, or move on to the bullywug lair in chapter two. Regardless of which path they choose, the players will still be able to complete both options if they want. To me, it makes more sense to condense them all into the first chapter where everything begins.

The rest of the adventure has three different locations with three different scenarios. The first deals with the Woodsinger elves and a delve into the ancient catacombs. Even with the larger map, I don't know if it would be enough to fill up an entire chapter by itself. The other two comprise the second book, signaling an end game of sorts. The players face off against the Iron Circle in a series of climatic confrontations, which makes a fitting final chapter. That still leaves at least two full chapters to flesh out with no more material to use from the original adventure.

So here's the thing. I previously estimated that I would need an average of eleven encounters per level. That doesn't necessarily apply to the narrative structure of chapters. A chapter should frame a distinct part of the story being told, which isn't beholden to levels or other game mechanics. In other words, I don't want an allotment of eleven encounters for bullywugs, eleven more for the catacombs, etc. If I did that, it would mean players would spend an entire level dealing with one thing, and only five specific things for the entire adventure. If not careful, that could come across as boring and tedious to play. Nobody I know would enjoy that for long.

Even though I'm not cutting any parts out of the original adventure, there's still going to be a lot of spaces to fill. As I mentioned before, encounters are easy to build. The tricky part is going to be adding more story, and more maps. But I already know where to start looking.
 

Jacob Lewis

Ye Olde GM
Part II: Just Add the Starter Set
Lost Mine of Phandelver (LMoP, 5th Edition Starter Set)


Anyone that has played 5th Edition Dungeon & Dragons since it came out will likely be familiar with, or at least heard of Lost Mine of Phandelver. It is the introductory adventure that comes with the Starter Set. Before you get any crazy ideas, let me assure you I am not thinking of cramming the two adventures together. But there are a lot of good maps that I can borrow for this adventure. And surprisingly, there are a few other things I can use that will fit very comfortably in Harkenwold.

The maps are really the key here. Not only were they drawn by the same artist (Mike Schley) who did the maps for Reavers of Harkenwold, but they are also available on his website. You can purchase them as a bundle, or individually if you prefer. The digital maps include hi-res versions without labels or grids. Best of all, they are similar in style and color to the ones in this adventure so they look like a complete set. There are seven maps total, and I have found places for five in my revised adventure.

Phandalin. This frontier settlement fills in perfectly for Easthill, a settlement of shepherds and stonecutters on the slopes of the Briar Hills. The village elder is thoroughly cowed by the Iron Circle, but a hunter has quietly stepped up to organize Easthill's fight. This scenario is similar to the one where the heroes need to deal with the bullywugs so the citizens of Tor's Hold can join the resistance. But I am changing one thing.

Redbrand Hideout. The town of Phandalin is dealing with a group of thugs who call themselves the Redbrand Ruffians and are hiding out beneath the ruins of a local manor. This setup works perfectly for Easthill, which is having similar troubles from the Iron Circle. However, I'm making the decision to use the Ashmadai instead. In particular, I will use Favria the dwarf, who leads the more aggressive and straightforward sect of Asmodeus worshippers. This will likely become a significant part of chapter 2 or 3.

Thundertree. Marl was a prosperous thorp until the Iron Circle burned it to the ground. It is now empty except for the dire rats, drakes, and goblins that skulk around the ruins. I don't have any significant plans for Marl in this adventure, but the map of Thundertree will serve in a pinch for a one-off encounter, or if the players decide they want to check it out for themselves. Perhaps the heroes may run into a group from the Fell Court and discover either a potential threat or an ally.

Cragmaw Caves and Cragmaw Castle. These two locations originally served as lairs for a tribe of goblins near Phandalin. In Harkenwold, they will feature goblins again. In case anyone missed it, the skeletal mage of Dal Nystiere is allied with the Daggerburg goblins. As far as I could tell, they were little more than door guards to his chambers in the published adventure. But adding these locations, I can do much more with the Woodsinger elves and make their quest something more substantial. This will be at least a full chapter by itself. I'll describe it in more detail later.

Suddenly, this adventure has gotten a whole lot bigger. There is nothing extraneous that doesn't tie in with something that was already mentioned or hinted at in the original design. In fact, most of the plots and quests from Lost Mine fit easily into Reavers with only minor alterations. Obviously there will need to be some conversions between the different settings and editions. But this one additional adventure from a different edition provides enough resources and inspiration to get this ball rolling. Time to see what our new adventure is going to look like.
 
Last edited:

Jacob Lewis

Ye Olde GM
Part III: The Revised Synopsis (Part I)


There isn't a whole lot I want to change about the adventure. In fact, I intend to keep a lot of the overall structure and designs intact. Those familiar with the original should be able to recognize it as Reavers of Harkenwold, but still be able to experience something new.

The goal of liberating Harkenwold from the Iron Circle remains the central theme, which will drive both the narrative and the players. Many of the existing people, encounters, and events will be the same, but some will receive greater attention and detail. Finally, the sequence of events will likely unfold as expected, but with additional storylines and even greater flexibility.

This is only a first draft so bear in mind that things may change. As such, I'm not too worried about most of the specifics and details at this stage. The finer points will be brought into focus when I begin working more in depth on the individual sections and encounters. For now, I just want to see how many pieces I will need to make everything fit.

========================
Chapter 1 A Call For Heroes (Level 1-2)
The first chapter will be composed of the first and second chapters from the original adventure. Using the expanded map for Toadwallow Caverns, that will fill out most of this chapter. Everything else will mostly be used as written. The only thing addition to this will be an expedition to the ruined village of Marl, which I will explain more below.

Dar Gremath, the rebel leader in Albridge, would be a logical choice to send the party to Marl. He already has them taking direct actions against the Iron Circle. Perhaps he needs them to find some important Intel, or recover supplies in a hidden cache. Whatever the reason, it would make a good diversion for some one-off encounters with random creatures. It will also be a good opportunity for a first encounter with the Fell Court. The party runs into a group of tiefling spies and felldrakes who appear to be scavengers, but the heroes may find clues about who they really are and why they are here.

Once the party has dealt with the bullywug menace, Tor's Hold is free to join the fight. If they participated in any actions against the Iron Circle, the heroes will have likely gained their notice and will be considered a minor threat that needs to be dealt with. The party should reach level 2 before they the next chapter begins.

========================
Chapter 2 The Devil's Bargain (Level 2-3)
This chapter will be the first major deviation from the original adventure. Instead of going straight to the Windsong elves, the party will continue their efforts to free other settlements in Harkenwold from oppression and strengthen their forces. Here I will introduce the Ashmadai and give some details about their involvement with the Iron Circle. I will also introduce some new characters, including a potential long-term villain who is not just another members of the Iron Circle. Changing up the bad guys should add a little more depth, variety, and political intrigue to the overall story.

After freeing the west end of Harkenwold, the characters turn to the east where Dardun and Easthill are held captive by tyranny and fear. Dardun in particular has become a foothold for the Iron Circle. Reavers patrol the village streets and routinely tyrannize Dardun's residents. The heroes will quickly realize that it would be too dangerous for them to openly show any opposition. However, they will soon make unexpected contact with a suspicious tiefling who offers them safe passage. In return, he employs their services to help with a situation in Easthill.

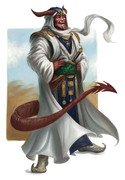
The tiefling is Mordai Vell, a cunning, deceptive, and charming opportunist who only desires power for himself. He is also a leader in a secret cult of Asmodeus worshipers called the Ashmadai. His organization is currently working with the Iron Circle, but the ambitious tiefling is no longer content with their current arrangements. He sees the heroes as a golden opportunity to disrupt the Circle's operations while keeping his own hands clean.

(Sidebar: Mordai Vell is an interesting character and will likely become one of the major villains in my campaign. Not only is he working to quietly undermine his arrangement with the Iron Circle while still supporting their efforts, he is also in contention for control of the Ashmadai. His chief rival, a fanatic dwarf and worshiper of Asmodeus named Favria, is the leader of another sect of Ashmadai. Although the dwarf does not approve of Mordai's methods or share his ambitions, she cannot deny the effectiveness of his abilites. Since the Iron Circle arrived, however, her willingness to cooperate and submit to their leadership has caused Mordai to lose some of his standing within the cult. That is something which he cannot tolerate.

Unlike Favria, Mordai Vell is willing to look outsider the cult of Asmodeus for support when he needs it. He has had successful dealings with the Fell Court in the past, and continues maintaining good relations with his fellow tieflings. Recently, he has convinced their leader, Melech Ambrose, to look into a potential alliance with the Iron Circle who have recently gained a hold in Harkenwold. Mordai is an expert manipulator and opportunist who will use the Fell Court, and anyone else, in a manner that will benefit him the most. The co-leader of the Ashmadai wants power for himself, and is willing to play this dangerous game. It just happens to be a game for which he is an accomplished master. )


The village of Easthill has been plagued by a cult of devil worshipers who call themselves the Ashmadai. The group, led by a fanatic dwarf named Favria, has thoroughly cowed the village elder and kidnapped a hunter named Adalbar. Adalbar had been quietly organizing the citizens for a fight, but now no one is there to lead them. The Ashmadai have established a defensible stronghold in the ruins of an old manor overlooking the town. Now there are reports that they have been abducting the locals for their infernal rituals and sacrifices. Mordai, who poses as a trader and business investor in Dardun, has financial interests with Easthill's quarry. He will show concern for his associates and contacts, if needed, but he feels that a substantial reward is the best way to gauge their moral compasses. After all, he may need new recruits to replenish the ranks soon.

What Mordai doesn't tell the heroes is that the Iron Circle put the Ashmadai there to keep the locals distracted from what is happening elsewhere. Favria was content to oblige seeing it as an opportunity to operate in the open for a change, something that Mordai avoids at all possible costs. Mordai hopes that the heroes will deal with his rival, or at least drive her away. Either way, the Iron Circle will see that their confidence was misplaced in her and that he was the better (now only) option. Of course, if the characters are defeated, it is no skin off his tail.

Regardless of the outcome, Mordai disappears without a trace. Instead of a reward, the characters find an ambush by members of the Fell Court who have grown suspicious of their recent activities. In truth, Mordai had tipped off the Fell Court who are now looking for adventurers fitting their description after an incident in Marl. If the party survives the encounter, they may run into Mordai again. What happens then depends on what the party suspects, what they can prove, and what Mordai believes he can get away with.

And in case you're wondering, the tiefling has multiple alibis and contingencies to avoid suspicion from every side. If the Iron Circle suspects that he hired the adventurers to disrupt their plans, Mordai will point to an imposter within the Fell Court. Or if Favria survives and suspects that the tiefling was responsible for sending the party against her, he'll likely shrug and call it a test from Asmodeus, which he will also point out that she passed. Mordai Vell will be a hard target to pin down, and even then he still has a few tricks up his sleeve.
 
Last edited:

Jacob Lewis

Ye Olde GM
Part IV: Regarding Eladrins, Elves, and Goblins


In the third chapter of the published adventure, the heroes seek help from the Woodsinger elves of Harken Forest. In order to gain their assistance, however, the party must deal with Yisarn, a cursed skeletal mage who is (presumably) trapped inside the ruins of Dal Nystiere. It sounds like a tall order, but the whole scenario plays out in only four encounters. In the first encounter, the adventurers meet the elves and given their instructions for completing the quest. Then the characters arrive at the entrance to the catacombs and fight some monsters. Then they enter the catacombs and fight more monsters. Then they enter the next room where they encounter Yisarn and... fight the monsters. Once the party defeats the monsters, they return to the elves who pledge to join the fight against the Iron Circle.

That is really all there is to say about this scenario, which is to say you don't want to overthink it. As written, it works adequately for an abridged version of this adventure. It was, in my opinion, an interesting concept that didn't have enough print space to give it the attention it deserved. But that's no longer an issue here. Without any limitations for space to write, I should be able to significantly expand and improve on this chapter. I just need more content to fill in all the extra space. Surprisingly, I found the first part of what I needed in the next adventure I planned to run, and the other parts in adventures that I have run before. And each one is from a different edition of D&D.

========================
The Knight of Mithrendain (Madness at Gardmore Abbey, 4e)
Madness at Gardmore Abbey introduces a large number of options for getting characters started. Using a variety of quests and patrons, DMs can weave hooks into their campaigns and move parties smoothly into this adventure. One of the minor patrons, Eriyel of the Woodsinger elves, provides a direct hook for characters that have already played through Reavers of Harkenwold. Her quest will lead the party to one of the three major patrons in Gardmore Abbey, Berrian Velfarren the eladrin knight

According to the adventure, Berrian Velfarren left his home city of Mithrendain with his sister Analastra to search for their long-vanished father. Accompanied by a small group of retainers, they have scoured the Feywild and the world alike to find traces of their father's passing. Their journey would eventually lead them to Gardmore Abbey, but not before they visited the Woodsinger clans in Harkenwold. In this adventure as written, it is assumed that the eladrin visited the elves in Harken Forest before the heroes did, presumably passing through without incident. So what if the eladrin were there at the same time and things weren't so uneventful for them? And here is the first hook!

1.When the heroes travel to meet the Woodsinger elves, the eladrin will be present to add something more to this adventure while planting seeds for the next one.

========================
The Song of the Elves (Red Hand of Doom, 3/3.5e)
The elves of Harkenwold barely register as a footnote in their own adventure. They meet the heroes, give them a quest, wait for them to come back, and agree to join the fight against the Iron Circle. There's no stats for any of the elves, by the way, because they don't actually join any of the battles that are directly involved with the players. They're more of the "in-the-background/off-camera/behind-the-scenes" variety of support (unless the DM gets creative and goes off-script). Given the amount of space for print available, and the overall pace of the adventure, it is to be expected that the elves would not have a more proactive role in the story.

The real tragedy here is that this episode could have done so much more with the elves. Granted, it might not have been the best idea to use up more print space with extraneous details and descriptions when the characters are not expected to spend more than a minute with the clans. But if I could come up with some original material to further flesh out the elven camp and some of its people, I may be able to do something more with the scenario. Maybe even give the players a temporary base of operations to do more in Harken Forest. And if I had an example of an elf camp with similar themes that I could readily borrow from, that would help make things easier on me.

I mentioned before that this adventure was similar to another one called Red Hand of Doom. One of the optional goals for the characters in that adventure is to forge an alliance with a local tribe of elves who call themselves the Tiri Kitor. In order to forge an alliance, the heroes must perform several tasks to aid the elves and make good impressions on several key and influential tribe members. Sounds familiar, doesn't it? So not only do I have some detailed NPCs I can probably use here with little modifications, I also have a number of ideas I can use for quests and interactions for this one. Hook number two!

2. The heroes will have much more to do to win the elves over, and will have more opportunities to interact with them while immersing themselves further into the setting.

(Sidebar: Mike Schley also did most of the maps for this adventure, too. And, of course, you can purchase them as a bundle from his website. I won't personally use them for this adventure, however, because they don't match the map styles and colors of the other maps I'm already using.)

========================
A Cragmaw Goblin in Daggerburg (Lost Mines of Phandelver, 5e)
Like almost everything else in Reavers of Harkenwold, there are not a lot of details regarding Yisarn, the undead wizard, and its alliance with the Daggerburg goblins. Bits and pieces of information are scattered in different places for the keen-eyed reader to try and puzzle together. There's some very interesting tidbits, too, like a full set of dragon bones that Yisarn plans to animate to create a skeletal black dragon servant. It's a safe bet to assume that I will be using that somehow! But right now, I want to focus on the goblins because they didn't get a big role in this. And there is a lot of potential to utilize them more than what they're doing now. Let's see what the adventure says about who they are and what they're doing with Yisarn.

Dal Nystiere is the domain of Yisarn who has ill plans for the Nentir Vale. The skeletal mage joined forces with a group of Daggerburg goblins in an effort to expel the Woodsinger elves from the Harken Forest. Snilvor, a goblin emissary, and his entourage have come to pay homage to Yisarn and secure three map scrolls. Each scroll is a map showing the location and layout of an elven crypt in the Harken Forest. The Daggerburg goblins intend to ransack these "lost crypts" to fatten their coffers and demoralize the Woodsinger elves.

Ok. Well, I don't find that inspiring to me. Plus, the minute I put a map with the juicy words "lost crypts" into the hands of the player characters, there is a very high possibility that they'll take that as an invitation to find these hidden vaults full of treasure and go tomb raiding. You know I'm not wrong on this! And even if I were to indulge this idea for my players, it would take them too far from the main theme of the adventure they should have their attention. Then all this work will have been for naught and I'll need to throw something else together, which I'm not ready to do at the moment. So let me rethink this and see if I can come up with something else. I'll start by re-examining the relationship between the goblin and Yisarn.

The alliance between the goblins and the undead wizard makes sense to me because they both share a common goal: they want to get rid of the elves from the forest. The Daggerburg goblins are described in greater detail in the Monster Vault: Threats of the Nentir Vale supplement, but I don't want to start diving too deep there unless the goblins are going to play a bigger part in the campaign. For now, all I need to know is that they are part of a larger organization that operates in the area and that a small group are working in Harken Forest with the undead mage.

It's most likely that they are serving Yisarn's needs not out of fear or respect, as one might expect lowly goblins to do, but out of mutual benefit. They have something to gain by working with the undead wizard, and vice versa. Yisarn, on the other hand, must have a good reason to rely on goblins for anything. My best assumption is that Yisarn is either unable or unwilling to leave the catacombs, and thus employs the goblins to do things outside of his sanctuary that the undead creature cannot. Whatever the arrangement is between them, it is likely built on a foundation of convenience and having shared goals. But there is no reason to believe that their alliance will hold up if one side stands to lose something more than they could possibly gain. Loyalty is only to themselves.

So if Yisarn is doing something down in the catacombs, like creating a skeletal dragon or whatever, then what could the goblins be doing on elsewhere? Well for starters, I have two maps from Lost Mines of Phandelver where goblins were doing a few things in that adventure. First, they were ambushing travelers on the road and taking prisoners and loot to a cave nearby. The more important individuals and treasures were then transported to another location where more goblins and their masters had set up their lair. And of course, they were all taking orders from a "secret villain" behind the scenes. Everything can be translated easily from that adventure using the same basic plot outline and replacing key characters with those appearing in this adventure. Which gives us hook number three!

3. The Daggerburg goblins are operating from a hidden location in Harken Forest, assailing travelers and elves in the area. When the party stumbles into an ambushed, they track down the goblins and discover a cave nearby where survivors from a band of eladrin are held captive.

========================
I'll give a more detailed outline in the next section, but you should already see where this is going if you're familiar with the adventure from the Starter Set (5e). And there's still Yisarn and its machinations to deal with deep inside the catacombs of Dal Nystiere to deal with. How is the undead wizard connected to all of this, and why will the players need to deal with him? I'll discuss that when I continue the revised synopsis below.
 
Last edited:


Remove ads

Top