• The VOIDRUNNER'S CODEX is LIVE! Explore new worlds, fight oppressive empires, fend off fearsome aliens, and wield deadly psionics with this comprehensive boxed set expansion for 5E and A5E!

Coolest. Gaming Set-up. Evar.

BruntFCA

First Post
Hi Steel,

I got the monsters to re-size using the "tail" trick no problem. However I've mad several posts over on the NWN forums about *placeable* scaling. Most people think its not easy to do.

I looked for an MDL ascii converter, the guy that made it has vanished...along with the tool. There's also some resizer app, but this needs to ascii version of the file, and although he's not vanished, the tool has not been updates for years, not even sure if it works.

I also did a search on the NWN directories for MDL files expecting to find 100s. There's only about 30 or so tiny files. Have they packed the MDL files into some sort of cab or something?

In a nutshell you sound very experienced with the toolset. As someone coming to this new, maybe a lot of the things you take for granted are not as easy as it appears. Certainly many of the tools of been discontinued. Do you have any copies of the tools you use; as this may be the only way for people to get them now.

I've also been playing with NWN2 toolset. I've had a lot more luck since resizing anything is very easy. The only touble there is getting tilest versions with the annoying ceilings removed. These ruin the way a map looks top down.

Still I'd like to continue playing also with NWN if I can, since it's so easy to "carve" out dungeons as it were, as opposed to having to "lay tiles" as in NWN2. However, without some help or current working tools to re-scale the placeables it looks as if NWN could be a dead end for most people.

My efforts in NWN2 are coming along nicely however, I will likely start a new thread once I have enough to show for it. Cheers.

B
 

log in or register to remove this ad

Steel_Wind

Legend
Hi Steel,

I got the monsters to re-size using the "tail" trick no problem. However I've mad several posts over on the NWN forums about *placeable* scaling. Most people think its not easy to do.

My mod team (DLA) was contracted by BioWare to create most of the art content for their NWN Premium module series. So yeah, I'm pretty familiar with the system - or was - I should say. It's been nearly 4 years since Wyvern Crown of Cormyr was released.

The model files (and virtually everything else of use) are contained in the BioWare Information Files - or .bif archives. Yes - they are in a .cab / .pak or other archive file in other games. In this case - it's a ".bif"

You extract the placeable model files in binary format out of the bifs and convert to ascii format using NWNExplorer. The utility is available on NWVault. Here's a link to a version of it.

The original author of NWNExplorer, Torlack (Tim Smith), is no longer part of the community as he works for BioWare as part of BioWare's tools development team. Robious, (Gareth Hughes) who tweaked several aspects in the original tool is also no longer part of the community. He's one of the principal coders behind all graphics driver code at NVidia.

If you try a version of NWNExplorer - you'll find it works fine.

In any event, there is no need to convert the file back to binary from ascii. The game loads an ascii mdl file just fine. Binary is a little more memory and processor friendly - but with the changes in hardware since the original design of the Aurora engine - you won't notice the difference. At all. (Indeed, even in 2002, it was pretty hard to notice the difference)

There was a rescaler for creatures initially that would work for placeable purposes (not the tail trick - we added that trick towards the end of the patches for NWN around 1.67/68 or so.) Before that - you used an util to rescale the mdl geometry. We generally used NWMax but that can be a little intimidating to noobs.

Try this instead: MDL Scaler
 
Last edited:


Aloïsius

First Post
LED TV panels are becoming more and more affordable, and they are way thinner than classical LCD or plasma... Sure, they are still 50 to 80% more expensive than classical LCD, but you can find some 40' LED screen for less than 700€ (or $).
 

Hague

First Post
I checked it out, that peg-board that people use for hanging tools on is exactly mapped out into one inch squares. A large sheet of that makes a great imaging surface and it's already got squares. Comes in 4 x 8 sheets. Glue it to your plywood set up.
 

This is an awesome thread!

I'm wondering if anyone has any experience with something like this? Seems to me that the portability and mounting issues could be instantly solved with some duct tape?


OnlineDM

Adventurer
So, I'm working on a projector rig myself right now (details in this thread here on EN World as well as on my blog), and while I'm currently working on a tripod approach that I can take to my local store and to conventions, I'm also interested in the single-pole approach. My big question is, how would I actually mount the projector to the pole?

I like the idea of a heavy steel plate that sits in front of the GM (clamped to the table), with a heavy pipe coming up out of it, and the projector mounted to the top of that pipe. But how would I do the mounting?
 
Last edited:

JDragon

Explorer
So, I'm working on a projector rig myself right now (details in this thread here on EN World as well as on my blog), and while I'm currently working on a tripod approach that I can take to my local store and to conventions, I'm also interested in the single-pole approach. My big question is, how would I actually mount the projector to the pole?

I like the idea of a heavy steel plate that sits in front of the GM (clamped to the table), with a heavy pipe coming up out of it, and the projector mounted to the top of that pipe. But how would I do the mounting?

Take a look at the bottom of your projector, if its designed to be mounted it will have several (3-4) threaded holes in the bottom. Check your owners guide for screw/thread size that you will need to work with your projector. Make sure the bolts you get are not to long as they could go to far in to the projector and cause problems.

Their are mounts that are available for ceiling mounting etc. However with your set up I would suggest you build a custom mount.

For my ceiling mount I built a rig out of aircraft grade alum i got at my local home depot. Its a square frame with holes drilled to fit the mounting holes in my projector. I have spacers between the mount and the projector to help with airflow. For my set up I have a bar attached to the frame that my mirror is mounted to. To connect mine to the ceiling I have large lag bolts coming through the ceiling that go through the mount.

For your set up I would do the pole like you are talking about. Then build a frame like I mentioned above and then look for hardware that will allow you to connect that frame to your pole. Preferably in a way that you can adjust height as needed. You will probably want to build in some spacers like i did to have a little space between the parts to allow you to work and for airflow. Just remember what I mentioned about the issues with heat rising up through the projector with that lens down set up.

Hope this made sense and helps, if you want to see pics let me know and I'll see what i can get for ya.
 

FoxWander

Adventurer
You can't see a 30 lumen projector image with the lights on.

You can't see your dice, character sheet or notes with the lights off.

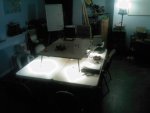
So how do you figure out how many lumens you need? My game setup (see pic) gives us plenty of reading light below the map, but can be fairly dim above. I would think we don't need a really bright projector to give us good results- but how do you figure out how bright is bright enough?
 

Attachments

  • Game setup.jpg
    Game setup.jpg
    69.6 KB · Views: 220

Voidrunner's Codex

Remove ads

Top