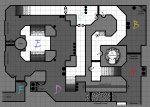
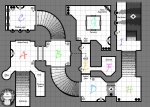
D&D 5E Fire and Water: Designing themed dungeons


log in or register to remove this ad

Quickleaf

Legend
[MENTION=6801286]Imaculata[/MENTION] I put a link to your design thread in my own :) I really like how your gradient on the stairs communicates up/down directionality, and how you illustrate various winches/gears that open the gates. Really makes reading the map easier and more interesting!
 

@Imaculata I put a link to your design thread in my own :) I really like how your gradient on the stairs communicates up/down directionality, and how you illustrate various winches/gears that open the gates. Really makes reading the map easier and more interesting!

Why thank you. The actual drawing of the map is something I hadn't really discussed yet, but I might later on, because it is worthy of discussion.

I think there's something to be said for showing off the lock before PC's have access to the key. I don't think that means that you necessarily prevent a clear group of players from bypassing the lock from time to time, but setting up a situation that says "this is where we need to go, let's go find out how to get there" is a way to establish, early on, a tangible short-term goal for the adventure. Even better if the discovery of the key creates recognition of the door, especially in cases where the "key" is a bit (or very) non-standard.

I wrote an adventure a long time ago, where the players encountered a huge set of doors that could only be opened with a mechanism, that was missing a gear. They also found a forge nearby, with various molds for gears. I made it clear that they needed to create a new gear from scratch by using a mold from the forge. You could say the key was hidden, and they had to make their own key. That is one way to mix up the classic door and key scenario.

Take the above-mentioned steam-locked door. If the release valve is found near or even in the same "room" as the door, then you can't really call that a key; functionally, it becomes no different than a door knob. If the release valve is located elsewhere, there needs to be some way to connect its function as a key to the door that's being locked.

Something I was pondering just now, is that maybe the valve in room D is missing its handle, and its on the other side of the hot steam, about 20 ft. away from them. This would add yet another way for them to possibly open the door, if they are smart and can figure out a way to get the valve handle over to them.

And then, of course, some smart:):):) PC might try something you hadn't anticipated (or maybe you had), and it would totally work, ruining all your hard work designing the key detour. That's simple enough; you just reward the cleverness by letting it work. Bypassing those kinds of challenges is their own reward.

Yes, my players have a habit of constructing a 20 ft. pole out of what ever they carry with them, or they'll just cast Protection from Fire and walk through the steam. Which is why I make sure that not a whole lot of the dungeon is behind that steam-locked door. If they skip it, thats fine.
 
Last edited:

2 - Dungeon side views

SaltMap.jpg

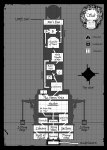
If your dungeon is more vertical than horizontal, a topdown perspective might not be the most efficient way to illustrate the dungeon. Since part of this adventure takes place in a tower, I also made a side view to better illustrate the various important locations.

You may have noticed that the rooms here are not drawn to represent the actual shape or looks of the rooms, but are merely a rough indication of their size and location. This map covers a very large structure, and so the map is not to scale. It is meant to illustrate just the lay out of the tower.

I've marked elevators with an elevator-icon, as well as locked doors and doors that require Beler's Key. Beler was the Oarsman who originally constructed the tower, and now only the high priestess carries his key... but Beler was also buried with one of these keys. The Beler key gives access to special rooms that are off limits to normal visitors. Unfortunately the High Priestess has been murdered, and replaced by a monster that has assumed her shape. The bad guys now have one of the Beler Keys, giving them access to the Underhaven.

Note that the Underhaven (the dungeon) is all the way at the bottom. At the top of the tower is Mor's Eye, a powerful lens that is used to evaporate salt water and create drinking water. But with enough lenses this feature can be turned into a powerful naval weapon that can scorch enemy ships from afar. This is what the bad guys are worried about. They do not want it to fall into the hands of the players.

3a- Narrative and enemies

If you tie the dungeon to a narrative, then this can greatly help you pick enemies and come up with rooms for your dungeon. One of the things a DM should always ask himself is, why are my monsters in this dungeon? What is their motivation? What are they trying to achieve? If the dungeon is their home or base of operations, then the dungeon probably facilitates all their basic needs. There will be food supplies, a kitchen, barracks, a privy, a weapon storage, maybe stables. But if the monsters are invading the dungeon, then perhaps they are trying to reach a certain room, which could also line up with the goals of the players.

So who are the main villains in this story, and what are they trying to achieve? And what effect does this have on the theming of your monsters?

Hydra
(Not to be confused with the multi-headed beast, nor with the evil organisation from Avengers)

Theme: Aquatic/Corruption/Cold/The Deep/Undead

hydra.jpg

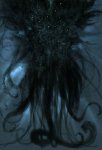
Hydra is a Lovecraftian horror from the depths, that sends its living ships to the surface to conquer the world of the living. It is in open battle with the established pantheon of gods, and because of this it cannot manifest itself on their world. The Oarsmen enchanted the tower on the island of Salt with ancient dwarven runes that prevent Hydra nor any of its minions from entering. This gives Hydra a goal. It wants those runes destroyed, and the tower to be conquered. Hydra also considers the players its enemy, and seeks to destroy them and their allies. For this purpose it has devised a devious plan to lure a fleet of allies of the players to Salt, where they can be ambushed by Hydra's forces from the depths. But for this to work, the tower must first be taken out of the equation. Hydra considers the tower a too powerful weapon to fall into the hands of the players. Like a master chess player, it is making its first powerful move. Hydra's minions consist of living ships, twisted sea creatures, corrupted beings and abominations. Hydra corrupts those who serve it, and makes them into powerful monsters.

Teehlyian'tara
(Lady of the Flesh)

Theme:Vermin/Insects/Deformation/Infestation/Flesh

This lesser deity is also known as the vermin goddess. Teehlyian'tara is not as powerful as Hydra, nor any of the gods, but unlike them it does not posses a physical form. Teehlyian'tara relies on human hosts (also called vessels) to serve as her avatar and to manifest herself. Her lack of physical form is both a weakness and a strength. She cannot fight the other gods directly, but she is also very hard to exterminate, because she divides herself amongst her many minions... as one would expect from a vermin goddess. What makes Teehlyian'tara especially dangerous, is that like a cockroach she can circumvent magical protection and infest anything. She allies herself with other more powerful evil beings and helps them make their grab for power. Teehlyian'tara is fine with being in the shadows, working silently to erode the power of the gods, so Hydra can conquer all. Her minions all embody vermin traits. They are either vermin themselves, or are corrupted humanoids infested with vermin. Hydra cannot enter the tower, but Teehlyian'tara's minions can! Hydra's forces can help get her minions to the Underhaven. Once they are inside, they need only deal with the magical runes, and allow Hydra's forces to enter.

3b- Selecting enemies

With the motivations of the villains out of the way, we can now select enemies that fit the army of those villains. The invading force will be minions of the vermin goddess, so they should be vermin, or have vermin traits. Usually we also want to make sure that the enemies are a tough but fair challenge. We'll be spamming multiple of these, so their Challenge Rating should be equal or slightly lower than the level of the party. Keep in mind that a Challenge Rating only serves as a rough guideline for making a fair fight; in other words, a fight that will not completely decimate the party.

However, a fair fight is not exactly our goal. So to that end, we'll start of with some small numbers, and then increment the amount of enemies as they go deeper into the dungeon. We'll also throw in some tougher enemies that will raise the CR beyond what is fair. Why? Because they are level 12, and fights should be tough by now. Plus I know from experience the strength of the party, and I know that they can handle enemies that are 2 CR's above their level. So if I throw a CR 14 monster at them, they should be fine. But I don't want them to be fine, so we'll make it even harder. As a DM you can always test the water a little, by throwing smaller amounts of an enemy at the party early in the dungeon, and then gradually ramping things up. Don't lock yourself down to what ever monster numbers you originally planned. Adapt the numbers according to how easily the party seems to defeat the enemies.

leechwalker.jpg
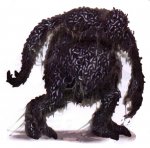
Leechwalker

There's only just one Monster Manual out for 5th edition right now, so you may feel a little limited in your choice of monsters. But you can also create your own monsters by using existing monsters as a template and adapting them.Or you can plunder the wealth of resources from older editions, and adapt those monsters to 5th edition. Quickleaf wrote an excellent article on adapting monsters, which I don't think I need to repeat. I fortunately have around 10 different books to plunder for monsters, so I went with this beauty.

The Leechwalker has low armor and a medium amount of hitpoints (which the players can easily knock away in one or two rounds at this level). But it also has wounding properties, high attack, and it drains constitution. It relies heavily on grab attacks. So to use this monster to its full capacity, it needs to be able to ambush the players, and it must always have backup. If the players encounter just one of these, that is no challenge what so ever. It is important to always thoroughly read the stats and abilities of your monsters. Don't let yourself be surprised mid-session by the strength or weakness of the monsters that you've picked. If the monsters have special immunities, make sure your players are equipped to deal with those immunities. If the monster has things it is really good at, be sure to make liberal use of that. This monster in particular is all about ambushes, so we want it to drop from the ceiling, crawl underneath things, or attack from a cloud of steam that hides it from sight.

Variants

I'm planning to use groups of these creatures, so I may want to create variants of them for diversity sake. Maybe one with better armor and more hitpoints (a brute), a suicide version (that explodes and sprays leeches everywhere) or one that spits leeches (a ranged enemy). These changes require minimal work, yet spice up the combat a lot.

Skulking Cyst

skulkingcyst.jpg

The Skulking Cyst is a CR 4 monster, which is way too low for my level 12 party. But I was looking for an enemy similar to the nasty enemies in Dark Souls that drop from the ceiling on top of the player. I think I'll beef up the attack/grapple stats and hitpoints of this monster. It doesn't have to last long, it just needs to succeed in grappling a player and drain them. I want my players to become very paranoid about ambushes from every direction.

Siege Crab

hugecrab.jpg

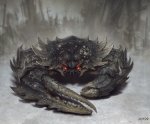
The Siege Crab is an enemy that can carry up to 4 medium sized creatures in its body. This creature will be one of Hydra's minions, and will aid the other monsters in breaching the Underhaven. It will make for an excellent boss fight, because it is a CR 14 monster. It has insane armor, 4 attacks, lots of hitpoints, and does a ton of damage. This thing is going to hurt them a lot. Its also going to be supported by more ground troops, skewing the battle vastly against the players. I'll probably try and come up with multiple goals for the players, and maybe add some ways for them to equal the playing field. Note that normally you would not want to make the fight this tough, but I'm simply adjusting for the power of the party.
 
Last edited:

4 - Boss Battles

In this next session of the dungeon we're going to throw a mid-boss battle at the players. The players won't be expecting a tough fight this early in the dungeon, but I suspect that my players will spend enough time in the first section that this feels about right. We've also introduced various concepts in the previous section that we can now put into practice.

The mid-boss here is the avatar of Teehlyian'tara, who has possessed the body of an npc. The avatar will grant the npc vastly increased powers, vermin-traits and special abilities that the npc wouldn't normally have. The npc will have a bonus to their armor class due to the swarm of insects surrounding the npc, along with a high regeneration, and a permanent swarm-aura that harms adjacent enemies. The npc will also have a whole lot of evil spells that will really hurt the players. On top of that, the boss has Leech Walker minions as well. The players could very well die here, so it will all be up to how they play. No more playing mister nice-DM.

UnderHaven2b.jpg

A - Flooded room
The players arrive in the bottom right corner, an area connected to the last room in the previous section. The room is flooded, and the water is deep enough to swim in. This will severely reduce the movement speed of the players, plus monsters can easily lie in wait below the murky surface. There's a corridor to the left that has collapsed. Using spells the players may be able to tunnel their way through, but it is unlikely they will do that. The collapsed corridor is mostly there because it makes sense for there to be a direct connection to the main boiler room (D and E), but I blocked it off because I want the path to twist and turn a bit. There's a secret sewage pipe that also leads directly to room D, if the players are willing to swim through such a tight space. Players often consider swimming sections a big risk, because they don't know when they'll be able to come up for air. But that's what makes it an interesting choice. There's a staircase up to an upper level, but the floodgate at the top is closed, and a high strength check is required to turn the valve. Higher ground offers an obvious advantage here. To the north is a partially closed gate (the gate will be stuck on something), which the players can swim underneath to reach the next room.

B - Pump room
I really like the aesthetic of this curved walkway overlooking a large room. It also is a perfect spot to place ranged enemies. The room is a dead end if the players came in through the water, but they can easily climb up to the balcony if they choose. There are also pump controls here that allow the players to drain the water from the dungeon. This would take the movement penalty out of the equation.

C - Pipe room
This room connects two walkways via two doors, with some pipes in the middle for cover. Hot steam flows through these pipes, and I was thinking of having a monster take a swipe at the pipes to spray hot steam into the room. This would be a clever way to let the players know that they can do the same. Since this room has two normal doors, the players can listen in on the conversations going on in room E, and learn what the plans of the villain are. This also gives them time to prepare for a big fight.

D - Boiler room corner
The players can sneak into this corner of the boiler room via the secret sewer pipe in room A, but they can also reach it from the walkway from room C (but then they'll be in full view of the villain in the middle of room E). There are a set of valves here in the corner, that the players could use to overload the boiler, if they have knowledge of engineering. This would do a lot of damage to the bad guys, and make the fight a bit easier.

E - Boiler room
This large room is where the mid-boss battle will take place (we're saving those siege crabs for later!). The avatar of Teehlyian'tara is commanding her minions to smash the protective magical Oarsmen runes on the wall with pickaxes. Once the enemies are aware of the players, they will all turn their attention to them instead. The players may be able to surprise the villains depending on their approach. The boiler and all of the pipes in this room, are all possible targets for destruction. The boiler will explode if enough damage is done to it (or if the valves in room D are used). All of the pipes in this room will spray hot steam when struck by attacks, which is a danger to both the players and the monsters. The boss is not going to stay in front of the boiler, so the players will need to exploit the moment, or face a tough fight.

F - Exit to harbor
This corridor continues into the third and last section of the dungeon, which we'll discuss later.

5 - Designing a boss room

When designing a boss room, you always want to be weary of having too much symmetry. If the room is a perfect mirror image on both sides, then visually that is rather boring. So what I did here is only add symmetry to the middle podium. The lower right of the room continues into a side room, while the walkways cover only the upper right corner of the room.

Another thing to pay attention to, is to provide enough angles of attack and space for the players and enemies to move around in. How wide do you make the walkways? If they are 5ft. wide, then the players and monsters are forced to move in a line. But if you make it 10ft. wide, then two characters can stand side by side to defend it. Multiple entry points into the boss room are also more interesting than a single entrance, as long as there are notable differences between them. In this case, one provides higher ground, while another provides stealth and close proximity to the boiler controls.

Having a large room for a boss fight is a given, but by adding staircases and places of cover, you are giving the players an opportunity to form a strategy. I've decided to also make most of this room flooded with water, as I did with the rest of this section of the dungeon. This means that the choice of the players to drain (or not drain) the water in room B will also seriously affect the boss fight.

Lastly there's several interactive elements. The boiler room is a central strategic element that the players can exploit to do damage to the boss and her minions. Various pipes provide minor cover, and can spray steam on the players or on the monsters if damaged. Interactive elements aren't a requirement for a good boss fight, but they certainly make your battle environment more interesting. Just be careful not to make them required to beating the boss, that would be railroading. The players will feel rewarded if they figure out these clever tricks by themselves.

6 - Player boss strategies

Since we already introduced hot steam and steam pressure, it makes sense to provide the players with a destructable environment that encourages clever use of said steam. But like I said, these are just options. I don't want to push my players into any specific strategy, that is all up to them. A good boss fight gives the players lots of options to form their own plan with. That is why there are walkways in the room that allow the players to funnel some of the melee enemies and limit the angles of attack against them. There's also plenty of cover, which is important against a spellcasting opponent. Various pipes in the room are positioned in such a way that the players could hit them on purpose to spray their enemies with steam.

7 - Boss behavior

The boss has a couple of minions to prevent the players from easily getting into close combat with her. I'll probably also throw in some of the exploding variants of the Leechwalker, to keep the players at bay. The avatar is primarily a spellcaster, so she really doesn't want to get into close combat with the players. Her insect swarm aura automatically subjects adjacent enemies to the effects of a swarm, to discourage them from getting close.

Attacks and spells
Her attacks consist mainly of evil spells (some of which death spells, and some protective spells as well), and a fear ability that can stun her enemies. If the boss is already aware of the players before they enter the room, it makes sense for her to have precasted several of her protective spells already (which the players will want to dispell). If the players use stealth however, she probably has not casted those spells yet, and they can fight her without those protections in place.

Lair actions / Legendary actions
For a boss like this, it makes sense to also give her a lair-action and/or legendary actions; a cool special ability that makes sense for the creature or its environment. Legendary actions are specifically meant to make a boss a tough and scary opponent. You can take inspiration from existing monsters in the Monster Manual, and copy or adapt the Legendary Actions they have. Given that this boss is the avatar of a vermin goddess, she can probably dematerialize into a swarm of insects, and rematerialize somewhere else. This also supports her inclination to avoid close combat.

When the fight seems lost
The boss knows that she could get backup at any time, so if it seems that she is fighting a losing battle, she will attempt to flee to get backup. She may be overconfident, but she is not stupid. She can try to dematerialize into insects and escape through corridor F by crawling underneath the gate without opening it. But just because she tries, does not mean she is guaranteed to succeed. As a DM you want to be careful not to script some sort of inevitable escape for your villains. Thats railroading, and negates your players choices. Never pit your players against a villain, unless you are prepared to let that villain die. In the case of this boss, she is totally expendable, but she will make a decent attempt to save her own skin.
 
Last edited:

Sacrosanct

Legend
A TON of good info in this thread. Also, (and I hope I didn't miss this brought up already), using a theme like water adds so many neat ideas like the mentioned steam locks. In addition, you can have traps, doors, etc all built around the properties of water--fluid and self leveling. Think of things like that old quiz where you have a 3 gallon container and a 5 gallon container but need exactly 1 gallon, etc. Or a locking mechanism that relies on setting up a series of pots that are connected, and you have to fill them in a certain order by opening switches. That kind of stuff.
 

8 - Ending a dungeon

Eventually all good things must come to an end, and dungeons are no different. But how do you stick a satisfying ending to a dungeon? Well, the most obvious way would be a boss battle, but we've already discussed one of those. Maybe just a big battle with lots of baddies can be just as entertaining? Or maybe a big discovery or plot revelation? I think it helps if there are things at stake.

In this dungeon the stakes are really high.

-We have an avatar of Teehlyian'tara who may or may not have escaped into this room.
-We have an army trying to invade the tower and bring in reinforcements using their siege crabs. The players will want to prevent that.
-We have two flood gates that prevent the siege crabs from entering (for the time being), and controls to open those flood gates.
-We have waves of enemies that will close in on the players.
-And we have a secret weapon that the bad guys want to bring in.


Now in order to clearly communicate the various objectives to the players, I have decided that one siege crab will have already breached one of the gates. This also ensures a decent challenge, regardless of whether the avatar is still alive. One of the players will want to rush to the other gate controls, and prevent the bad guys from opening that gate as well. There's a special weapon on the way, so that adds a time component to this scene, and the players will want to close the gate that is already open ASAP. Both gate controls will be guarded, but we'll also throw in some interactive stuff to help the players out.

Key elements to this part of the dungeon are once again water, height differences, interactive environment elements, combined with multiple objectives. Steam pipes are included again, but there are less of them, so the players will have to rely more on other things to beat this fight. Flooding of the entire harbor is also a thing they need to watch out for. There are way more access points for the enemies to exploit to reach the players: Two ladders, two staircases, and one elevator. So they'll probably want to split up to cover all these angles.

UnderHaven3.jpg

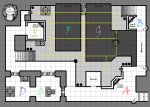
A - Crane controls
The players start out on higher ground, looking down on the moon pool of the harbor. There are two pools of water (F and G), each with their own gate. The controls operate a giant steam powered mechanical crane (indicated by a crane icon) that travels across the tracks indicated with yellow lines. The crane has a maximum speed of 60ft. per round. The crane can lift heavy stuff and drop them on top of enemies, or it could even lift up one of the siege crabs, if the players think of that. There's also a nearby cargo elevator which is currently located at the top, but the bad guys could call it down. The players could use the elevator for some obscure plan, and it adds an extra path to the players for the enemies.

B - Gate B controls
These controls can close the gate to pool G, which has already been breached by a siege crab. To reach this location, the players can cross the bridge between A and B, which can be lifted up and down with a nearby valve, which could prove useful if enemies try to cross the bridge.

C - Warehouse
This warehouse contains cannonballs and gunpowder kegs. The players could make use of these during the battle. A walkway goes around the warehouse, and I've drawn the gray outlines of the harbor to show that there is space underneath the walkways. These walkways could also be smashed by the siege crabs, and the siege crabs can reach up there with their claws.

D - Warehouse
This warehouse contains a cannon, which the players could push to a useful position where they can take a shot at the bad guys. This is not essential for beating the battle, but it would make it a lot easier to take down the siege crabs, because of their high armor and resistances. Moving the cannon is time consuming though, and if they position it on the walkway, and the walkway collapses, they can kiss their cannon goodbye.

E - Gate A controls
These controls can open the floodgate to pool F. Keeping this gate closed is super important, but the controls will be swarmed with enemies when the players arrive. Fortunately the walkways limit the path that the enemies can take to reach the players, so they'll have some what of an upper hand here.

F and G - Moon pools
These pools of water are intended as docks for submarines. Massive underwater floodgates allow ships to enter the harbor here. The floodgate to pool G will already be open when the players arrive, and a large Siegecrab will be occupying the pool. Pool F however will still have its gate closed, but the players probably want to stop the bad guys from opening it.

Flooding danger
There is a large threat of water spilling into the harbor, because it is below sealevel. If too much of the harbor is destroyed or damaged during this battle, water will start pouring in, and the water level of the harbor will rise by 5ft. per round. I'm not sure yet how to determine when water should start coming in. The room itself is about 20 ft. high if measured from the top floor. So this means that once the water reaches the top level, the players have 4 more rounds until they are all completely underwater (so the harbor floods within 8 rounds). If they don't drown, they'll have to retreat.

Defeat conditions
If the players fail to stop the floodgates from opening, they will face an opposition force that is probably too much for them to handle. They may be forced to abandon the harbor, which means the invasion force can flood the tower, and stop the players from putting the tower to use later on. Failing to close the gates also means that the bad guys will be able to bring in their secret weapon, a fearsome Broodkeeper.

Victory conditions
If the players are able to prevent the bad guys from opening the floodgates, they still have a siege crab to deal with. Further more, the bad guys can also attempt to simply smash the remaining floodgate with their second siege crab. If the players can figure out a way to close off the entrance permanently, then the bad guys will be forced to abandon this plan and continue into phase 2 of the battle. Which is to assault the fleet of the allies of the players with everything they've got. This will be a massive cliffhanger for the next session, although I'm unsure how long it will take the players to make their way through this whole dungeon. It may just take them more than one session. This may seem surprising, considering the modest scope of the dungeon. But bare in mind that almost every room of the dungeon is filled with meaningful content, so they'll progress through the dungeon a lot slower than you might expect.
 
Last edited:

Eltab

Lord of the Hidden Layer
Pipes full of steam ...

How much pressure is the steam under? If the PCs are really clobbering BBEG, he might not attack anybody at all, but target a visible pipe, knowing the resulting steam geyser will block visibility, prevent movement through it, and otherwise buy time to escape the other direction.

At a previous job, I explained to a trainee that the pipes in the ceiling did not actually have live steam or high-pressure steam in them, but when using a forklift to place pallets in upper-level racks, he should pretend that the pipes did. Because the damage and disruption and danger are easier to imagine.

Ever been to see Old Faithful? (Yellowstone National Park) That is steam building up naturally and being released. If you watch videocam footage, notice the smaller geysers in the distant background (you see the steam plume, not the fountain), shortly before Old Faithful erupts. Doing something like that with the landscape outside the steamy dungeon will help the players remember the vicinity and reinforce the theme.

I've thought about using the 3e Slayer's Guide to Troglodytes material to create a cavern where the PCs have to go spelunking a short distance to finally exterminate the tribe - the females swim to safety in a farther-back cavern, which hosts a breeding ground. The problem I haven't solved yet: indicating (without telling them outright or beating them over the head with something obvious) to them that they DO need to go spelunking.
 

Session 1 has concluded
We concluded our session, and the players cleared the first two sections of the dungeon. We ended mid boss battle with the avatar of Teehlyian'tara, after one of the players barely succeeded on a save against a terrifying level 9 spell from the Book of Vile Darkness that would have done horrible things to his mind.

Lets analyse what choices the players made and if some of our predictions came true...

Section 1

UnderHaven.jpg

I provided an extra incentive to enter the dungeon. An npc-ally called Sophie had been lured into the dungeon by the avatar of Teehlyian'tara, and was now wounded. She was able to call for help through the mysterious powers of the Druids (I won't go too much into this, but suffice to say one of the players was able to warn the rest of the party that Sophie was dying).

In the first section the players didn't waste much time in room A and B. The clock was ticking, and their ally was dying. They were in a hurry.

They decided to skip room C, because they were trying to quickly get to their wounded ally, which according to a Locate Person spell was elsewhere. Thus they skipped the room filled with steam obscuring an ambush. I kind of liked the idea of monsters emerging from the steam, so I decided to move this idea to room I instead. This way I got to reuse an idea for a room they skipped, and make another room more interesting in the process.

The players discovered the secret tunnel in room B, but opted not to go there.

The players used a protective spell to shield them from the hot steam in room D, as I predicted. But skipped corridor E initially. They improvised a solution to cover up the steam leaking from the pipe.

Once they reached room I they hesistated, because their Locate Person spell was giving them confusing information. They now had to second guess the lay out of the dungeon, and they guessed wrong. They decided to backtrack a bit and investigate corridor E anyway. They used the valve wheel in room H to open the gate to corridor E.

They were able to hear enemies in the showers (F) and thus sealed off this room with a spell, to avoid an ambush.

They used spells to spy into room G, and once they figured out that their wounded ally wasn't here, they returned to room I.

In room I they were ambushed by Leechwalkers dropping from the ceiling. Here I introduced the exploding Leechwalker as well, which added a lot of extra excitement to the battle. In fact, this battle was a good way to measure how the players would fair against these enemies, and it became clear that even in moderate numbers these enemies were a bit on the easy side for the party. But the suicide-Leechwalker (nicknamed the bloater during the session) added a bit of much needed punch into the mix. The damage the bloaters dealt was nothing to sneeze at, which balanced out the encounter. Now I knew that I only needed to adjust the numbers for the boss battle, to make it a proper challenge.

The Leechwalkers were able to drop onto the players from the ceiling, but failed to grapple the players due to their Freedom of Movement spells. This meant the players avoided a lot of drain attacks. I may have underestimated their buffing capabilities.

They used the Ring of the Ram (there it is again!) to launch one of the bloaters into the two steam clouds in room I, thus dealing a lot of damage.

Section 2

UnderHaven2b.jpg

As the players entered room A of section 2, they were hesitant where to go next. They discussed the option of using spells to unblock the collapsed passage to the west, but decided not to. They were also hesitant to swim through the underwater tunnel.

They used a scrying spell at the top of the staircase in room A, to spy on the upper walkway of room B, where they could see the ranged variant of the Leechwalker lying in wait.

They decided to let the druid in the party use a spell to transform his hand into a spider, and spy on the other side of the tunnel. They were able to check out room D and E this way, and see what the boss was up to. They then all swam through the tunnel anyway, and arrived in room D.

Much to my surprise the players did not blow up the boiler, or break the pipes to unleash hot steam on their enemies. But they did use the murky water to stealthily approach the boss.

They tried to use the desintegrate spell from a trapped chest they were carrying, to hurt the boss. They opened the trapped chest in her direction, but unfortunately she saved against the spell.

They used a scrying spell to locate their wounded ally, and then used a teleport spell to move half of their party members into room C, where they found their wounded ally, and saved her life. It turns out that she had already tried to save herself, and managed to wound the boss slightly with a holdout pistol.

The boss had a bunch of her minions lined up against the west wall of room E, to destroy the ancient Oarsmen runes. This allowed the players to cast a Fire Wall and Wall of Thorns on top of all of them, and do a ton of damage to the mayority of the Leechwalkers.

Some of the Leechwalkers made a run for exit F, and started opening the door. At first the players thought that the boss was having them open the exit so that she could flee. But as it turns out, she was calling reinforcements. The players did not stop them from opening the door, and so a whole army of Leechwalkers, Bloater-leechwalkers, and ranged Leechwalkers was ready to pour into the room.

Once the players realized just what a dangerous spellcaster the avatar of Teehlyian'tara was, one of the players decided to focus completely on counterspelling her.

Meanwhile two of the bloaters in the room charged the players, and tried to inflict as much hurt on them. The Druid-PC transformed into a large animal, and willingly took all of the damage from one of the bloaters, to protect a friend from the blast.

Fearing that the avatar might try and kill their wounded ally Sophie, they consecrated room C, preventing the avatar from entering.

The avatar used her special ability to teleport out of close combat once.

The Druid used a repel vermin spell at exit F, which succeeded in repelling half the reinforcements. However, some of the reinforcements made their save and entered anyway, and that included a ranged-leechwalker. The ranged Leechwalker started spitting swarms of leeches, and the players were quite startled by the sheer size of the swarms that these creature could vomit.

Next the players tried a bit of roleplaying to distract the avatar of Teehlyian'tara, which was partially successful. The avatar had taken over the body of a powerful elven sorceress, who was a life long friend of one of the PC's. And so they tried to create a magical mindlink with the avatar, to try and reach her true self, and end the avatar's hold of her. Unfortunately, the avatar used this connection to attempt a truly terrifying level 9 mind affecting spell to try and steal and erase all of the memories of one of the PC's. He barely made his save against it, and this is where we'll continue the next session.

So now we still have the whole third section of the dungeon to go, with the whole Siegecrab debacle. It seems very likely now that the avatar will attempt to escape into the third section of the dungeon, to even the odds in her favor. And the door to do so is wide open. I think this mid-boss battle has done a good job at depleting their spells a fair bit, and beating them up a bit. I can now raise the difficulty in the third and final section of the dungeon.
 
Last edited:

Session 2 has concluded

This week the group finished the battle that we started 2 weeks prior. They were in the middle of a big boss battle, and kind of on the ropes. But this week they returned with renewed courage, and with plans. The players had been discussing tactics all week, and also in the car on their way to my house. So now they were prepared to turn the tables, and start working more as a group. They were no longer feeling a little desperate... they were going to win this!

Much to my surprise, one of the players tried to reactivate the Oarsmen runes in the room. This was an option I had not considered. Most of the runes had been smashed already by the villains, but I figured such an original idea should not go unrewarded. So I ruled that the runes partially lit up, and would impose a penalty on the attacks of Hydra servants now. But it would take a professional runesmith to restore the magical runes completely.

The players used a clever combination of spells, to block the entry that reinforcements were pouring through. First they got some of their npc allies out of there, and then used a Control Water spell, in combination with a cold spell, to block the entrance with frozen ice. This allowed them to focus on the boss, instead of the minions. Plus because some of the water had been moved, part of the room was now dry. This allowed their summoned Fire Elemental to cross over to the other side of the room and attack the boss. This is the first time I've seen them use spell combos like that. I now see that it was good to push them to their limits so much. Desperate situations demand desperate (and clever) plans. Because of this blockade, the avatar could now not retreat, which was very decisive.

The players were able to finish off the avatar, with the help of their Fire Elementals. The avatar was unable to escape, and they focused fire on her to get through her damage reduction and regeneration. As the avatar caught fire, it made one last attempt to dive into the water to extinguish the flames, but an attack of opportunity from a Fire Elemental finished her off.

In the avatar's mind

Meanwhile an interesting roleplaying situation emerged. I ruled that since one of the players (an elf named Bioran) was still in a mindlink with the dying avatar, his conscience would still be trapped in her mind as she was dying. The player wanted to try and find the soul of their elven friend, that would surely still be in the avatar's body somewhere. So I ruled he had to take a search action to search her mind (how's that for a clever use of that skill?). Bioran succeeded in finding her, and I described it as if he was in a pitch black room, where he could only see the elf that the avatar had taken over. She was wrapped in goo, as if cocooned, unable to move. But meanwhile he could feel that the room was getting smaller, as life slipped away from her body. He would have to succeed at a willpower (wisdom) check to free her. His goal was to try and take her soul with him, but he did poorly on the check, and so he could feel her starting to be lifted upward. With her last gasps she warned him that "they had to hurry, because Hydra was about to breach the gates of the tower, because the builder never finished the harbor's defenses. They could not let Salt fall into the hands of the enemy..."

It was at this point that another party member, Che, the priest of the group, decided that he would try and get Bioran to wake up. Because he didn't know what Bioran was trying to do, and only saw Bioran collapse on the ground as the avatar died. He believed Bioran's conscience could end up trapped in the avatar's body if he didn't bring him back fast, and he wasn't wrong.

I thought to myself that this would be the perfect moment for a cinematic moment. Just as the priest started to pull Bioran out of the avatar's mind, I had the elven lady say: "...There is one more very important thing I need to tell you...", and that is when I had them roll opposing willpower (wisdom checks), with advantage for the priest. The priest won, and yoinked him back into his own body before she could finish her sentence.
UnderHaven3.jpg

Part 3 - stopping the invasion

The big boss battle was over, but they still had a second big battle to deal with in the final third area of the dungeon. A lot of this battle was balanced around the idea that the boss could have fled into this final part of the room... but she didn't. I decided to still give them a fair number of enemies to deal with, plus two new enemies they hadn't seen before: Siege Crabs and Avolakia. The latter are large upright worm like creatures, with many tentacles, many attacks, and the ability to polymorph into the shape of any human, and use mind affecting singing to influence enemies. This was an enemy I had as a backup, incase the other enemies were starting to feel repetitive.

I had one of the Avolakia shapeshift into the avatar of Teehlyian'tara, which gave the players a big scare! But they succeeded in recognizing that it was merely a polymorph spell. Still, the singing of the Avolakia succeeded in persuating some npc allies in coming to her aid, and help with opening valve B.

The players were quick to close off the floodgate G. But the Avolakia would later manage to open it again at B (and with the help of some hypnotized npc's), there by letting a second Siege Crab in. The players had underestimated how short it would take the next Siege Crab to enter. The floodgate was opened in one round, and the Siege Crab entered in the next, which is not unreasonable I think.

The players were able to use the Ring of the Ram (here we go again!) to knock one of the valve handles off at E, to prevent another Avolakia from opening floodgate F.

The players understood immediately that the crane controls at A could be used to grapple one of the crabs, and they loved it. It took them a few attempts, but they finally got it, just as the second Siege Crab entered. Just in time! With one Siege Crab grappled by the crane, they now had only one crab to deal with, instead of two. They quickly closed floodgate G again, to prevent further reinforcements.

The players discovered the cannon, rifles and gunpowder in warehouses C and D a bit late in the fight. But they used a barrel of gunpowder at the end to kill off multiple enemies at once, and also collapse part of the harbor in the process.

The players even used the elevator to lower one of their Huge Fire Elementals down.

The players used the various balconies for cover, although none of the enemies had ranged attacks. This may have been a mistake on my part in hind sight.

The players exploited the moment where one of the Siege Crabs opened its armor to unload a passenger, to score lots of hits on it. Because opening the armor lowers its armor class temporarely, until it closes again.

The players made a lot of use of summoned creatures to deal with the big threats in these battles. Lots of use of beefy fire and earth elementals.

One player had to retreat, or he would have been killed. The Siege Crab did massive damage to him, and could have grappled him and killed him, if it weren't for Freedom of Movement. It is good when the players know when to retreat.

In conclusion

I got an applause from my players for such a thrilling and intense battle! (never had that before) This was just the sort of prolonged battle that they were longing for, which drained their resources, and really threw them on the ropes. All of the PC's had sustained big injuries, and one came close to being dropped to 0 HP, if it weren't for a quick retreat.

I ended the campaign by describing how they finished off the Siege Crab that was grappled by the crane, with the cannon, and then emerged victoriously up above. But as they gazed over the water outside the tower of Salt, they now saw a massive enemy fleet had surrounded the royal navy of St Valenz. The silhouettes of several of Hydra's Living Ships could be seen underneath the surface of the water, and the flagships of their arch enemies, the Circle of Azarah, could be seen in full view. They had survived a huge land battle, but the biggest naval battle was about to begin.

The players went home very excited, full of plans on how to deal with this new threat for our next session. They were already discussing all their intended actions as they were heading for the car. And they probably spent the rest of the evening discussing all the highlights of the evening, of which there were many. Surprisingly some of the best roleplaying moments (such as with activating the runes, and entering the mind of the avatar) were completely improvised on the spot.

Evaluation of the enemies

I'm also very happy with my choice of enemies for this session. The Leechwalkers were simple and beefy, with some good damage potential, lots of HP, yet easily tanked. Their Wounding attacks were especially potent, if they manage to hit. A good enemy to spam in groups.

The Bloater was a very good variant, that allowed me to push some damage through all their protective spells, and force them to think about where and when to fight the thing. I could have the Bloater rush into a group of players and explode, thus forcing them to spread out more.

The Swarm spitting Leechwalkers were scary to the players, even though the swarms themselves are not as dangerous as they believed them to be.

Avolakia can do a lot of damage to low armored players (they have 9 attacks), but their spell-like abilities were way too weak to be any serious threat to the players. Their polymorph ability did make for some funny roleplaying situations though. In hindsight, their attacks were way too weak to hit most of the PC's, so they were only ever a threat to the npc's. I think I didn't use them to their full potential here, but they were welcome variety in this final battle.

The Siege Crab is a fantastic enemy for a big boss battle. It has insanely high armor, that makes it very difficult to hit with conventional weapons, and it has a huge reach. Its grapple attacks would have been more effective if the players didn't all have Freedom of Movement, but at least I got to use its Trample ability. The Siege Crab would have been a much tougher opponent in a wide open space, rather than one like this, that is specifically designed to offer lots of spots that are easily defended, with lots of higher ground.

Evaluation of the final part of the dungeon


Every corner of this final map was used. Mainly because of the objectives (the valves that operate the floodgates) on either side of the room, forcing the players to spread out, and cover multiple sides of the room. I think a lot of lessons can be learned from this for future battles. You need to motivate the players to move to multiple sides of the room, and you really need to think hard about all the angles of attack of your enemies. I'm glad I added the extra ladders, that allowed some of the enemies to close the gap quickly. During the final part of the battle, several players and npc's were hiding in the bottom right corner, because of the crane controls, and because of the cover position. But because of the nearby ladder, I could have a bloater quickly get up to the whole group, and punish this behavior with its AOE attack.
 
Last edited:

Remove ads

Top