• NOW LIVE! Into the Woods--new character species, eerie monsters, and haunting villains to populate the woodlands of your D&D games.

Digital Art Workshop for Absolute Beginners

Jürgen Hubert

First Post
After the success of my recent Cartography Workshop, I thought I'd start another workshop - this time on digital artwork in general, with the eventual goal of being able to create original artwork.

And this thread is intended for absolute beginners. You need not ever have had any experience with creating digital artwork before - or, indeed, with creating art in general (beyond that possibly taught in schools...). If you have any questions, no matter how naive it may sound, don't hesitate to ask - someone (either me or other people around here) surly will try to answer them. (And for that matter, I will likely also have some questions - I am still very much a beginner myself, and though I have made some progress, I am still nowhere near as good as I would like).


But first, the basics. What you need for this thread - at the least, what you need to follow my instructions - is a graphics tablet. A graphics tablet is a nifty device you can connect to one of your USB ports on your computer. Tablets have a flat "sensor" area, and a special "pen" that you can move around on the sensor area - and the cursor will move around in the exact same manner on the screen! Additionally, if you press the pen against the tablet, the computer will interpret it as if you pressed the left mouse button. With a properly installed graphics program, you can thus "draw" on the screen in pretty much the same way in which you draw something on a piece of paper with a conventional pen! While you can draw images on the screen with an ordinary mouse, using a tablet allows for much more natural hand movements and is much easier to do. Try it out once, and you will never want to go back.

I recommend a tablet made by Wacom, which are pretty much universally considered to be the best on the maket. I bought their cheapest one for €50, and it was worth every cent. Not only don't they need any batteries within the pen (which makes the pens large and clumsy, and forces you to periodically buy new batteries), but they also have a nifty little feature called "pressure sensitivity", meaning that the tablet senses just how much you press the pen against it - and that is an invaluable tool for digital art, as will be shown later.

You also need a graphics program. For this, I recommend GIMP, an Open Source program freely available for a multitude of platforms which can do most of the same things that commercial programs such as Photoshop can do. Download it, install it, and be free from the World of Pain that is MS Paint.

If you can get your hands on them, you can also use Photoshop, Painter, or similar commercial programs - they should work just fine for what I am about to teach, but some of the commands might work in slightly different ways. But the differences should be minor enough so that you shouldn't have any difficulties.


Finally, I'd also recommend the Art Tutorial Links List I have painstakenly assembled over at the RPGNet Wiki this summer. This list has tutorials on a vast range of different subjects, and should provide you with plenty of fodder for your own artistic experiments. BTW, if you find a nifty tutorial somewhere online, and it is about something that's not covered in that list, please add it to the list! Future generations of would-be artists will thank you. ;)
 
Last edited:

log in or register to remove this ad

On to the first lesson!


So you have never done any artwork before beyond the mandatory classes back in high school, and even those were pretty boring and a very long time ago, so you fogot everything you learned there. But now you have bought the hardware and installed the software. Are you ready to create your first masterpiece? Well, what shall it be? A noble paladin in shining armor? A fierce orc charging with his battleaxe? A voluptous sorceress in diphanous robes (hem, hem)? A raging dragon destroying a village with his fire breath?

Heh. Let's not kid ourselves.

If you are anything like I was eight months ago, you don't know a thing about proportions, anatomy, shading or any of the other things an artist needs to know to create original work that looks halfway decent. And until you learn all of these things, your art is going to... well, it's not going to look good, and I am not going to coddle you and pretend otherwise.

Fortunately, all of these things can be learned. And while this will take some effort on your part, it's not as difficult as it might seen at first.

There are several ways of learning these subjects. One of them is to go to art courses. But these take a long time, cost a lot of money, and are often problematic to fit into one's schedule. Another one is to read good textbooks on the subject. But frankly, I read enough try texts as part of my day job as a scientist, and I don't have any desire to do too much of that in my free time.

So that leaves diving right into practice. Let's start with drawing people and faces. People are a quite complex subject to draw - but it's one that you will do again and again if you decide to pursue fantasy art, and the basic lessons you learn here will be invaluable for your later works.

First you need some reference pictures on which you can base your first exercises. Google Image is always a good source for reference pictures, but for this particular exercise I recommend this link instead. It calls up random pictures from the users of a dating site, and thus has a large variety of reference images you can use. Just click through the images until you see one that inspires you. Save the image, and then display it with some sort of image viewer so that you can see it on the left side of the screen (I use IrfanView for that purpose, but whatever gets the job done).

Then load up GIMP. Create a new, blank image with File->New. I usually choose a size of 500x500 pixels for exercises like this - it is large enough for some basic scribblings without being too cumbersome. Move that new window until you can see both it and the reference picture in full at the same time. Now try out your shiney new graphics tablet and click on the "Fuzzy Brush" tool in the Tools window (you must use the tablet for this because GIMP "remembers" different tools for mouse and tablet usage. This will be useful later on), and click on the "Brush" field in the lower half of that window. Choose the "Circle (03)" brush (though you can experiment with other brushes later - in fact, I recommend doing so).

Now move the "Opacity" slider to "20,0". This means that when you paint with that brush it won't use the full intensity of the color you have selected (the current "foreground" and "background" colors can be found slightly above the slide, and you can change them by clicking on these fields). But if you repeatedly paint over the same location, the color intensity there will eventually reach full strength. Using a low opacity for the brush is ideal for making quick sketches - this way you won't have to correct every single brush stroke you are unhappy with.

And if you have followed my advice and bought a Wacom tablet (and if not, why not?), you can also make use of the "Pressure Sensitivity" field in the lower half. Switch on "Opacity" and switch off everything else. This means that the opacity of your brush stroke will be fine-controlled by just how much you push the pen against the pencil. Try it out - it's pretty similar to drawing something with an ordinary pencil!

Now before we continue, some advice on how to remove the test scribblings you have made (and anything else you want to remove from future drawings). One possibility is to use the "Edit->Undo" function in the window with the image - but I usually only press Ctrl+Z instead. You can use that function multiple times in a row without any problems. Another one is the Eraser tool, which can be selected from the Tool window. I usually use the mouse for this, and select a large brush size. This way, whenever you move the mouse across the image, the program will automatically switch to the Eraser tool - and when you use the tablet again, it will switch back to whatever paint tool you used last!

But back to the exercise. You have a reference picture on the left side, and a blank image on the right side. Now try to copy the reference picture. Don't bother with colors or other brush shapes and sizes - just try to capture the outlines and shadows as accurately as possible.

Oh, and do all this in no more than 10 minutes.


After this time is over, stop. Save the image (by going to "File->Save As" in the image window. Note that you need to add the ending of the image format you want to use manually to the file name. I recommend saving all files in the ".xcf" format, which is the "standard" format GIMP uses and which prevents any data loss. Save it with a ".jpg" ending if you want to display the image with other programs) for future reference and comparison (hey, I'm sure you can use the laugh a couple of months down the road when you will have improved vastly...). And then start with the next reference picture and a new blank image.


Sure, you could spend an eternity trying to get this picture "just right". But only frustration lies that way for a beginner. What you need now is getting a good eye for basic proportions, shadows, and anatomy, and the best way to do that is by drawing as many different people as possible as fast as possible.

And conveniently, this exercise is short enough so that you can easily fit it into your daily schedule. Try to do one or two such pictures every day, and you will improve fast. And what's more, you will also teach yourself to create art fast, and that's a useful skill to have. Sure, some people like to work at individual pictures for many days, if not weeks - but unless you get paid for this effort, it's probably not worth your time. Better to create reasonably-looking art in a reasonable amount of time, I say.

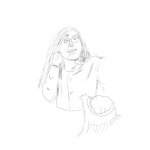
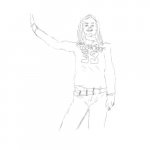
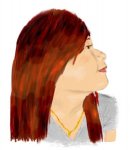
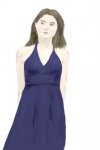
And as a final encouragement, I'd like to show you four pieces of art I have created. The first two were the very first exercises I created using this method - about eight months ago. The last two are two pieces I created this weekend. Granted, with the latter I used color and some additional tricks (which I will get into later) and put some more effort into them, which meant that the time I spend on them was about an hour instead of 10 minutes. But I gained the basic skills required for them from this exericise - and I must add that I often went througn weeks without doing any art. But still, I'd say the difference is noticeable.

And if I can do it, then so can you.
 

Attachments

  • 001Drawing.jpg
    001Drawing.jpg
    14.3 KB · Views: 91
  • 002Drawing.jpg
    002Drawing.jpg
    12.8 KB · Views: 97
  • AsianMannequinDrawing.jpg
    AsianMannequinDrawing.jpg
    21.3 KB · Views: 90
  • t_golinDrawing.jpg
    t_golinDrawing.jpg
    11.9 KB · Views: 93

Damn! I have some new tutorial material, but for some reason I can't attach anything to posts now. Is this some sort of temporary bug, or is it the new standard?


Well, I've uploaded them to my brother's server...

This time, let's work on a portrait in color! Since I am not entirely comfortable with posting the images of complete strangers, let's use an old picture of me instead:

Juergen_Hubert.jpg


Now you need to do a sketch of the image like you practiced. This time, you don't need to rush quite as much, though you shouldn't spend too much time on it, either.

But before you start on the sketch, you should create a new layer in your image. Layers are one of the most important tools in the arsenal of any decent graphics program, since they allow you to work on different aspects of a picture independently and without having to fear that you will affect other parts of it.

After you have created a new image, you only have a single, completely white layer. Click on Dialogs->Layers to open up the Layers Dialog (appropriately enough). Click on the "New Layer" on the lower right corner, name the new layer "Sketch", and choose "Transparency" as the Layer Fill Type. You can now switch between editing different layers by clicking on them in the layer dialog. You can also switch the visibility of the different layers on and off by clicking on the "eye" icon, and you can also "fix" individual layers (making them unchangeable) by clicking on the empty space right to the eyes - a stylized chain will appear then. Finally, you can move individual layers around by left-clicking on them and moving them around in the layer dialog (though the original white layer that you started with cannot be moved for some reason - but if it comes up, you can just delete it and create a new white layer instead, or if you want to keep the original layer for some reason, you can create a copy of it with the "Duplicate Layer" icon in the dialog before deleting it, and the copy is fully moveable).

Switch to the Sketch layer and create the usual sketch on it. You won't really notice any differences at this stage - you can draw on it and erase parts of it like usual - but it will become very important later on.

Now, if you have practiced sketching dilligently like I told you, you should be able to create a sketch of similar quality to this one:

Draft.jpg


Now the coloring fun begins! Create a new, transparent layer titled "Skin" and move it below the Sketch layer in the layer dialog!

Pick a new brush color by clicking on the "Foreground Color" box on the Tools window. In the color dialog you can see a big square in which you can choose both the brightness of the color and the "saturation" of the color (at the bottom of the square, the current color will be a grey tone of some kind, while at the top of the square you will have a "pure" primary color). To the right of the square you can choose the "primary color" your current color is based upon - this square cycles through the three elementary colors red, blue, and green from which all other colors are dervied (yes, that's green and not yellow. Color theory works a bit differently if you work with pure light than it does with ordinary painting. I'm not in the mood to go into the color theory of light at the moment, so let's just leave it at that yellow is created through a mixture of red and green...).

To the right you see all sorts of slides that allows you to fine-tune your color until you get precisely the tone you want. Experiment a bit with them to get familiar with how they work, and then pick a nice flesh tone for the brush. It doesn't matter if that tone precisely matches that of the original - the color of objects is enormously affected by the local lighting conditions anyway.

In the lower right portion of the dialog you will also see twelve fields with different colors. This is the "color history", where you can store older colors you used previously. To add the current color to the color history, simply click on the "Add current color" field to the left of it. You can retrieve the older color simply by clicking on it.

You will also see a field called "HTML" notation, which generates a code for the color you have chosen in the hexadecimal system (which means that each digit does not only go from "0-9" but also has the letters "a-f" on top of them. So "0f" would be 15, and "10" would be 16 in the decimal writing system). Each color gets two digits in the order "Red"-"Green"-"Blue" (or "RGB" for short). This is not only useful for website coders, but also if you want to remember colors you used in older pictures which aren't displayed in the color history any more - simply add the HTML code of that color into the field, and you have the color again (for the record, I used "ffd6cb" as my flesh tone).

Back to the practice. After you have chosen the flesh tone, pick a medium-size brush ("Circle (7)" and "Circle (9)" are both appropriate). Choose the "fuzzy brush" tool, pick an Opacity of 100, and switch Pressure Sensitivity to "Size" (switching off Pressure Sensitivity for Opacity in the process). This means that the size of your brush will vary depending on how hard you press the pen against the tablet, allowing you to either fill out large areas rapidly with your brush or creating fine details at the borders of an area.

Now fill out all "skin" areas with that color, resulting in something like this:

Skin-1.jpg


Here we see for the first time just how useful the layers are - they allow us to paint areas below the sketch without affecting the sketch in the slightest! This is one of the biggest advantages digital painting has over traditional art, and one that we are going to exploit to the fullest.


Well, unfortunately my Internet time is up (I'm using a modem connection to access the internet from my parents' house during the Christmas vacation, and they don't like it if I block the phone line during normal daylight hours...), so my explanations on how to do shading will have to wait for later...
 

Awesome :D Thank you very much. I read the one you did on Cartography and found that to be good. Please keep up this level of work.
 

Now it's time to add some shading and plasticity to the skin. There are two ways of doing this. Actually, there are many ways of doing this, but I'll cover only two of them today.

Both start with looking at where the color of the skin areas deviates significantly from the norm. Look at the photo. There are areas that are brighter than others. There are areas that have a slightly different color. You need to add this variety to the basic, "neutral" skin tone.

The first possibility is to simply use another color and apply it with the brush tool directly on the skin layer. Use a low opacity for this, and set the pressure sensitivity to "opacity" as well - you only want to introduce minor variations, and not repaint large areas in a different color! I used this to add some minor red discolorations to represent areas where the blood vessels are closer under the skin.

The second one is to use the "Dodge or Burn strokes" tool from the Tool windows - it is the last one in the tool list and looks like some sort of black... thing. Well, I don't know what it is supposed to be, either, but you should be able to find it. With the "Dodge" option, you can brighten up areas. With the "Burn" option you can darken them. Note that you need to switch between different "lighting bands" ("Shadows", "Midtones" and "Highlights") since this tool treats different levels of brightness differently. Experiment until you find the level that gets the most effect.

For both effects, use whatever brush size you think is appropriate. After adding the red touches, I brightened up several key areas with the "Dodge" tool:

Skin-2.jpg


After that, I also darkened several areas with the "Burn" tool:

Skin-3.jpg


It's starting to get more plastic - but still, the boundaries between the altered areas and the original pink look artificial and too sudden. Fortunately, there are ways to deal with that, too.

For one thing, there is the "Blur" tool (the one that looks like a drop of water). Apply it to the boundary areas, and they will look much smoother.

But there's an even better option - the "Smudge" tool (the hand with the pointed index finger). To use it, I usually pick a mid-sized Fuzzy Circle brush and set it to full Opacity, though an ordinary Circle brush with lower Opacity should work as well. With this tool, you can "move" colors around on your layer - so use that to smooth out the boundary layers, and to introduce gradual color changes. Oh, and re-apply the tools used earlier if you find that some parts of the skin have not turned out quite the way they should!

I eventually ended up with the skin layer like this:

Skin-4.jpg


That's it for today. Practice with the Smudge tool until you feel fully comfortable with it - it's really an amazingly powerful and versatile tool.

Tomorrow, we will get to a different topic: Hair.
 

The human head usually has about a 100,000 individual hair strands. Obviously, you can't draw them all - or rather, you'd go nuts if you attempted to do this, and it wouldn't show at this image resolution anyway. So you will have to hint at the individual hair strands instead of painting each and every one of them.

(In fact, that's good advice for art in general. It is almost never necessary to paint every last detail - the human brain is so good at pattern recognition that it tends to make up any missing elements. This is good, since few people either have the ability or the patience to draw all those details correctly.)

It took me ages to work out a technique to paint hair that I was reasonably satisfied with, and I am going to explain it now.

(As a side note, if you have developed any good techniques for creating hair on your own, please share them here - I'd love to hear about them!)

First create a new layer called "Hair" above the Skin and below the Sketch layer and switch to it. Then you need to set up a "range" of colors between your Foreground Color and Background Color (the box "below" the Foreground Color) to represent the fact that different hair strands will have slightly different coloration. Granted, this is easier to do for lighter hair tones than mine, but even for such dark tones you still need some variety - trust me, even if the color differences might not be immediately noticeable, the final effect will be worth it. If in doubt, just make up some slight differences! I used "1a1a1a" and "2a2a1a" for the two colors (remember the HTML notation?).

Now select the Fuzzy Brush, and pick a "Fuzzy Circle (05)" brush. Set opacity to 100, and set the Pressure Sensitivity to "Color" - this means that the color of your brush will vary between the Foreground and Background colors depending on how strongly you press the pen against the tablet! This will guarantee minor color differences that give the impression of multiple hair strands.

Now begin to draw hair strands, following the hair growth patterns of the reference image:

Hair-1.jpg


If there are noticeable color differences in the original image, vary the pressure strength accordingly. If not (as it is often the case with darker hair colors), just keep on drawing without worrying about it.

Eventually, you should end up with something like this:

Hair-2.jpg


Now use the Smudge tool to smooth out the edges of the hair. You can also use it to represent short, thin strands of hair that stick out from the main mass - this is especially noticeable for people with long hair, but even portraits of people with military haircuts like me can benefit from this technique. Finally, smudge out the minor holes in the main hair mass.

Important: Always move the Smudge tool in the same direction like the growth of the hair!

Hair-3.jpg


Now it is time to use the Dodge/Burn tool again to show the lighting differences in the hair (again, it's more noticeable in lighter hair tones - see the images I posted at the start of the thread!). You can also use it to simulate the onset of male pattern baldness, as in my case... If you use too much Dodge or Burn at some places, smooth it over with more applications of the Smudge tool until it looks acceptable (again, moving in the same direction as the hair itself).

I also added the eyebrows at this point, simply because I forgot to do it earlier. You are unlikely to get the precise shape right with the brush at the first try - but instead of messing around with the eraser, simply use the Smudge tool to move the shape until you get it right...

Hair-4.jpg


That's it for the hair! Tune in tomorrow as we move on to some other details...
 

Sorry for the delay - even my vacations seem to be more hectic than I anticipated...

Anyway, on to the eyes. Open up a new layer, and paint the basic eye white at the right positions. But don't use actual white - there are few things in nature that are pure white, and thus you should avoid the color as much as possible. Instead, use a very light gray with a minor touch of blue.

Then add the iris and the pupil in the appropriate colors to it. At larger resolutions we might add some fine detail to the iris, but it's probably not worth it here. Add the eyelashes, and you are done:

Eyes.jpg


Now we are done with the actual head. Let's move on to the clothes, starting with the jacket.

Pick two colors which are both close to the color of the jacket and only have minor differences from each other as the foreground and background color. Pick the Fuzzy Brush tool, choose a large brush (Circle 13 or 15 ought to do it), set Opacity to 100, and set Pressure Sensitivity to both Size and Color. Paint the area of the jacket with the brush. This will create minor, only barely noticeable color differences - and this will look much more "real" than if we had simply used an uniform color.

Jacket-1.jpg


Now switch to the "Dodge/Burn" tool. Select a low Opacity, and switch the Pressure Sensitivity to Opacity and Size - this will create some smooth and "natural"-looking highlights. Now highlight or darken the brighter or darker areas on the jacket, especially the folds of the clothing:

Jacket-2.jpg


And now we are done with the jacket as well. All that's left is the shirt and the tie...
 

Into the Woods

Remove ads

Top