Fighting the Gray Tide (Miniature Painting)

Fell off the internet for awhile cuz my puter died, but I've spent the time banging out nearly half a dozen Metal Earth models that I then gave away to a coworker's children: Deadpool, R2D2, the Millenium Falcon, an AT-AT and the Black Pearl... Currently assembling Soundwave for myself.
I have, however, started sculpting a figure, roughly 28mm scale... Hoping to have time to do some decent work on it this week.
 

log in or register to remove this ad

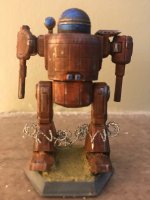
July painting comp Battletech the theme this month is junkyard. The Mackie the first battlemech.
 

Attachments

  • 1753232539040.jpeg
    1753232539040.jpeg
    1.1 MB · Views: 22


This is a work in progress: An escape pod from Star Wars: Legion. It's kind of amazing how some Star Wars models are just so darned basic. If you look up the model used in the original SW movie, you'll see that it's pretty much just the same color. But I decided to mix it up a bit and add some weathering. I over did it with the chipping I think and no matter how many times I use AK streaks it never quite looks right. The scorching from reentry doesn't look so bad though. I still need to attach the rear thrusters and of course paint the sandy base.

The black scorch was added using weathering powder. I've had mixed results in the past, but this time I applied the powder and then sprayed some matte finish to lock everything in place.

IMG_2726.jpeg
 

Variety is the spice of life and that applies to miniature painting as well. i.e. It's nice to do something a little different now and then. I don't normally paint terrain, but that's exactly what this escape pod is. In Star Wars Legion, you can use this terrain as part of some specific scenarios, or you can just place it on the map as another obstacle to fight around. The most difficult decision I had was whether to make it look like the pod just crashed or if it had been sitting the desert for a while. I went with recent crash and tried a few new techniques.

In the sand around the base of the pod, I used some Tamiya Smoke applied through my airbrush to darken the sand. I typically use acrylics, and Tamiya is an enamel paint, and I as it's very translucent, I had to apply several layers around the base of the pod to build up to the level of opacity you see in the photo. When the Tamiya Smoke dries it is super glossy though. I ended up using a matte varnish to tone everything down.

And about that varnish...I over applied and thought I ruined the base. As it was drying, I was able to actually peel away the coagulated varnish before it solidified, blocking detail. <whew> Don't overspray, kids. If you look closely at the nose of the pod, you'll see a fingerprint. Thankfully it's not so easy to notice when looking at the pod while it's on the table. But I'll always know its there.


IMG_2727.jpeg
 

A minor character from a obscure 1970s science fiction movie nobody remembers. There's always something a little frightening about painting a figure everyone is so familiar with. What's the exact color of a beholder, a red dragon, or an aboleth? Maybe it's why I shy away from historical miniatures. There are a lot of ways one can paint gold and I have plenty of shades. I ended up using Vallejo airbrush gold (using a regular brush), but had I used Retributor Armour from Citadel Paints I would have gotten a more intense golden color. I don't regret my choice, I'm just noting it could have been quite a bit different but still remain somewhat accurate to that obscure movie I mentioned at the beginning.

From a technical standpoint, you really can't get much easier than this guy. All I did was apply the gold, then a sepia wash, some more gold to bring the color back up, painted his right leg below the knee a silver color, and painted a few wires in his midsection before applying some Citadel Contrast Black. Always remember it doesn't always have to be complicated to look good.

IMG_2729.jpeg


Remove ads

Top