D&D General DIY xps foam terrain. Videos? Pics? Advice?

not-so-newguy

I'm the Straw Man in your argument
The most recent piece I bought at Home Depot (which was 4' x 8' and yes I did bring my hobby knife with me to cut it up into pieces that fit in my car in the parking lot) had a thin film on it that I need to peel off. It cut easily, so I didn't realized it until after I had started shaping it, but thankfully before I applied mod podge or paint.
Nah, I don't think that's the case.

I just got home from work and checked it out. I think the problem is that it's slightly raised in the center and I was using quite a bit of water. I suspect the paint was moving away from the center and flowing to the sides because of that.

I'll put another coat on that one, but use a book or something to flatten it out. Paint one half tonight and the other tomorrow.
 

log in or register to remove this ad

pogre

Legend
The most recent piece I bought at Home Depot (which was 4' x 8' and yes I did bring my hobby knife with me to cut it up into pieces that fit in my car in the parking lot) had a thin film on it that I need to peel off. It cut easily, so I didn't realized it until after I had started shaping it, but thankfully before I applied mod podge or paint.
As an aside, I had to purchase some foam for my recent projects and was duly impressed by how expensive a 4' x 8' sheet of two-inch foam is! I know you get a lot of terrain out of that foam, but I still had a bit of sticker shock. I knew that construction materials had jumped in price a lot due to the pandemic, but still...

In another too little too late suggestion category - I base all of my foam projects on floor tiles. I use really cheap linoleum 12" x 12" self-adhesive tiles. I then glue (to the self-adhesive side) a layer of cheap black felt to the bottom. I have not had any problems with warping when I am painting (knock on foam). The tile is also a little lighter than then mdf, which can also warp in my experience.
 

not-so-newguy

I'm the Straw Man in your argument
As an aside, I had to purchase some foam for my recent projects and was duly impressed by how expensive a 4' x 8' sheet of two-inch foam is! I know you get a lot of terrain out of that foam, but I still had a bit of sticker shock. I knew that construction materials had jumped in price a lot due to the pandemic, but still...

In another too little too late suggestion category - I base all of my foam projects on floor tiles. I use really cheap linoleum 12" x 12" self-adhesive tiles. I then glue (to the self-adhesive side) a layer of cheap black felt to the bottom. I have not had any problems with warping when I am painting (knock on foam). The tile is also a little lighter than then mdf, which can also warp in my experience.
Nice trick. I'll have to keep it in mind for next time :)

I didn't expect it to be perfect, so I'm not too worried about it. It'll almost certainly be better than my beat up 10+ year old battlemat.
 

el-remmen

Moderator Emeritus
As an aside, I had to purchase some foam for my recent projects and was duly impressed by how expensive a 4' x 8' sheet of two-inch foam is! I know you get a lot of terrain out of that foam, but I still had a bit of sticker shock. I knew that construction materials had jumped in price a lot due to the pandemic, but still...

That 4' x 8' board I bought was just under 20 bucks, but it was only a half-inch thick. I usually buy one-inch thick 2' x 2' boards for about 6 or 7 bucks.
 

not-so-newguy

I'm the Straw Man in your argument
I'm going to try a trick that I picked up from this video


At the 12:10 mark, he describes a way of staining wood. He takes super fine grade (0000) steel wool pads and soaks them in vinegar for 3 days. The liquid is strained of metal bits and then the wooden pieces are soaked in this liquid, staining them a grayish brown.

I have 65 or so Jenga* pieces that will be stained this way and plan to use them to mark walls. It's not a great solution, but it seems like an easy one.


*actually a cheap Jenga ripoff.


_________

In other news, I remembered that there's a reason I will never throw out my old battlemat; or at least a piece of it.

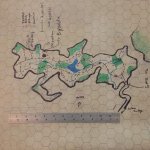
Back in 2015, i drew the map of the Lost Valley of The Hutaaka from B10 on the Hex side of the mat. It is now permanently stained on it. If/when this mat becomes obsolete, then I plan to cut it out and retool it into a game prop of some sort. I mean I have all these nifty tools and videos now, how could i not?

received_369281465005133.jpeg

In case you don't know B10 (but I'm guessing you probably do), this map is a big reveal and turning point within the adventure.
 

not-so-newguy

I'm the Straw Man in your argument
My plan for today is to watch the niners beat the cowboys and work the game board.

I'll be dry brushing. Here's a pic of the base color + dry brushing colors:

USER_SCOPED_TEMP_DATA_orca-image-2100831949_kindlephoto-442741737.jpg


1. Grey (base)
2. Suede
3. Fog Grey
4. Vanilla
5. White

Does this seem like a decent plan? Should I use fewer colors for dry brushing? More?
 

el-remmen

Moderator Emeritus
I would start with dark gray as the base coat, personally - but you gotta try to match your own vision. As for number of colors for dry brushing I usually do 2 to 3, sometimes 4 - but honestly I just do whatever until it looks like I want and I want it to look like random discoloration and dust collection and water staining - so that method works for me.
 

el-remmen

Moderator Emeritus
Today my focus is painting minis (I do a batch of minis for a week or so then switch my work area to crafting for a week or so, back and forth - I usually do flocking for either between "shifts" because that is the messiest part of the work for me). But I am also working on cutting pieces of package cardboard to be the stone façade of a keep I am making out of the cardboard insert that came with the new sink installed in the downstairs bathroom. I do this while waiting for minis to dry or while watching TV (yesterday, I did a bunch while watching Eternals).

270202405_985916998972622_2399594702538302845_n.jpg
271532885_1144629519635406_1735821062524139050_n.jpg
 

not-so-newguy

I'm the Straw Man in your argument
I would start with dark gray as the base coat, personally - but you gotta try to match your own vision. As for number of colors for dry brushing I usually do 2 to 3, sometimes 4 - but honestly I just do whatever until it looks like I want and I want it to look like random discoloration and dust collection and water staining - so that method works for me.
Yeah, using a lighter shade was a conscious choice. I like it better... in my head at least. I might switch to a darker grey on future tiles.s
Today my focus is painting minis (I do a batch of minis for a week or so then switch my work area to crafting for a week or so, back and forth - I usually do flocking for either between "shifts" because that is the messiest part of the work for me). But I am also working on cutting pieces of package cardboard to be the stone façade of a keep I am making out of the cardboard insert that came with the new sink installed in the downstairs bathroom. I do this while waiting for minis to dry or while watching TV (yesterday, I did a bunch while watching Eternals).

View attachment 150030
View attachment 150031
Nice! Please share future pics!

Edit: nevermind. I just caught your Instagram link


Remove ads

Top